
Elden Ring Giant’s Mountaintop Catacombs guide
This one is a doozy.
Share this article...
WePC is reader-supported. When you buy through links on our site, we may earn an affiliate commission. Prices subject to change. Learn more
The Mountaintops of the Giants is one of the final regions you’ll gain access to in Elden Ring. After making your way through some of the toughest enemies in the game, you’ll find yourself in this snow-covered land, and faced with even stronger enemies and tougher challenges. Some of the hardest challenges in the area can be found in the dungeons, which give you some of the best rewards you can find anywhere in the game. Our Giant’s Mountaintop Catacombs guide will show you how to get through one of these late-game dungeons without falling apart.
Finding Giant’s Mountaintop Catacombs

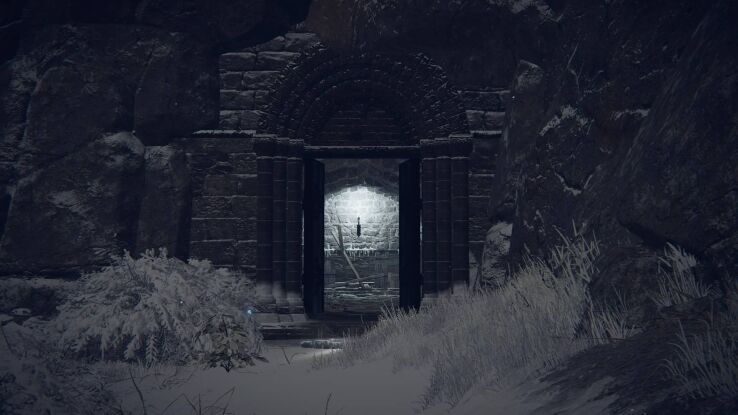
Firstly, you’ll need to make sure you’ve reached the Mountaintops of the Giants region of the game. Once you do, make your way through the linear section of the area until you hit the Zamor Ruins point of grace. From here, head west and follow the path around to the north until you see a narrow path surrounded by enemies. Check to your right and you should see a slope heading down to the side of this area. Follow the slope down to find the entrance to the dungeon. Once you’ve opened it, get in there and activate the point of grace to start.
Giant’s Mountaintop Catacombs walkthrough

From the point of grace, head forward and down the stairs to activate the summoning pool. Stay on your guard, as an imp will enter the room with a two-handed ax so you’ll need to deal with it quickly. Now it’s dead, you can approach the room that imp came from. Aggro the imp you see from a distance, then take him out and deal with his friend hiding around the left corner. The only reward is some Ash Summon upgrade stuff, but it could be worth it if you need to level yours up a bit. Once you’re done, head down the stairs in the main room and take out the first imp you can see from a distance, then enter the room and take out his friend.
Once you’re done, follow the tunnel around to find a lift room. Grab the grave violet if you need it, then get on the lift. You can see a ledge to climb onto on the way down but there’s nothing on it. When you hit the ground floor, activate the left but quickly get off it to send the lift back up alone. Eventually, another lift will show up for you to climb onto. You can go and deal with this optional area now if you like, just jump ahead to the Extra Area heading below. If not, continue into the boss door room.
Opening the Giant’s Mountaintop Catacombs boss door

Look left from the boss door to see an imp down some stairs. Aggro him from a distance and take him out. Head down the stairs but keep to the left or right side of the passage. In the next room, there are two imps who start throwing magic-damage jars at you, but neither can hit you if you stand in the right position. Take one out with a bow or spells, but keep an eye out for the one you’re not attacking, as they can get bored and change position to deal damage to you. Once they’re both dead, you can move onto the next room where you’ll find yet another lift, this time without any surprises waiting beneath it.
Go down in the lift, and approach the next corridor carefully. In the open section with arches on either side, you can find some mini living jars waiting for you to destroy them. Make sure you take them out, or they’ll wake up and kill you from behind. Once they’re down, enter the next tunnel and walk towards the next room slowly. If you’re moving slow enough, a full-sized living jar will jump down from above just ahead of you. He can’t fit down the tunnel, so if you’re a magic or bow user then you can take him out quite easily. If you’re going melee, try to clear out the other mini living pots that are dotted around the edges of the room, or you’ll have a huge task on your hands to take than all down at once safely.
Exploration nation

Head into the next tunnel and up the stairs, but watch out for a pressure plate ahead of you. Move around it, and around the corner to see a giant-blade-falling room at the top of the next flight of stairs. The room is also filled with more mini living jars, but this time they’re the exploding kind. The safest way through the trap room is to attack from a distance using fire. This makes the jars explode without giving them time to run at you first, making this much easier. If you can’t deal ranged fire damage, then you’re going to need to bait the jars into trying to attack you, then safely time your dodges away from them to avoid both the explosion and the falling blades.
Once you’ve cleared the room, you can head out and kill the normal living jar in the offshoot ahead. Once they’re dead, head up the stairs to find a room of poison-spitting eggs. There are about five in the room, but the enemies aren’t particularly threatening if you’ve got some means of clearing poison on you. Take them out with your preferred method and then head up the next flight of stairs. Kill the two living jars in here, but avoid the pressure plate. The room straight ahead has a giant living jar, but you can easily kill him by exploiting the pressure plate in the previous room to shoot him instead of you. Make sure you pick up the ritual jar he was guarding.
Finally finding the Giant’s Mountaintop Catacombs lever

Go back into the room with the pressure plate itself, and drop into the chute in the wall to find yourself in an area that should look pretty familiar to you. It’s not actually the upper area of the place you were in before, but it’s supposed to make you think that it is. From the upper level, you might be able to spot some of the flaming pots below, but either way, jump down and avoid their attacks to run into the lift room. Get on the lift to activate it, then roll off again to reveal a hole in the ground. There’s a giant living jar waiting below that you can take out safely from up here, or jump down if you’re feeling brave.
Enter the next room to actually find yourself in the area above where you were before. Activate the lever to open the boss room and you’re officially done with the dungeon, assuming you don’t want to find every scrap of loot. If you fell down in the room with the giant jar, you’ll have to walk around the dungeon again for another go. Just follow the advice from before when you got down the second lift and you’ll be fine.
Extra areas

The first optional area (not the lift one) is to be found in the duplicate of the boss lever room. Instead of heading straight for what’s under the lift, follow the path back around to find there’s a falling blade room filled with exploding living jars. Once you’ve cleared them out, you can aggro the big lad in the back and use his inability to get through small spaces against him. Once he’s dead loot the room he was guarding and ignore any messages about gesturing to the statue as they’re lies. Head up the stairs outside to find another room filled with poisonous eggs. Ignore them unless you’re desperate for the runes, and run into the next room.
AVoid the pressure plate and take out the giant living jar to loot his room for summoning upgrades. Back in the previous room, jump down the hole again to find yourself back in the fake lever room you were just in. This time, run for the lift and go up. IN the next room, take out the three imps who are hiding here, then go ahead and provoke the burial watchdog fight ahead. This thing will follow you to the lift but no further, so you can use that to your advantage if your build supports it. Either way, you’ll get a Grave Glowwart [9] for killing him so make sure you loot his lair once he’s dead.
The first lift room

Back at the first lift of the dungeon, let it ride up, then get inside and go down. Once you’re off the lift, sneak down the stairs ahead and backstab the imp. Make sure you take him down while he’s on this upper ledge, or he’ll interfere with you in the fight ahead. On the level below, there is a Burial Watchdog mini-boss who stands in your way. You can just jump down, run under the alcove to grab loot, then face the enemy. It’s a stand Burial Watchdog with Ice-Breath, but you really don’t need to fight it unless you’re after the runes. Just make sure that you keep an eye on the next tunnel, and run down it just after the ice-trap pillar ahead has fired off. Head down the tunnel to your left, watching out for the pressure pad in the middle of the path, but don’t run into the room ahead just yet.
There’s an imp on either side of the doorway, and together they can probably kill you if you’re unprepared. Lure out the one on the right first and take him out quickly so you’re not doing a 2-on-1 fight. Once they’re dead, take the loot from the room then head back towards the trap tunnel. If you didn’t kill the Watchdog before, you can wait at the end of this tunnel for the ice trap to do the job for you. Once you’re ready, you can shoot the trap tower from here to make the route much safer going forward.
Traps for days

With the trap taken down, move into the room that contained the trap. There’s another corridor with a trap ahead, so pull out your bow and shoot that to bring it down, revealing the watchdog who was hiding behind it. You can aggro the watchdog from here, then activate the trap to kill it off, though you’ll have to step into then out of the corridor ahead to fire the trap. Once the watchdog is dead, deactivate the trap again and head into the tunnel. To the right is an obvious fake wall with an Imp and a Grave Glowwart waiting behind it. Take out the enemy, pick up the loot, then enter the room that the second Watchdog was guarding. Inside the chest, you’ll find a new Ash Summon for a Flame Monk.
More Elden Ring content
We’ve been waiting to get our hands on FromSoftware’s Elden Ring for so long, we almost can’t believe it’s finally arrived and we have a massive amount of content just for you. Other than our Tier List, We’ll be here to walk you through every step of your journey through the Lands Between. Join us for all our Elden Ring content and guides over the coming days and weeks!


