
Elden Ring Sealed Tunnel guide
When they say sealed, they mean SEALED
Share this article...
WePC is reader-supported. When you buy through links on our site, we may earn an affiliate commission. Prices subject to change. Learn more
As with anything in life, there are some dungeons in Elden Ring that are worth your time more than others. On your 20th playthrough, going after that same Wolves den probably isn’t going to give you anything key to your game. However, there are some dungeons in the game that are a straight-up necessity. One such example of this is the Sealed Tunnel, a dungeon in Altus Plateau that you’ll want to take the time to clear, which is where we come in. We present our Elden ring Sealed Tunnel guide.
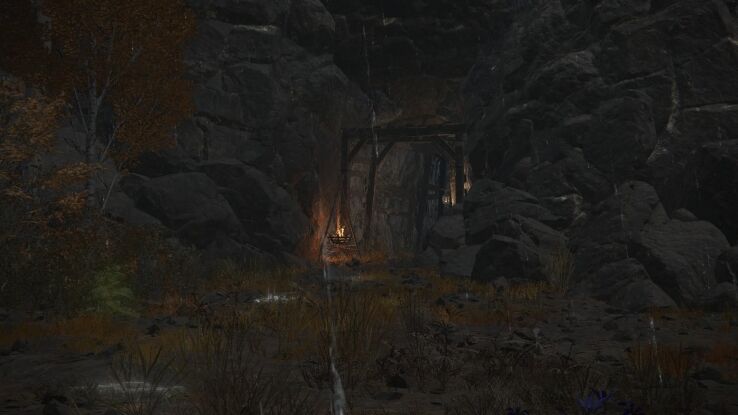
How to find the Sealed Tunnel

The first thing you’ll need to do to access the Sealed Tunnel is to get yourself to the Altus Plateau, and then inside the outer city limits. You’ll need to head for the southern area of the Altus Plateau that is inside the giant walls. You should see a church on top of the hill, but if you head to the cliff nearby, you should be able to see a shallow lake down below. Follow the cliff around and down the slope until you hit the lake and run straight ahead ignoring the enemies. You should see a tunnel held up by scaffolding ahead. Get inside and activate the site of grace inside and we can get started on the real fun.
Sealed Tunnel walkthrough

The first thing you’ll need to do is actually find the cave. There’s an invisible wall on the west side of the cave near to the summon pool, which you should also activate at this stage. Head into the newly revealed passage and enter stealth if you want to do this the easy way. As with most tunnels, this place is inhabited by guys who are resistant to most melee damage outside of strike damage. Double-hand your weapon to make sure you’re not bouncing off the enemy, and take out the guy on your right. Wait for the miner to walk below the wooden passage near the entrance and then drop down to kill them, but do it quickly. Another miner will tackle you from the other side of the cave and you’ll need to take them out too.
There are 3 miners working in the lower part of the area, but they can all be reliably back-stabbed so if you do enough damage it’s a one-shot kill. Once they’re down, loot everything and then approach the central wooden scaffold where one of those little guys with the smoke bombs is waiting for you. Take him out from this side to basically ruin his entire ambush. To his left, you should see a chest that contains a bell bearing you need to give to the twin maiden husks. Behind the chest is another invisible wall that hides the rest of the dungeon, so give it a smack, and get in there.
Another Hidden Door, eh?

Get on the lift ahead but make sure you hang around the back left corner because after a second you should see a ledge you can roll onto to grab a smithing stone. Pick your way carefully down the rocks or you’ll regret it. Once you safely hit the bottom, head directly forward from the lift to find another, slightly more obvious hidden wall. Smack it and go through to find another dead end with a rune on a corpse. Give the wall a smack for yet another hidden door to reveal itself. Someone really doesn’t want you in here. Go ahead and you should come to an area with giant roots crisscrossing the room.
Head across the roots to the right of the room and drop down onto the wooden platform. There are 3 more of those smoke-bomb dudes, but they’re not particularly threatening as long as you don’t let them sneak up on you. Take them out and then head across the root that has a corpse and item on it. Ignore both of those for now and go straight across the root and take out the other couple of enemies waiting on this side before you go back to collect your spoils. Go back to the platform you first landed on and into the tunnel to find another weak enemy and some loot. Deal with both and head back across the root once more. At this stage, if you want to explore what’s at the bottom of this area, head for the ‘extra locations’ heading below.
Explosions everywhere

Through the next tunnel, you’ll enter a room filled with roots that once again block your path. Climb up them and drop down on the other side, but be prepared to move. those piles of stone balls all over the place are explosives. When you get near or hit them, they’ll start fizzing. If you can’t take them down before they’re done then they’ll blow up in your face and deal a decent amount of damage to you. Having said that, these things are the only enemies in this area, so you can safely explore as long as you roll away when they start glowing. There’s some decent loot in the room, but once you’re done, you can head to the wall opposite the staircase and give it a little tap to reveal the exit.
In this next area, you’ll need to drop down through a shaft deeper into the ground. If you fall, you’ll get to start again at the Stake of Marika in the previous room, so it’s not too bad. You’ll also be able to get some Smithing Stones and Lightning Grease on your way down at least. When you hit the bottom, watch out for a few more of those exploding orbs. In the next room is the dungeon’s boss fight, so head on in if you’re ready for a fight. It’s a one-on-one fight with a heavy focus on melee, so if you’re a ranged character, you might be in a spot of bother. Once the boss is dead, you’ll get a new sword, and access to a very interesting building outside the boss room.
Extra locations in the Sealed Tunnel

There’s not much in the way of extras in the Sealed Tunnel dungeon, but there is a bit more to explore. Head for the room with roots that stretch across the area, and take out the little guys waiting for you. Once you’re done, drop down to the ground below and get ready for another fight. An Abductor will approach from the back of the cave, which is going to be a tough prospect in this limited space due to its huge sweep attacks. Try to lure it closer to the glowing statue in the corner, as that’s the only way to crack it open and reveal the juicy loot hidden inside. Unfortunately, that’s pretty much the limit to the hidden stuff in this dungeon, so at this stage, you can just climb back up the ladder and carry on your merry way.
More Elden Ring content
We’ve been waiting to get our hands on FromSoftware’s Elden Ring for so long, we almost can’t believe it’s finally arrived and we have a massive amount of content just for you. Other than our Tier List, We’ll be here to walk you through every step of your journey through the Lands Between. Join us for all our Elden Ring content and guides over the coming days and weeks!


