
How to complete the Runakit Shrine in Zelda Tears of the Kingdom
Built to Carry
Share this article...
WePC is reader-supported. When you buy through links on our site, we may earn an affiliate commission. Prices subject to change. Learn more
The newest title in the long-running Zelda series, Legend of Zelda: Tears of the Kingdom is already a smash hit, similar to its predecessor The Legend of Zelda: Breath of the Wild. Tears of the Kingdom features a new storyline, new abilities and of course new shrines for Link to complete. If you’re getting stuck in the new shrines trying to get those sweet Light of Blessing orbs, have no fear, we’re here to help. This guide will give you a walkthrough of the Runakit Shrine.
How to beat the Runakit Shrine in Legend of Zelda: Tears of the Kingdom
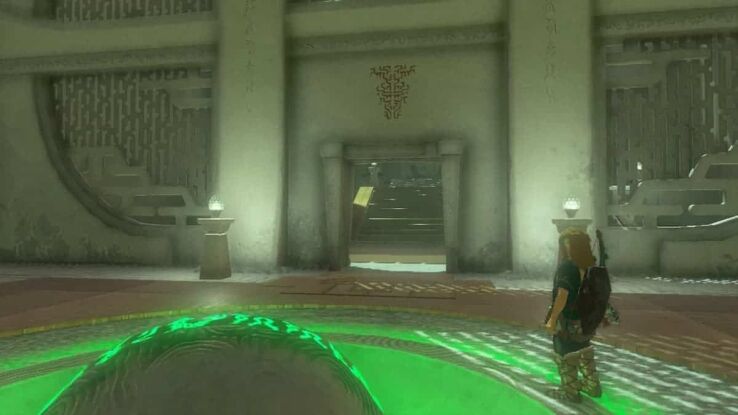
This shrine will open up to a large, open room with three platforms of varying heights, all connected by rails. On the ground where you walked in, you’ll see a slot for a ball to be placed in to your left. Directly across from you will be the tallest platform. Jump and glide over to it, and climb to the top using the ladders.
At the top, you’ll find the ball you need for the slot. Using the Ultrahand ability, pick it up and place it on the first rail down to the next platform. This rail will let it roll down without any tweaking. Paraglide down to the next platform.
For the next platform, the rails will be too far apart to let the ball roll down as usual. You’ll be provided with two pillars on this platform, so using Ultrahand again, attach them top to bottom to form a longer pillar. Then, you can attach the ball that’s been rolled down to the center where the two pillars are glued together, and place the ball in between the railings. The pillars will keep it from falling into the chasm as it slides down.
The final platform will only have one railing instead of two. Detach the pillars from the ball by wiggling the right stick, and this time attach it to one of the slab pieces that form a corner that’s along the wall. Make sure to attach it to the ‘top’ where the two slabs connect, because this will keep it balanced on the railing. Once attached, send it down the railing to the platform you entered on and you can paraglide over. Place the ball in the slot, and the gate will open to receive the Light of Blessing.
There is one treasure chest in this shrine, which will be on a small platform to the right when you first enter the shrine. When you’re on the third and final platform with the corner pieces, attach two of them together to place on the railing leading over to the chest platform and run along those. There will be a ladder up to the chest that you can jump to and climb up to open the chest. Inside will be a Construct Bow.
Where is the Runakit Shrine in Legend of Zelda: Tears of the Kingdom
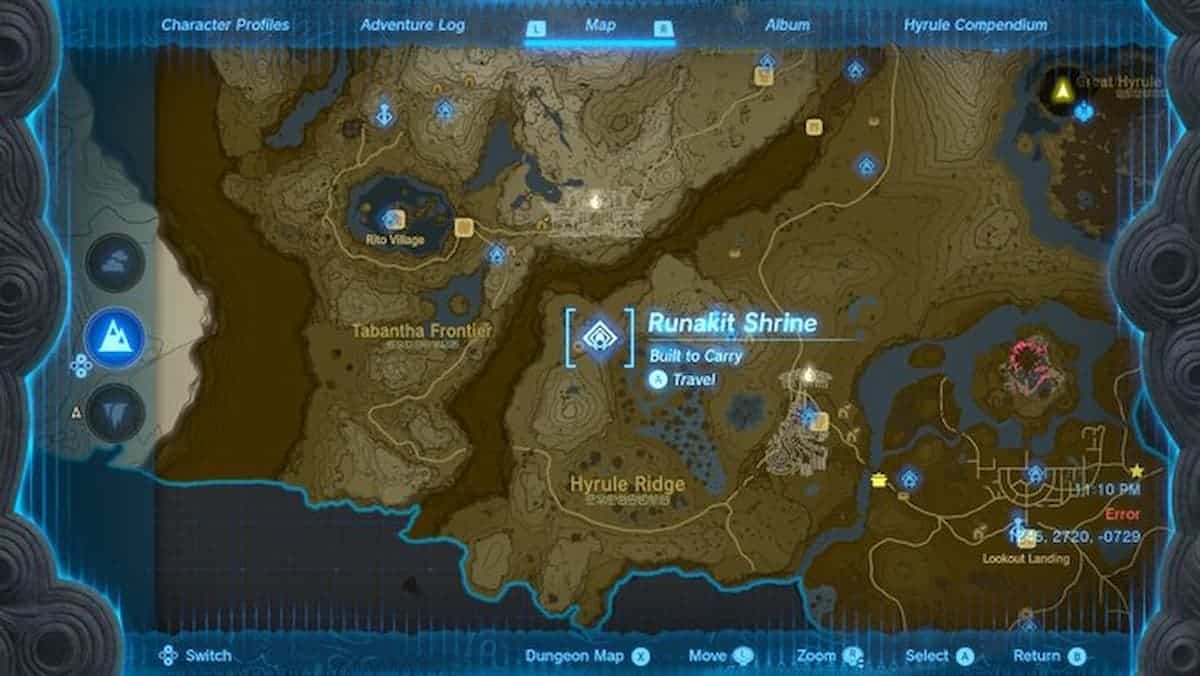
The Runakit Shrine will be just North of Mount Rhoam, and to the West of the Lindor’s Brow Skyview Tower. You can paraglide down from either peak to reach it. The exact coordinates are -2527, 1169, 0177.
If you’re stuck in shrines, check out our other guides, like the Kisinona Shrine or the Kiuyoyou Shrine.


