
Lost Ark Glaivier Guide: Builds, Skills, Engravings
Here is a Lost Ark Glaivier guide, offering you a perspective on builds, and engravings for PvE end game content.
Share this article...
WePC is reader-supported. When you buy through links on our site, we may earn an affiliate commission. Prices subject to change. Learn more
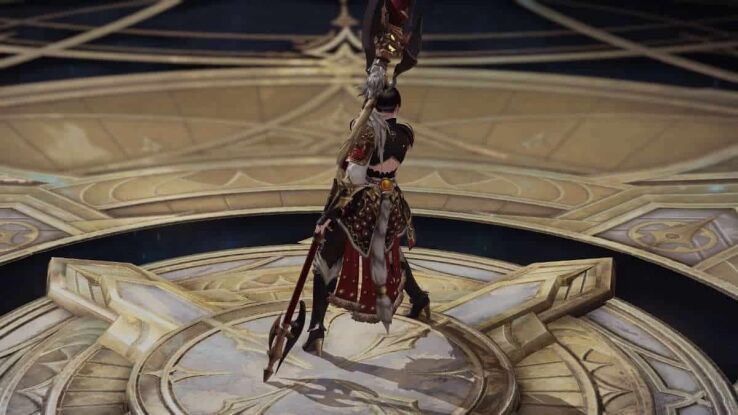
The Lost Ark Glaivier is one of the most anticipated classes to come to the western build of Lost Ark. At launch it was not featured, but, as of the April Update, players can finally jump on the spear and glaive wielding martial artist to take on the changes. For those who want to experience class, here is a Lost Ark Glaivier Guide, featuring a look at the Glaivier builds and engravings to see if the class is for you or to prepare wisely.
Lost Ark Glaivier Guide
The Glaivier is an interesting class, with its very unique identity meter. As you stay in combat and attack enemies, you will generate a resource that fills your Dual Meter. This resource is separated into three distinct bars, each granting a buff when you switch to the other weapon. The Dual Meter is your bread and butter until you unlock one of the class engravings.
Ideally, you want to build your identity meter to the full third bar, as that rewards the next buffs when you switch your other stance. Also, it is good practice to switch stances when you fill the third bar, as this is how the Pinnacle build works (more on this later). As for the buffs themselves, you can get
| Dual Meter | Flurry | Focus Stance |
| Level 1 | +5% movement speed | +10% attack speed |
| Level 2 | +10% movement speed +10% damage to foes | +10% attack speed +10% damage to foes |
| Level 3 | +15% movement speed +10% damage to foes + 25% crit damage | +10% attack speed +10% damage to foes +15% crit rate |
Lost Ark Glaivier Builds

The Lost Ark Glaivier playstyle has two very different builds. The first is the Pinnacle build, which is known as the Climax build in Korea. This build is all about changing your stance when you get the third dual meter block filled for bonus damage. When it is filled, you get even more bonuses on top of your stances, which are, 15% movement speed, 20% damage, and 50% crit damage (at the best possible version of the Pinnacle engraving)
On the other hand, there is the Control build, which prevents you from using the Focus weapon ( blue skills). To compensate, your blue skills get an 18% damage buff. This build is ideal for those who like utility, as the blue tree is filled with counters, dashes and knock-ups. Your skills are relatively the same as the Pinnacle build, but with a few tripod switch-ups.
Regardless of which build you go, you want to use the red awakening skill. This skill does lots of thrust attacks, and slash attacks and drags enemies closer to you (if applicable). This scales incredibly well with your attacks speed and attack damage buffs, along with the crit. Not to mention this works well with your increased mass engraving (more on that later). So, we highly recommend using this skill engraving whenever possible, regardless of the content you are running.
Lost Ark Glaivier Pinnacle Build
The pinnacle Build is by the far the most common build for the Glaivier. The reason why is fairly straightforward, with the build granting plenty of bonus crit damage, making your numbers go insane. If you check out the Korean leaderboards, there are even Glaiviers (Lance Masters) that are competing against the usual Mayhem Berserkers and Ignite Sorcs. So, for those who want to be competitive, then the Lost Ark pinnacle build is the go-to for your Glaivier.
| Weapon | Skill | What it does | Tripod 1 | Tripod 2 | Tripod 3 |
| Blue | Chain Slash | Strike and forward dash. Enemies already airborne are knocked in the air again. | Swoop | ||
| Blue | Half Moon Slash | Multiple slashes that launch enemies into the air with the final hit. | Flurry Expertise | Final Decision | Your preference |
| Blue | Raging Dragon slash | 360-degree attack that launches foes back. | Quick Prep | Quick Slash | Awaken |
| Blue | Cutting Wind | 8M dash that returns you to your original position. | Quick Prep | Valor | |
| Blue | Wheel of Blades | Several spinning attacks. Enemies in the air who are hit with the attack are knocked in the air and then slammed to the ground on the final attack. | Flame Slash or Quick Prep (Chaos Dungeon or main boss dependent) | Precise Slash | Awaken |
| Blue | Flash Kick | Massive dash skill which can be later improved. | Excellent Mobility | ||
| Blue | Vault | Counterattack skill | Optional | ||
| Blue | Shackling Blue Dragon | AOE skill that applies your party buff – lowers crit resistance. | Quick Prep | Blitz | Critical Spear (-18% Critical resistance) |
| Red | 4-headed Dragon | Thrust your spear several times in target direction. | Firepower Control – dual meter generator | The Last Spear | Quick Prep |
| Red | Dragonscale Defense | Block an attack. If successful do two attacks | |||
| Red | Red Dragon’s Horn | Perfect Zone skill that does a long-range spear attack that inflicts damage and knocks foes back | Firepower Control (resource generator) or Quick Prep | Spear of Destruction (always inflict crit) | Weak Point Detection You can go Aiming Distance if you feel comfortable you can reliably land the tip, but it can be inconsistent, especially if your target moves suddenly as your charge it up. |
| Red | Spiraling Spear | Basic spear thrust attack | |||
| Red | Starfall Pounce | Jump into the air and slam down on target location, launching them into the air. | Weak point detection – single target push immune foes Or Wide Angle attack for Chaos Dungeons. | Quick Prep | Powerful Finish – 100% crit rate on push immune foes. Or Ground Explosion for other content. |
| Red | Thrust of Destruction | Charged attack that deals damage with a beam that emits from your weapon. | Weak Point Detection Quick prep if you don’t have enough cooldown reduction through your Specialization stat | Speartip Thrust – 50% Crit chance on skill | Air-Ripping Thrust – Another 50% crit chance on full charge. = guaranteed crit using both tripods. |
Before we go any further, you need to know a few combos and limitations.
Blue Combo: Half Moon Slash > Chain Slash> Wheel of Blades.
Half Moon Slash is the skill that gets your enemies into the air, Chain Slash keeps them in the air and Wheel of Blades brings them down. This is your primary Chaos Dungeon and PvP combo for sweeping up enemies and dealing damage.
One other factor is that red is all about damage, but this is when you can be the most exposed. We recommend using the Dragonscale Defense skill if you do happen to get yourself caught as it can save your life. Meanwhile, the Red Dragon Horn skill is ideal if your character is in a position where they need to range attack their foe thanks to AOE effects on the floor.
Lastly, Schackling Blue Dragon is only available once you get your first awakening skill. When you get it, you then gain a crucial skill that applies a party-wide crit resistance buff. It is an incredible party synergy buff that you must take.
In terms of your gearing, you want to focus as hard as you can on your Specialization. Specialization increases your Dual meter generation, allowing you to get into that third Dual Meter bar earlier, meaning you get more Pinnacle buff uptime. Here is an example top end Korean build to emphasise the playstyle.
Lost Ark Glaivier Control Build

For the most part, you will use the same blue skills as you do in the Pinnacle build. However, the tripods are slightly different, you are losing out on guaranteed crit attacks through the red weapon, along with extra crit chance and damage buffs thanks to the pinnacle engraving. So, you want to get your extra damage on your skills, and any additional crit increase. If there is an option to get more damage or crit, grab it. You can still use quick prep, if you are lacking in Swiftness gear, but swap it out when you have over 1000 Swiftness. The only exception to this rule is Shackling Blue Dragon, as that needs to be off cooldown for the crit resistance debuff.
In terms of gear, you will need more Crit to compensate for the lack of bonus crit rate in your gear. Meanwhile, Swiftness remains an important part of your build and is still your priority as you have six fewer skills to deal damage with, so, more cooldown is advised. Here is an example of a top-end Korean Control build.
While this build has weaker overall output, you get much more reliable movement, making it a good spec for learning to play the game on, along with progressing on abyss raids.
Lost Ark Glaivier Engravings
Your priority of Lost Ark Glaivier engravings should be your class engravings, followed by Grudge only if it is maxed out. If you don’t have a maxed out Grudge, you can then Keen Blunt Weapon or Mass Increase.
Keen Blunt Weapon is a great engraving, as it increases your crit damage. Since most of the skills in both Control and Pinnacle have high crit damage, and both builds apply the crit resistance debuff, it is a high-value engraving. Increases Mass is another great engraving, as your class has plenty of skills that benefit from increased attack speed, and you also get increased damage and attack speed thanks to your identity buffs.
This concludes our Lost Ark Glaivier Guide. For more class guides, why not head over to our Lost Ark hub for more content on the game?


