
Lost Ark Tranquil Karkosa Abyss Dungeon Guide
Can’t get the hang of Lost Ark’s Tranquil Karkosa Abyss Dungeon? This guide will cover all of the tips, tricks and mechanics you need.
Share this article...
WePC is reader-supported. When you buy through links on our site, we may earn an affiliate commission. Prices subject to change. Learn more
Tranquil Karkosa is the fourth available T2 end game Abyss Dungeon Lost Ark has to offer. Like Sea of Indolence, Tranquil Karkosa continues the Gate of Paradise Abyss Dungeons nautical theme, as well as keeping the oxygen mechanic from the previous dungeon. This guide will cover all of the tips, strategies and mechanics you will need to take this one down!
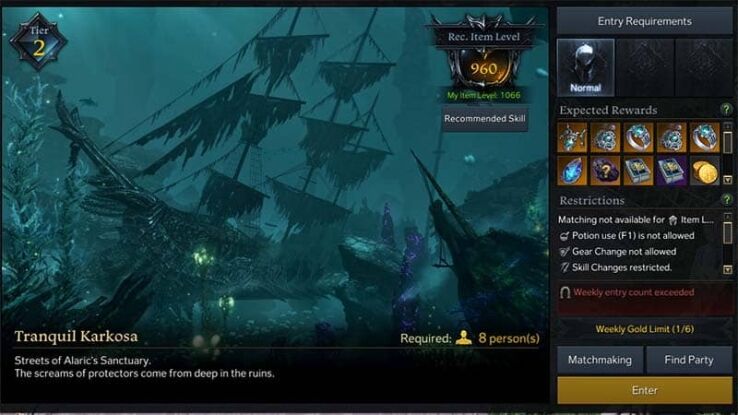
To enter the Lost Ark Tranquil Karkosa Abyss Dungeon, you will need to have two parties with four players in each. All these players need to be item level 960+ and need to have completed all of the previous Abyss Dungeons. You can use matchmaking or find party features to group up and tackle these dungeons.
Lost Ark Tranquil Karkosa Abyss Dungeon Mechanics and Tactics
The first thing to note in Tranquil Karkosa is the continuation of the oxygen mechanic introduced in the previous abyss dungeon. Once again, a slowly emptying ring will appear above the player’s head, indicating their remaining oxygen. To refill this meter, you need to stand on air bubbles or interact with plants that will be marked on your mini-map. Do so, otherwise, you will drown and will have to cheer your teammates on in boss fights.
Kallivan of the Eroded Storm tactics, tips and mechanics
Kallivan is the first boss in the Lost Ark Tranquil Karkosa Abyss Dungeon, and he has some pretty interesting and challenging mechanics.
- Kallivan will intermittently turn the players into living weapons. A pair of slowly closing, light blue lines will appear in front of random players. When these lines meet the player releases a blast of energy in front of them, damaging and knocking up teammates. If you are targeted by this ability, try to move away from the party.
- Moreso, Kallivan will raise either his pistol in his left hand or anchor in his right, into the air. At the same time, both a blue and red zone will appear on the floor around Kallivan. If he raises his pistol, the red area is safe. Alternatively, if he raises his anchor, the blue area is now safe. Stand in the safe areas to avoid incoming damage.
- Kallivan will surround himself with a shield making him immune to damage. Two Cursed Ghost Necromancers will then spawn (you can see their location on the mini-map), who also have shields. As this is an eight-player encounter, try to split the party between the two targets. You need to hit the Necromancer’s shields with destruction bombs or abilities to break them. Successfully taking down these enemies in time removes Kallivan’s shield.
- Shortly after the previous ability, Kallivan will begin to charge a wipe attack. You need to hit him with whirlwind grenades and stagger abilities to interrupt this, you can see how much is left by the orange bar underneath him. Hopefully you have some high stagger classes like the Scrapper or Artillerist in the dungeon to make it easier.
Karkosa’s Punisher tactics, tips and mechanics
Karkosa’s Punisher is probably a little easier to understand than Kallivan. She has a couple of major mechanics to think about, but no raid wipe abilities this time around.
- The Punisher will sometimes grab a member of the party and begin walking away. She will then slam them into the ground for big damage, and an AEO knock up. You can stagger her during this attack to release your teammate using whirlwind grenades and stagger abilities.
- A large pufferfish will spawn during this fight. You want to switch your focus to this target. It will slowly make its way towards the Punisher in the centre of the arena. This will then detonate in a large AOE if not killed fast enough. Focus the fish.
- The Punisher’s attacks can trap teammates. Any trapped players can be freed by hitting them enough times, this is indicated by a purple bar underneath them. Free your friends.
- The main ability to watch out for is a large, tracking cone attack. The Punisher will target three players with large cones that follow them, eventually dealing damage and stunning anyone in the blast. If you are targeted, you should try to run in a straight line out the back of your cone. This stops the ability from moving around, giving your teammates a chance to get out of the way as well.
Karkosa Monarch Draikhan tactics, tips and mechanics
Karkosa Monarch Draikhan is probably the most difficult encounter Lost Ark players will have faced until this point and requires a little coordination. The first thing you need to do, before leaving the starting area, is assign each player a position. These positions should be laid out as if you were standing around an octagon with a player covering each side.
- When Draikhan reaches 16 remaining HP bars he will begin to charge his wipe mechanic. Draikhan will move to the centre of the arena and the water will begin surging towards him. At this point, the party should move to their assigned positions set out earlier and stand close to the boss. White and gold orbs will begin to form and move towards the boss. You need to block the orb that forms on your side. The party then needs to move clockwise to the next orb, if your previous orb was white, this one should be gold and vice versa. Then repeat this twice more, with each player collecting four orbs in total, two of each colour.
- When Draikhan reaches 8 remaining HP bars, he will repeat his wipe mechanic. This time, however, instead of moving and collecting your orbs like this: 1 > 2 > 3 > 4, you need to collect them like this: 1 > 2 > 3+4 > 5. The easiest way to do this is for the party to repeat the rotations the same as last time, until collecting the third orb. At which point, you stop rotating and take the same orb again, before rotating one last time.
- Most of Draikhan’s abilities give you a stacking waterlogged or electrocuted debuff. You can clear these by collecting the glowing blue orbs that will appear periodically around the arena. You should ensure you clear them before the wipe mechanic as they make this even more difficult.
We hope you found this Lost Ark Tranquil Karkosa Abyss Dungeon Guide useful! Why not check out some of our other great guides and content at the Lost Ark Hub?


