
Sniper Elite 5 Liberation workbench locations guide
Here is a guide to finding all the Sniper Elite 5 Liberation workbench locations.
Share this article...
WePC is reader-supported. When you buy through links on our site, we may earn an affiliate commission. Prices subject to change. Learn more
The sixth mission in Sniper Elite takes you behind enemy lines on D-Day. You head into Norman towns, getting a glimpse of the preparations for the assaulting allied army. However, it is up to you to take out what you can to make it easier to assault. While that is the main purpose, some are going back to D-Day to get their hands on the Workbenches. Here are all the Sniper Elite 5 Liberation Workbench locations.
Sniper Elite 5 Liberation Workbench locations

As with all maps, there are three workbenches. The above image shows exactly where they are on the level map.
However, some of these are a little tricky, even with a map telling you where they are. Below you will find tips on how to get every single one.
The first workbench on the Liberation map is quite close to the first objective point at the crossing. Once you take out the defensive placements, you then turn right at the T-junction in the village. The workbench is inside the building with the scaffolding, climb partway up the stairs and cross the wooden planks to get to the first workbench.

The second workbench is located in the watermill building at the main river crossing. You can cross a wooden bridge rather than cross the heavy defender stone bridge. Then head into the water mill, and break open the wooden floorboards over the hole. You can use a crowbar to open it, as there is one inside the room with the boarded floor.
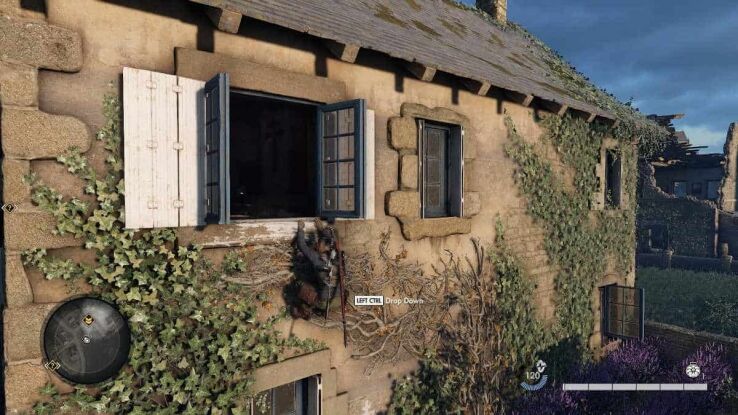
The final workbench on Liberation is at the very end of the level. It is where you need to plant explosives on the bridge. Just before crossing the bridge, there is a building along the eastern road. The workbench is on the top floor. You can either go into the building and armor pen or blow the door up to gain access or climb the vines in the garden bit and access it through the open window.

And there you have it; you now know how to get all the Sniper Elite 5 Liberation Workbench locations. Why not check out the Sniper Elite 5 hub for more walkthroughs and guides if you want more content?


