
Sniper Elite 5 Workbench locations: All Maps and missions
Here are the locations of all the Sniper Elite 5 workbenches
Share this article...
WePC is reader-supported. When you buy through links on our site, we may earn an affiliate commission. Prices subject to change. Learn more
Sniper Elite 5 has a brand new feature called Workbenches, which offers players two new interest aspects of gameplay. The first is that it allows you to customize your loadout and modify your weapons per your needs and playstyle. Meanwhile, the second purpose is that they unlock new weapon attachments that allow you to modify your guns.
However, finding all the workbenches on each map is slightly tricky. This is where we step in. We will show you how to find all the workbenches in Sniper Elite 5, allowing you to get the Pistol, Rifle and SMG attachments from every level in the game. If you need more detailed tips and guides, then we are linking to specific tip pages to help you even further.
Read Mode: Sniper Elite 5 review.
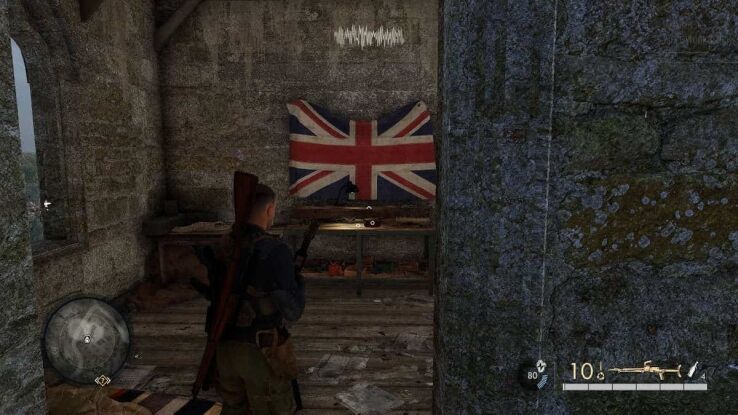
Sniper Elite 5 workbench locations
Atlantic Wall Workbench locations – Mission 1

- First room after the tutorial.
- Inside the french informant’s house in the attic. Need to climb outside the building at the back via the vines.
- Pistol workbench at the small military camp in the top left of the map. You need an Armory key to get in, which you can find on the nearby officer.
If you need more details we have a bigger guide on the Atlantic Wall workbenches.
Occupied Residence Workbench locations – Mission 2

- In the basement of the chateau.
- Inside a building roof on the very top left of the map outside the chateau.
- Head towards the most eastern part where there are several buildings that look like a rectangle on the map. Inside the most eastern one is an office, get his key and you can unlock the wooden door in the same building.
For a more detailed guide, you can find the full details on the Occupied Residence here.
Spy Academy Workbench locations – Mission 3

- In the very northern part of the castle inside the wall. You can either climb from the beach near the exfiltration point using the vines or find your way to the northern outside part of the spy academy building.
- Head right from the main entrance to the main city complex. Follow the road until you see a hotel building walk past and then there’s a whitish climbable wall. Head up and then you can enter the hotel and find the bench.
- Kill the officer in the small church just outside the central complex of the map. You can then head to the square building slightly south of the central complex.
We have more detailed tips and map section on the Spy Academy workbenches here.
War Factory Workbench locations – Mission 4

- Get the Refinery key from the dude near the guard near the refinery objective marker. You then head to a locked room on the western facing wall of the floor below the guard.
- The Rifle Workbench is in the smaller factory building to the east side of the road to the refinery. Head to the south side of the building and climb down the hole. The workbench is in the basement.
- The final workbench is on the top floor of a building where the curve road is in the centre of the map. You can get a key to open it from the final mission objective, or blow it up with a satchel charge.
Visit our War Factory guide for more details on the workbench locations.
Festung Guernsey Workbench locations – Mission 5

- In the stone church in the middle of the map. You need to climb the tower from the outside using the vines and then the bars on the walls to climb it.
- Inside a tiny stone house near the bottom right side of the map. Enter the building, prone under the desk and climb the ladder to the basement.
- Head inside the AA gun trench closest to the left facing yellow shaped checkpoint shed on the map on the top left. Then head inside and it is in one of the dugouts.
You can check out our Festung Guernsey guide for all the collectables here and for more tips on finding the workbenches.
Liberation Workbench locations – Mission 6

- In the house at the very top right of the map before the bridge crossing. Find it upstairs of the building. You can access it via the climbable branches leading to the window.
- Inside a water wheel mill in the centre of the map. You enter the building and have to break open a board covering a hatch. The workbench is on the floor below.
- Inside a farm barn that you can access via a stone tower with a nazi banner. The farm barn is located along the main road near the south of the map that turns east. It is also opposite the turning that heads toward the farmhouse.
Check out our Liberation workbench guide for more content, tips and tricks if you need an extra hand.
Secret Weapons Workbench locations – Mission 7

- Workbench inside the armoury found near the underwater missile site hatch. The nearby officer will get you access or you can satchel charge it if you wish.
- Near the resistance cache if you have that intel. It is near the waterfall if you travel to the nazi base near the bottom left corner of the map. Don’t cross the stone bridge, follow the dirt path and then into the cave.
- Inside the master dome research facility. Get the key from a scientist and then follow the circular stairway. There should be a corridor partway through with a locked door right at the end. Follow it, then up the wooden ramp, then run and jump onto the climbing wooden beams to access it.
Rubble and Ruin Workbench locations – Mission 8

- Inside one of the blown-up residential quarters just to the south of the kill objective. There should be an easy to spot path that leads through a blown-up building. It is also a good spot to pick off guards if you want to do the kill mission.
- You need to climb the giant stone church in the centre of the map. You can climb up the scaffolding to the side, and then drop down the hole in the roof, rather than enter, which you do for the chandelier part of the main story.
- Head into the submarine depot through the sewer tunnels. You will come across three guards at the end. Of the first tunnel. Kill them, loot the key and then open the door just to the left.
This concludes this Sniper Elite 5 Workbench guide. For more guides on Sniper Elite, feel free to check out our hub.


