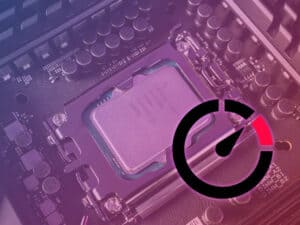
How to lower CPU temperature in 2024 – 9 ways to cool down your CPU
Lets stop your CPU from getting hot enough to cook bread, here are 9 methods that should help

WePC is reader-supported. When you buy through links on our site, we may earn an affiliate commission. Prices subject to change. Learn more
Do you think that your CPU is too hot? Have you ever experienced a full system shutdown right in the middle of playing a video game? This could be caused by any number of faults, but one very common reason for a PC to shut down is when the CPU gets too hot and shuts down. So you might be asking, how to lower CPU temperature? Here at WePC, we have tested hundreds of different CPU and cooler combinations, so it’s safe to say we know a thing or two about CPU cooling.
We are up to date with the latest CPU cooling practices, we’ve even accounted for Intel’s 14th generation CPUs, Intel’s latest CPU generation. However, they have been met with some mixed feelings, as we stated in our 14900K review. Cooling your CPU sufficiently is almost as important as having one to begin with, because failing to do so leaves your CPU useless, or worse, it can permanently damage your hardware.
Is your CPU too hot? How to reduce CPU temps and keep them down
If you’re stuck for time, we have outlined a few things you can do to keep your CPU temperatures down. We elaborate on each point in more detail below, but if you’re hard on time, this is our shortlist for how to reduce CPU temperature in 2024.
- Clean Your Computer: Dust and debris can accumulate inside your computer case, blocking airflow and causing components to overheat. Regularly clean your computer, especially the CPU cooler, and fans. Compressed air can be used to blow out dust.
- Improve Airflow: Ensure your computer case has proper airflow. Arrange cables to avoid blocking airflow, and make sure you have intake and exhaust fans. Consider adding additional case fans for better cooling.
- Upgrade CPU Cooler: If you’re using the stock CPU cooler that came with your processor, consider upgrading to an aftermarket cooler. High-quality coolers can provide better cooling performance.
- Thermal Paste Replacement: The thermal paste between the CPU and cooler can dry out over time. Applying fresh thermal paste can improve heat transfer and reduce temperatures.
- Undervolt the CPU: Undervolting reduces the amount of voltage supplied to the CPU, which can lower power consumption and subsequently reduce heat generation. Be cautious and ensure system stability when undervolting.
- Monitor and Control Fan Speed: Use software to monitor and control fan speeds. Adjust fan curves to increase the fan speed when the CPU temperature rises and decrease it when the temperature drops.
- Reduce Overclocking: Overclocking can increase CPU temperature significantly. If you’ve overclocked your CPU, consider reverting to its default settings or a more conservative overclock to reduce heat generation.
How to lower CPU temperatures in 2024
Allow better airflow
One extremely simple way to ensure acceptable CPU temperatures is to have the correct airflow configuration within your PC. Of course, open airflow cases are excluded because they’re an entirely different beast, but for your ‘normal’ PC cases there are a few configurations you need to understand.
First, we have ‘Positive pressure’: this configuration puts more air into your PC than is being exhausted, so there’s hot air almost stagnating within the PC. The opposite of this is the ‘negative pressure’ configuration that consists of more air being exhausted from the PC case than is entering. This creates a pocket of void space that ideally we’d like a nice stream of air to fill.
These two configurations are less than ideal. The only way it would work efficiently is if you had access to and full control of every single fan to compensate for either the positive or negative difference.
The ideal configuration is ‘neutral pressure’ meaning you have just as much air entering as you have exhausting, creating a flow of air that doesn’t get caught up or stagnate inside your PC case.

Cable management
Cable management is a factor in not just CPU temperature control but overall temperature control. Messy cables can disrupt a clean flow of air and create object resistances we don’t need when trying to create a free-flowing efficient cooling environment. Keep those cables in check.

Location of your system
Another common reason for CPU temperatures to skyrocket is by situating your system in a poorly ventilated area. Regardless of how efficient your airflow configuration is, or how well-rated for airflow your case is, your CPU will get hot if you don’t have any cool fresh air getting to it in the first place.
Clean your PC
Fans are solely responsible for the intake and exhaustion of air to and from your PC, so it’s imperative that you keep them well maintained. Fans experience much higher air exposure than most PC components as they’re the only hardware responsible for pushing air through your PC. All this air exposure brings with it dust and debris.
Like everything else in your house fans get dusty and require regular cleaning. Don’t be ashamed, PCs in the cleanest of houses still get dusty, it really is inevitable. All this dust can cause more than a few problems, from electrical issues to fan failures, and you don’t want any of these things happening. To clean your fans (and the rest of your PC) simply take it outside and clean it out with a can of compressed air. If you’re an avid gamer and feel you’re going to be doing this a lot, it’s perfectly acceptable to buy a compressor of some sort to save you buying a can of air every few weeks.

Step
Remove the screws from the back of the side panel
Remove any screws securing your side panel to your PC’s chassis.

Step
Carefully remove the side panel
Remove the side panel itself and any dust filters you wish to clean.

Step
Use a can of compressed air (or compressor) to remove residual dust
Now using your compressed air, blower, or compressor, remove the dust from your PC being careful to place your PC in a well-ventilated area and a place you don’t mind getting a little dusty.

Step
Blow the dust off from the fans
Make sure you never allow the fans to spin when blowing them as this can cause damage to the fan’s motor – they don’t like to spin when unpowered.

Step
Use the compressed air to dust off the power supply fans
Don’t forget about blowing dust out of the PSU, as this is the component that’s most likely to suffer a damaging short at the hands of excessive dust build up.

Step
Refit and re-screw the side panel
Replace the side panel and any accompanying screws.

Open air vs closed case
There’s been a long-standing debate in the PC space that open-air cases are advantageous in terms of airflow. This is, however surprisingly, counterintuitive as open-air cases cause a few more issues than they fix. However, they do look amazing when done right. Without a closed directional system the cooling capabilities become more inefficient. The open case also invites in much more dust due to the absence of various filters. Because of these simple facts, open-air cases are out. Unless you’re fine with cleaning your PC every week or so.
Re-apply thermal paste
Re-applying the cracked, dry, and worn-out thermal paste (or simply upgrading to a better quality compound) can do wonders for your temperatures. Thermal paste is designed to sit in-between the IHS can the cold plate on the CPU cooler, which makes it the only thing to come in contact with each component.
The idea is to eliminate air between the two plates (which is incredibly insulating) and allow for more efficient heat transfer to the cooler. As you can imagine, dry thermal paste is not very good at doing this. Also, some thermal compounds are better than others, if you want the best results, go for a named brand. (or industrial thermal interface material)

Invest in a better CPU cooler
Stock coolers are great for the bare minimum cooling capacity, the coolers that work just well enough to be functional. You shouldn’t expect to get respectable CPU temperatures with mediocre cooling solutions at best, though. Installing aftermarket cooling solutions can get a little pricy at the high end, but the difference in temperature can be night and day. Of course, there are budget options available but as with anything, budget options have limitations. Better to go with a CPU cooler with no compromises like the ASUS Ryujin II for example, especially if you plan on overclocking your CPU. AIO or (all in one) coolers work magic in terms of reducing CPU temperatures and keeping them at bay. AIO coolers offer an excellent mid-way between the sometimes disappointing performance of air coolers in comparison to liquid-based coolers, and the scarily daunting custom water cooling solutions. AIO installations follow the same basic models and you can find a tutorial in the article outlined above, just in case you run into any issues.
Reapplying the thermal paste can work wonders when attempting to lower your CPU temperatures, thermal paste becomes dry and cracks when left unchanged for long periods of time. As it’s a thermally conductive compound it’s also subject to thermal decomposition so the more you use it the lower its longevity.
You can increase the thermal pastes life span and the efficiency of said paste by purchasing higher quality paste. but generally, thermal paste can already withstand a number of years of use but this number is subjective and situational so we won’t outline how long thermal paste is supposed to last.
We will however, advise that you change your thermal paste once every one to one and a half years, to ensure proper performance. Or if you remove your cooler for any reason it’s always best to reapply.
If you’re unsure about the logistics of applying thermal paste, check out this article on how to properly apply thermal paste.
Invest in more fans
How many fans do you have in your PC? if the answer is three or less, you could probably benefit from an additional fan or two (providing your case supports extra fans). We outlined the importance of airflow configurations earlier but if you can, you should add more fans to your airflow setup. You’ll be adding a stronger airflow aiding your PC in achieving a lower operating temperature.

Set higher fan speeds in motherboard BIOS
Manually adjusting the CPU fan or fan curve in your motherboard’s BIOS (basic input-output system) can work well when attempting to keep high CPU temperatures at bay. By default, CPU fan control is set to ‘Auto’ – this curve profile is designed to be a hybrid between noise and effectiveness. In general, allowing the motherboard to control the CPU fan speed based on a temperature variable is smart and effective, but there’s some cooling performance to be had by simply adjusting the curve. If you’re a headset gamer and aren’t phased by a little extra noise erupting from your PC then you can achieve better temperatures by creating a more airflow heavy curve. But of course, having your CPU fan spinning at 100% speed for the foreseeable future will do nothing for its longevity. Contrarily, if you’re a gamer more conscious of noise, you can try adjusting the curve more steadily. The next few steps may look scary, especially if you’re not accustomed to navigating a motherboard BIOS. You do have the potential to break your PC in here, but if you follow the steps closely you’ll be just fine. Your motherboard layout will look slightly different, but most have access to fan controls in the ‘Easy mode’ section. If you’re unsure just look up your motherboard manual or check out: How to check what motherboard you have.

Step
Enter your motherboard BIOS by pressing the ‘DEL’ key at POST
Enter the BIOS by pressing the Delete key when the PC first posts.

Step
Enter your fan control software. In our case it’s ‘Smart Fan 5’
Enter the fan control section.

Step
Set the ‘CPU fan speed control’ to manual
Now go to CPU fan speed control to manually set the speed.

Step
Move each node on the curve to adjust it.
At 50%, you should have cool temperatures with low processes and idle speeds. Make sure you adjust the temperatures when gaming to maintain low temperatures.

Step
Hit ‘ESC’ when you’ve finished adjusting your curve and then hit ‘Save and exit’
Once finished, press Escape and then save and exit.

Why is my CPU temperature so high? Things to consider
High CPU temps could be the result of several different things. It’s often a combination of problems that drive the operating temperature of your processor way up. The list below explains some common factors to pay attention to.
- Poor airflow or cable management: The first thing to consider is the airflow of your PC case. Getting a PC case with good airflow ensures that there is enough space for hot air to circulate. Another part of this is cable management, as messy cables restrict airflow.
- Dust: This is a simple one. As you may know, the inside of your gaming PC can get incredibly dusty if left uncleaned for a long period. If you have a build-up of dust and grime, then this will affect your cooling solution and cause your CPU temperature to rise.
- Insufficient CPU cooler: Moving on to hardware here – the CPU cooler you’re using for your processor could be lackluster. In other words, if you have a high-end CPU and a pretty budget CPU cooler, then it could not be doing a great job. For seriously hot CPUs, we recommend checking out the best AIO coolers. On a similar note, your CPU cooler could also be not functioning fully.
- Overclocked CPU: If you’re overclocking your CPU, that means you are pushing your processor to its limits – this will cause the temperature to rise.
- Incorrect fan speed settings: Finally, fan speed is an important factor. If your fan speeds are set to low, even when under high load, then your CPU is not getting as much cooler as it could be.
What happens when a CPU gets too hot?
When a CPU reaches a temperature it deems unsafe, a safety mechanism triggers thermal throttling. A thermal throttle reduces the maximum processor usage because it exceeds safe operating temperatures. This causes the CPU to run slower and generate less heat, allowing the cooling solution to catch up.
This sudden slowdown is often what causes sudden full system crashes. Thermal throttling itself, however, is not a problem, it’s a solution. The problem is excessively high temperatures. And High temperatures are the enemy of PC components.
Running a component outside of its safe operating temperature is not only warranty-voiding but also extremely detrimental to its integrity and longevity, and is just generally an all-around bad idea. Overheating CPUs, if left unchecked, also have the potential to damage CPU sockets, rendering motherboards useless.
If all of this sounds scary, don’t worry, it can be easily prevented. Here are some easy ways to reduce CPU temperatures and stop overheating.
How hot should my CPU be at idle?
The temperature of a CPU at idle varies depending on several factors such as ambient temperature, cooling system, and the specific model of the CPU. Generally, a CPU temperature of 30-50°C is considered normal for most CPUs when idle.
It is important to keep the temperature within the safe operating range specified by the manufacturer to prevent overheating and potential damage to the components.
How hot should my CPU be when gaming?
This is a very open question and depends on a lot of variables such as where the PC is located, the case, the CPU, the CPU cooler, and how many fans the PC has… to name but a few.
A ‘standard’ gaming PC (if you can even standardize such a thing) should be seeing temperatures between 158°F (70°C) and 176°F (80°C) while under heavy CPU load.
But obviously, the more efficient your cooling solution and the lower your CPU temperature when under load the better. If you can get a CPU temperature of 114°F (46°C) under load then great, your CPU will thank you in the long run. You can find the best CPU temperature monitoring software here.
FAQs
How do I change my CPU temp limit?
When it comes to the temperature limit of your CPU, it is important that you should not change this. There is a reason why manufacturers choose a limit for the CPU. If the CPU operates above this temperature it can have dangerous consequences.
You should ensure that you are sticking to the amount that has been set by the manufacturer. Typically, when you reach the temperature limit, this will cause the CPU to shut itself down to prevent overheating.
A CPU that reaches its max temperatures and beyond this will be impacted significantly, and this will likely cause lasting damage to the CPU.
While you can overclock the majority of CPUs, you should never attempt to adjust the temperature limit. The CPU is not intended to work about the max temperature levels, and will become unstable if this happens. This can cause irreversible damage to your build.
What is a dangerous temperature for a CPU?
A dangerous temperature for a CPU will change slightly depending on the type of CPU you own. They will all have varying temperature limits. However, typically anything over 80 degrees, is very dangerous for a CPU.
100 degrees is boiling point, and given this, you will want the temperature of your CPU to be significantly lower than this. The lower the temperature, the better your PC and its components will run overall.
The temperature of your CPU is likely to fluctuate depending on how heaving it is being used. For example, an idle PC typically should run at around 35 degrees. If an idle PC reaches 50 degrees, this is a serious issue.
When the PC is working at its full capacity, it should ideally sit at around 60 degrees. Any higher than this can be dangerous.
Final word
Ensuring your CPU remains within a safe operating temperature is important for the function and longevity of your PC, and will prevent it from becoming an expensive smoke machine. This applies to the majority of your PC hardware – the cooler it is then the longer it should last, so keep yourself and your PC safe by keeping the temperatures in check. You now know 9 easy methods to lower your CPU temperatures.
It’s not only your CPU that’s at risk either. High CPU temperatures will eventually lead to damage to your CPU socket or even motherboard, resulting in a much more expensive repair. If you’re worried about high temperatures, it’s best to do something about it sooner rather than later, as we mentioned. high temperatures over time can lead to irreparable damage.
This tragic eventuality is easily avoided by using at least one of these 9 methods outlined above. Happy gaming.