How To Install GeForce Experience
Our easy to follow guide on how to quickly install GeForce Experience!
WePC is reader-supported. When you buy through links on our site, we may earn an affiliate commission. Prices subject to change. Learn more
Learning how to install GeForce Experience isn’t difficult, in fact, it’s one of the easiest applications to install and use. That being said, many still ask us how to install GeForce Experience, haunted by the issues that would often plague past NVIDIA GPUs.
Our quick and easy guide on how to install GeForce Experience walks you through the process, shining some light on areas that have often caused confusion in the past.
So, let’s waste no further time and dive straight into it!
Download GeForce Experience here
What is GeForce Experience?
GeForce Experience is a great tool that helps users keep their GeForce graphics card drivers are up to date – something that can not be overlooked in the modern age of tech and gaming. Alongside this, the GeForce ‘companion’ tool (as NVIDIA calls it) also provides great ways in which you can capture and share videos, screenshots, and even live streams with friends. The software application also allows you to optimize your game settings too, enabling you to prioritize graphics over performance – or vice versa.
Ultimately, GeForce Experience is your one-stop-shop for everything GeForce-related.
How to install GeForce Experience
This is the simplest way to install GeForce Experience from scratch. Allowing you to easily keep drivers up to date, alongside a slew of other features as well.
Step
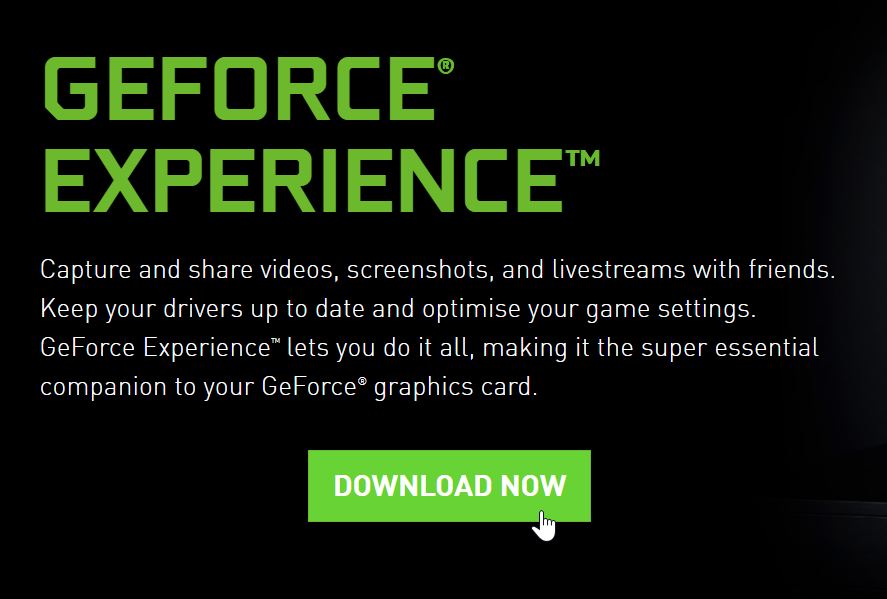
Download GeForce Experience from the NVIDIA website
Start off by heading over to the NVIDIA website and finding the GeForce Experience download page.
Start the download by clicking the ‘Download Now’ button.
Step
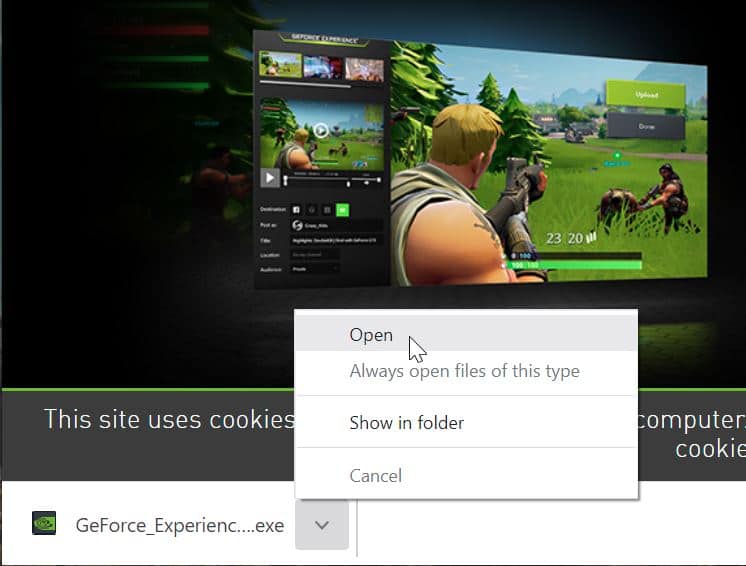
Open the GeForce Experience .exe file
In your browser taskbar (we’re using Google Chrome), you’ll see the download file.
Simply click the arrow and select ‘Open’ from the available options.
Step
Start the GeForce Experience installation
After clicking ‘Open’, you will be prompted by GeForce Experience – asking you whether you want to start the installation process.
Simply click ‘Yes’ and allow GeForce Experience will start to initialize.

Step
Click ‘Agree and Install’
After GeForce Experience has initialized, you will see what version of Experience you’re about to install.
At this stage, simply click the ‘Agree and Install’ to start the installation.

Step
Complete the installation
The application will automatically complete and load GeForce Experience.
That’s all there is to it – you have successfully installed GeForce Experience.

Final word
So, there you have it, our quick guide on how to install GeForce Experience. As you can see, the installation process is incredibly simple and easy to do.
GeForce Experience has a tonne of features and benefits to use, making it one of the best GPU applications for NVIDIA graphics cards. However, if you have any questions regarding the application, feel free to drop us a comment in the section below and we’ll answer them as soon as we can.