Our first back-connect PC build with the Corsair 2500X
We put the cable-hiding credentials of this Corsair dual-chamber case to the test
Share this article...

WePC is reader-supported. When you buy through links on our site, we may earn an affiliate commission. Prices subject to change. Learn more
SPONSORED PIECE
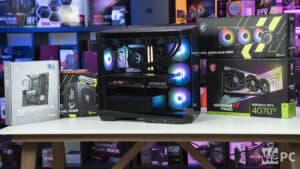
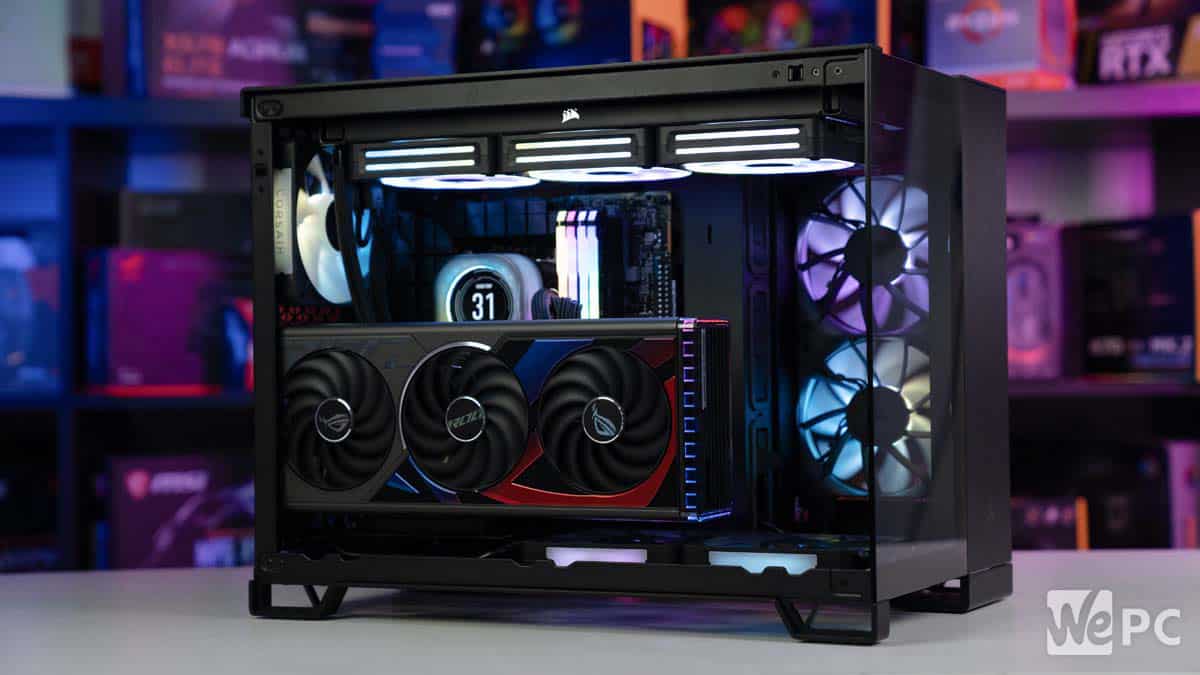
In our review of the Corsair 2500X PC case we noted its biggest strength was its support for ‘cableless’ back-connect PC builds, though sadly we did not have the components at the time to make a fully operational one ourselves. Well, now we have, and we are quite pleased with the end result!
We decided to put together this build with an AIO cooler setup and a vertically mounted GPU as a bit of a test of the case’s full capabilities. Read below for our experiences in putting together this beautiful beast, the components we used, and what you should bear in mind if attempting one of these builds yourself.
What is a back connect PC build?
Back connect motherboards are those which have all of their cable mounts located on the back/underside, so that all of the wiring is located in the back chamber of the case, freeing up the main chamber of the PC to have a nicer aesthetic appearance and better air flow. Although this technology has existed for a couple of years now, these boards have really started to take off in 2024, and likely represent the mainstream future of PC building.
Various PC cases have also been released that are designed to be fully compatible with these motherboards, having the necessary holes in the motherboard plate to feed the wiring through into the back chamber, and the space within the back chamber for the additional cable length. These include a range of ‘dual-chamber’ cases from Corsair (such as the 2500X/D and the 6500X/D), so named because the back chamber is almost as large as the main one, giving sufficient space for cable management.
There have even been a few back-connect graphics cards released which connect to a PCIe High-Power connector and graphics card high-power slot on the motherboard for their power, which in turn connects to the PSU. This removes the need for the long power cable to snake directly from the GPU to the PSU in the back.


What we included in our back-connect build
Although back connect builds are becoming increasingly popular, there’s still not a massive number of cases and motherboards out there that do support this tech, and those that do aren’t always compatible with each other, so the first step is to make sure that all of your components are before you pull the trigger.
Corsair kindly supplied us with the case, vertical GPU mount, and a full array of the latest RX120 RGB fans and a LCD iCUE link H150i AIO cooling system, plus we used our own Corsair PSU and RAM which are our go-tos of choice anyway, and an iCUE LINK Cable kit. We’d strongly recommend getting a cable kit if you’re putting together a similar AIO build to ensure you have a sufficient number of the longer cables, giving you more flexibility when it comes to component positioning.
The TUF GAMING B760M-BTF WIFI motherboard was kindly supplied by ASUS (if you’re using DDR5 RAM you’ll want to pick the D5 variant, and D4 for DDR4), and we used an ASUS ROG Strix RTX 4070 Ti SUPER graphics card that we had in stock, plus an Intel Core i9-12900KS processor.

Corsair 2500X
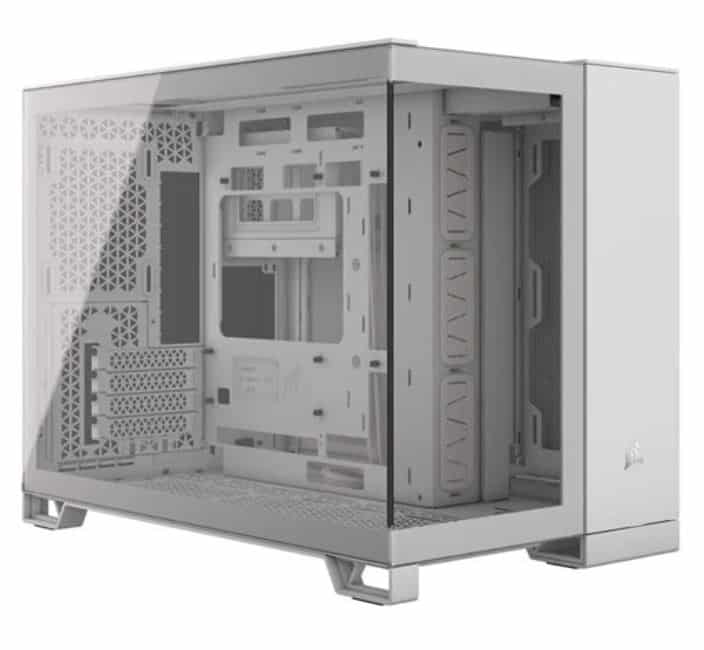
Type
mATX Mid-tower
Motherboard Support
Mini-ITX, Micro-ATX
Dimensions
479mm x 304mm x 376mm
Total Fan mounts
9x 120mm / 4x 140mm + 3x 120mm
Included Fans
n/a
Radiator Compatibility
Top: 360mm, 280mm, 240mm Side: 240mm Bottom: 360mm, 280mm, 240mm Rear: 120mm
ASUS TUF GAMING B760M-BTF WIFI D4
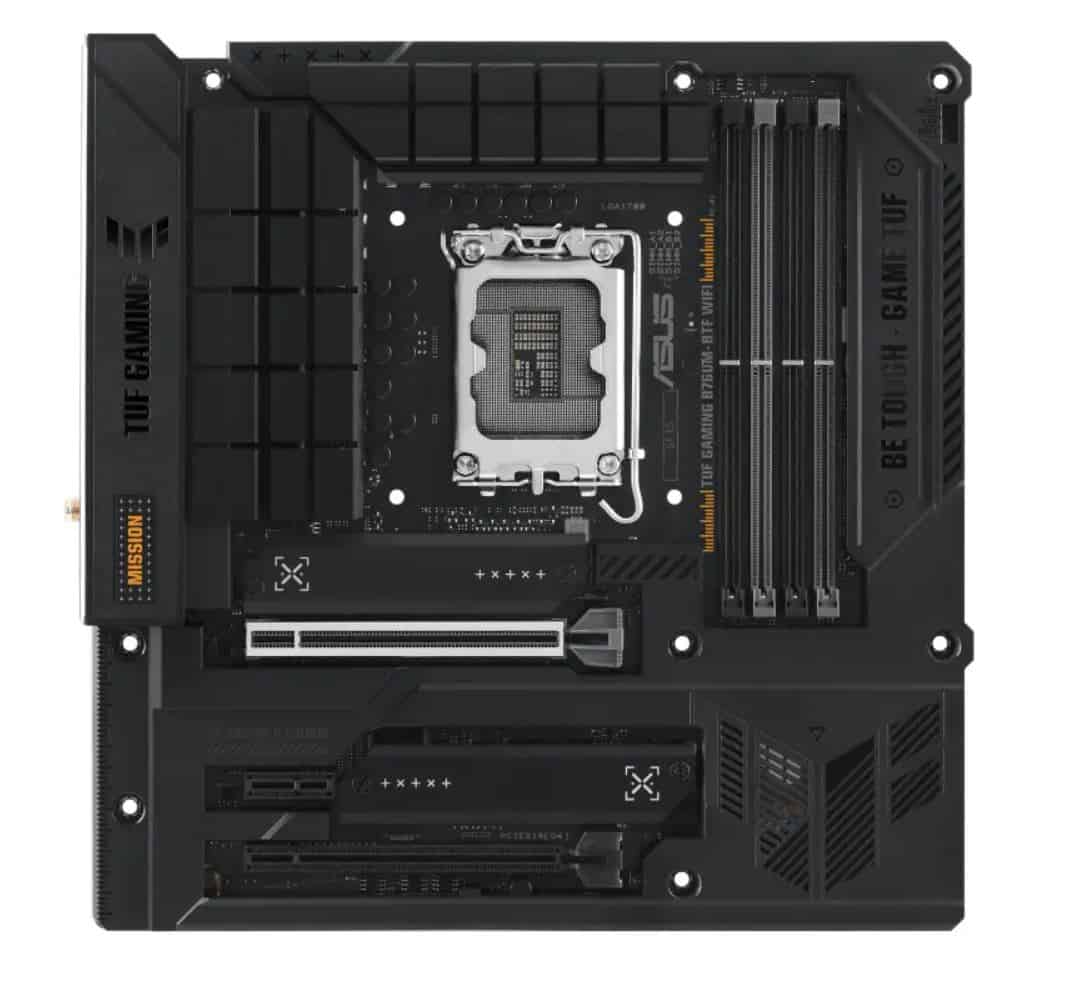
Form factor
Micro-ATX, Mini-ITX
Socket
LGA1700 socket
Power stages
12+1 DrMOS (with enlarged VRAM heatsinks)
Expansion slots
1 x PCIe 5.0 x16, 1 x PCIe 4.0 x16, 1 x PCIe 4.0 x1 slots, 3 x M.2 slots and 4 x SATA 6Gb/s ports
Max memory speed:
DDR4 at 5333 Mhz
Rear I/O
1 x DisplayPort 1 x HDMI 1 x Line In 1 x Line Out 1 x Mic-In 1 x RJ-45 4 x USB 2.0 2 x USB 3.2 Gen1 Type-A 1 x USB 3.2 Gen1 Type-C 1 x USB 3.2 Gen2 Type-A 1 x USB 3.2 Gen2 Type-C 1 x USB 3.2 Gen2x2 Type-C
ASUS ROG Strix RTX 4070 Ti Super OC
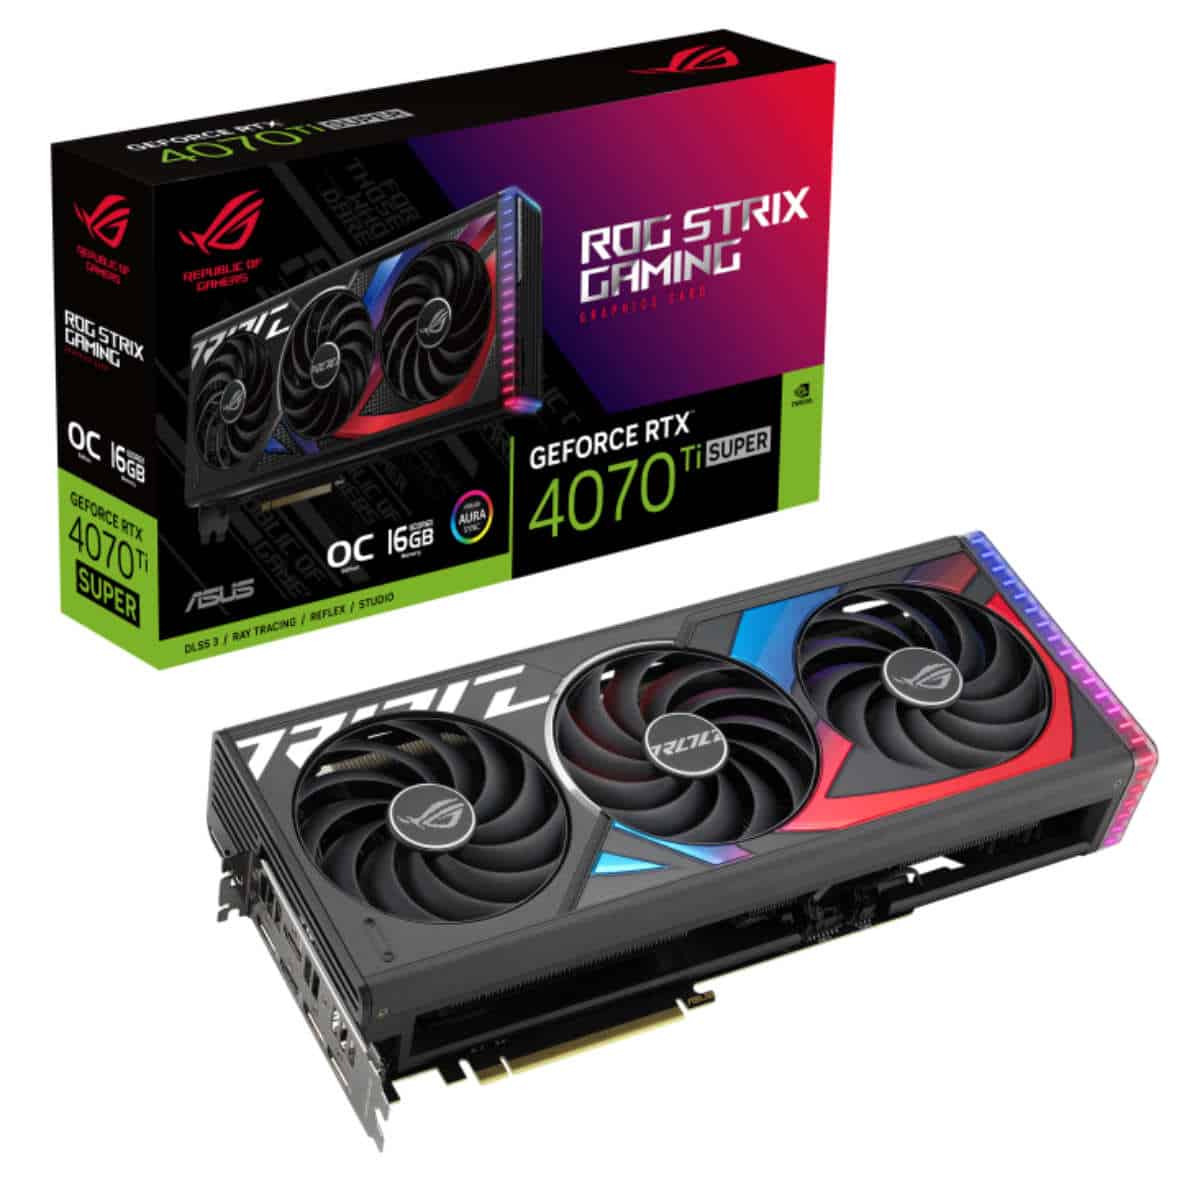
Core clock speed
2,670MHz boost, 2,340MHz base
CUDA count
8,448
Memory
16GB GDDR6X
Dimensions
336 x 150 x 63 mm ( 13.22 x 5.9 x 2.48 inch)
PSU required
750W
TBP
285W

Corsair 2500 Series Vertical GPU Mount Kit
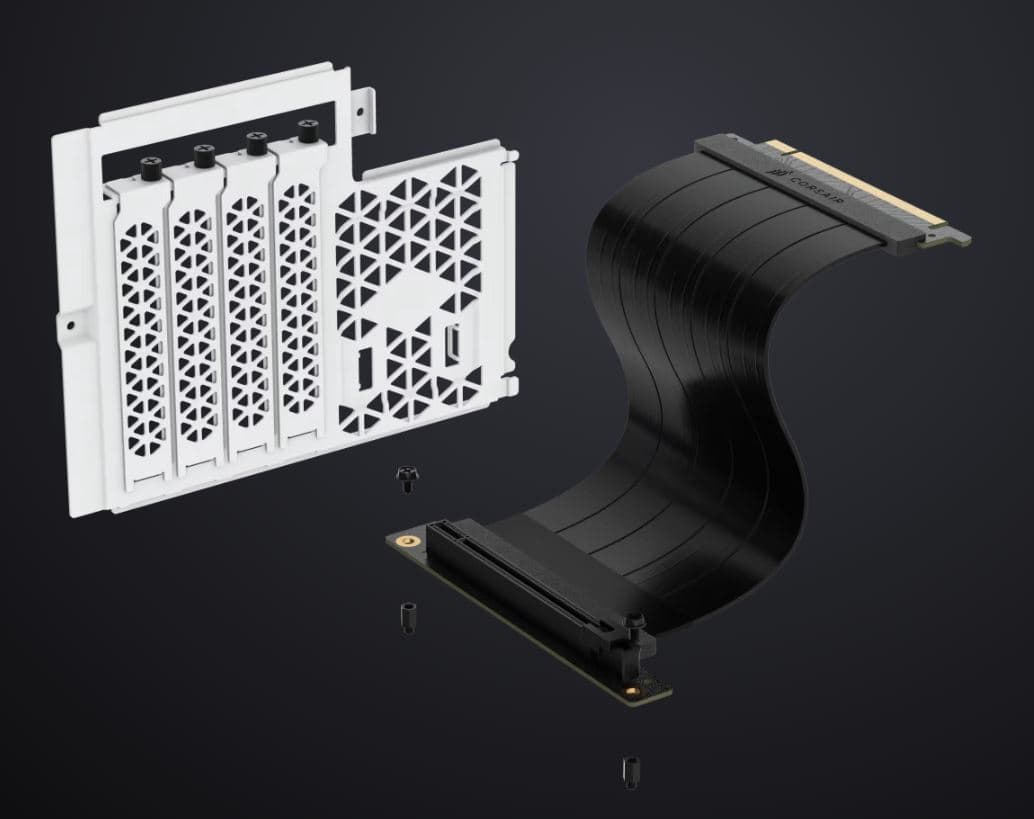
Contains
1x Vertical PCI Mounting Panel, 1x 125mm PCIe 4.0 Riser Cable
Screws
2x Long Standoffs, 4x Screws
Intel Core i9-12900KS
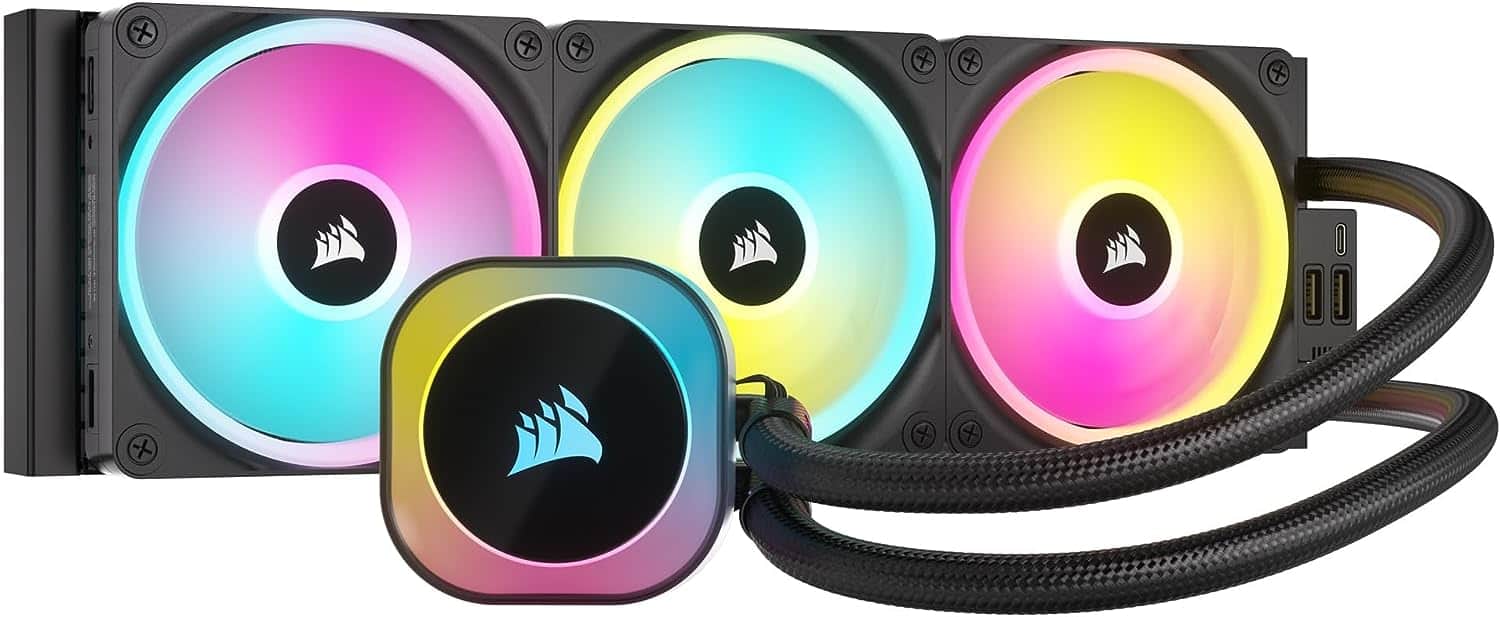
Corsair iCUE Link H150i AIO 360mm
Size
360mm
Noise Level
37 dBa
Dimensions
15.63 x 4.72 x 1.06 – inches
CORSAIR iCUE Link RX120 RGB 120mm triple fan kit with iCUE Link System Hub

Airflow
up to 74.2 CFM per fan
Static Pressure
up to 4.38mm-H2O of static pressure per fan
Max speed
2,100 RPM
Sound Level
10 – 36 dBa
Dimensions
4.72″ x 4.72″ x 0.98″
Corsair iCUE Link Cable Kit
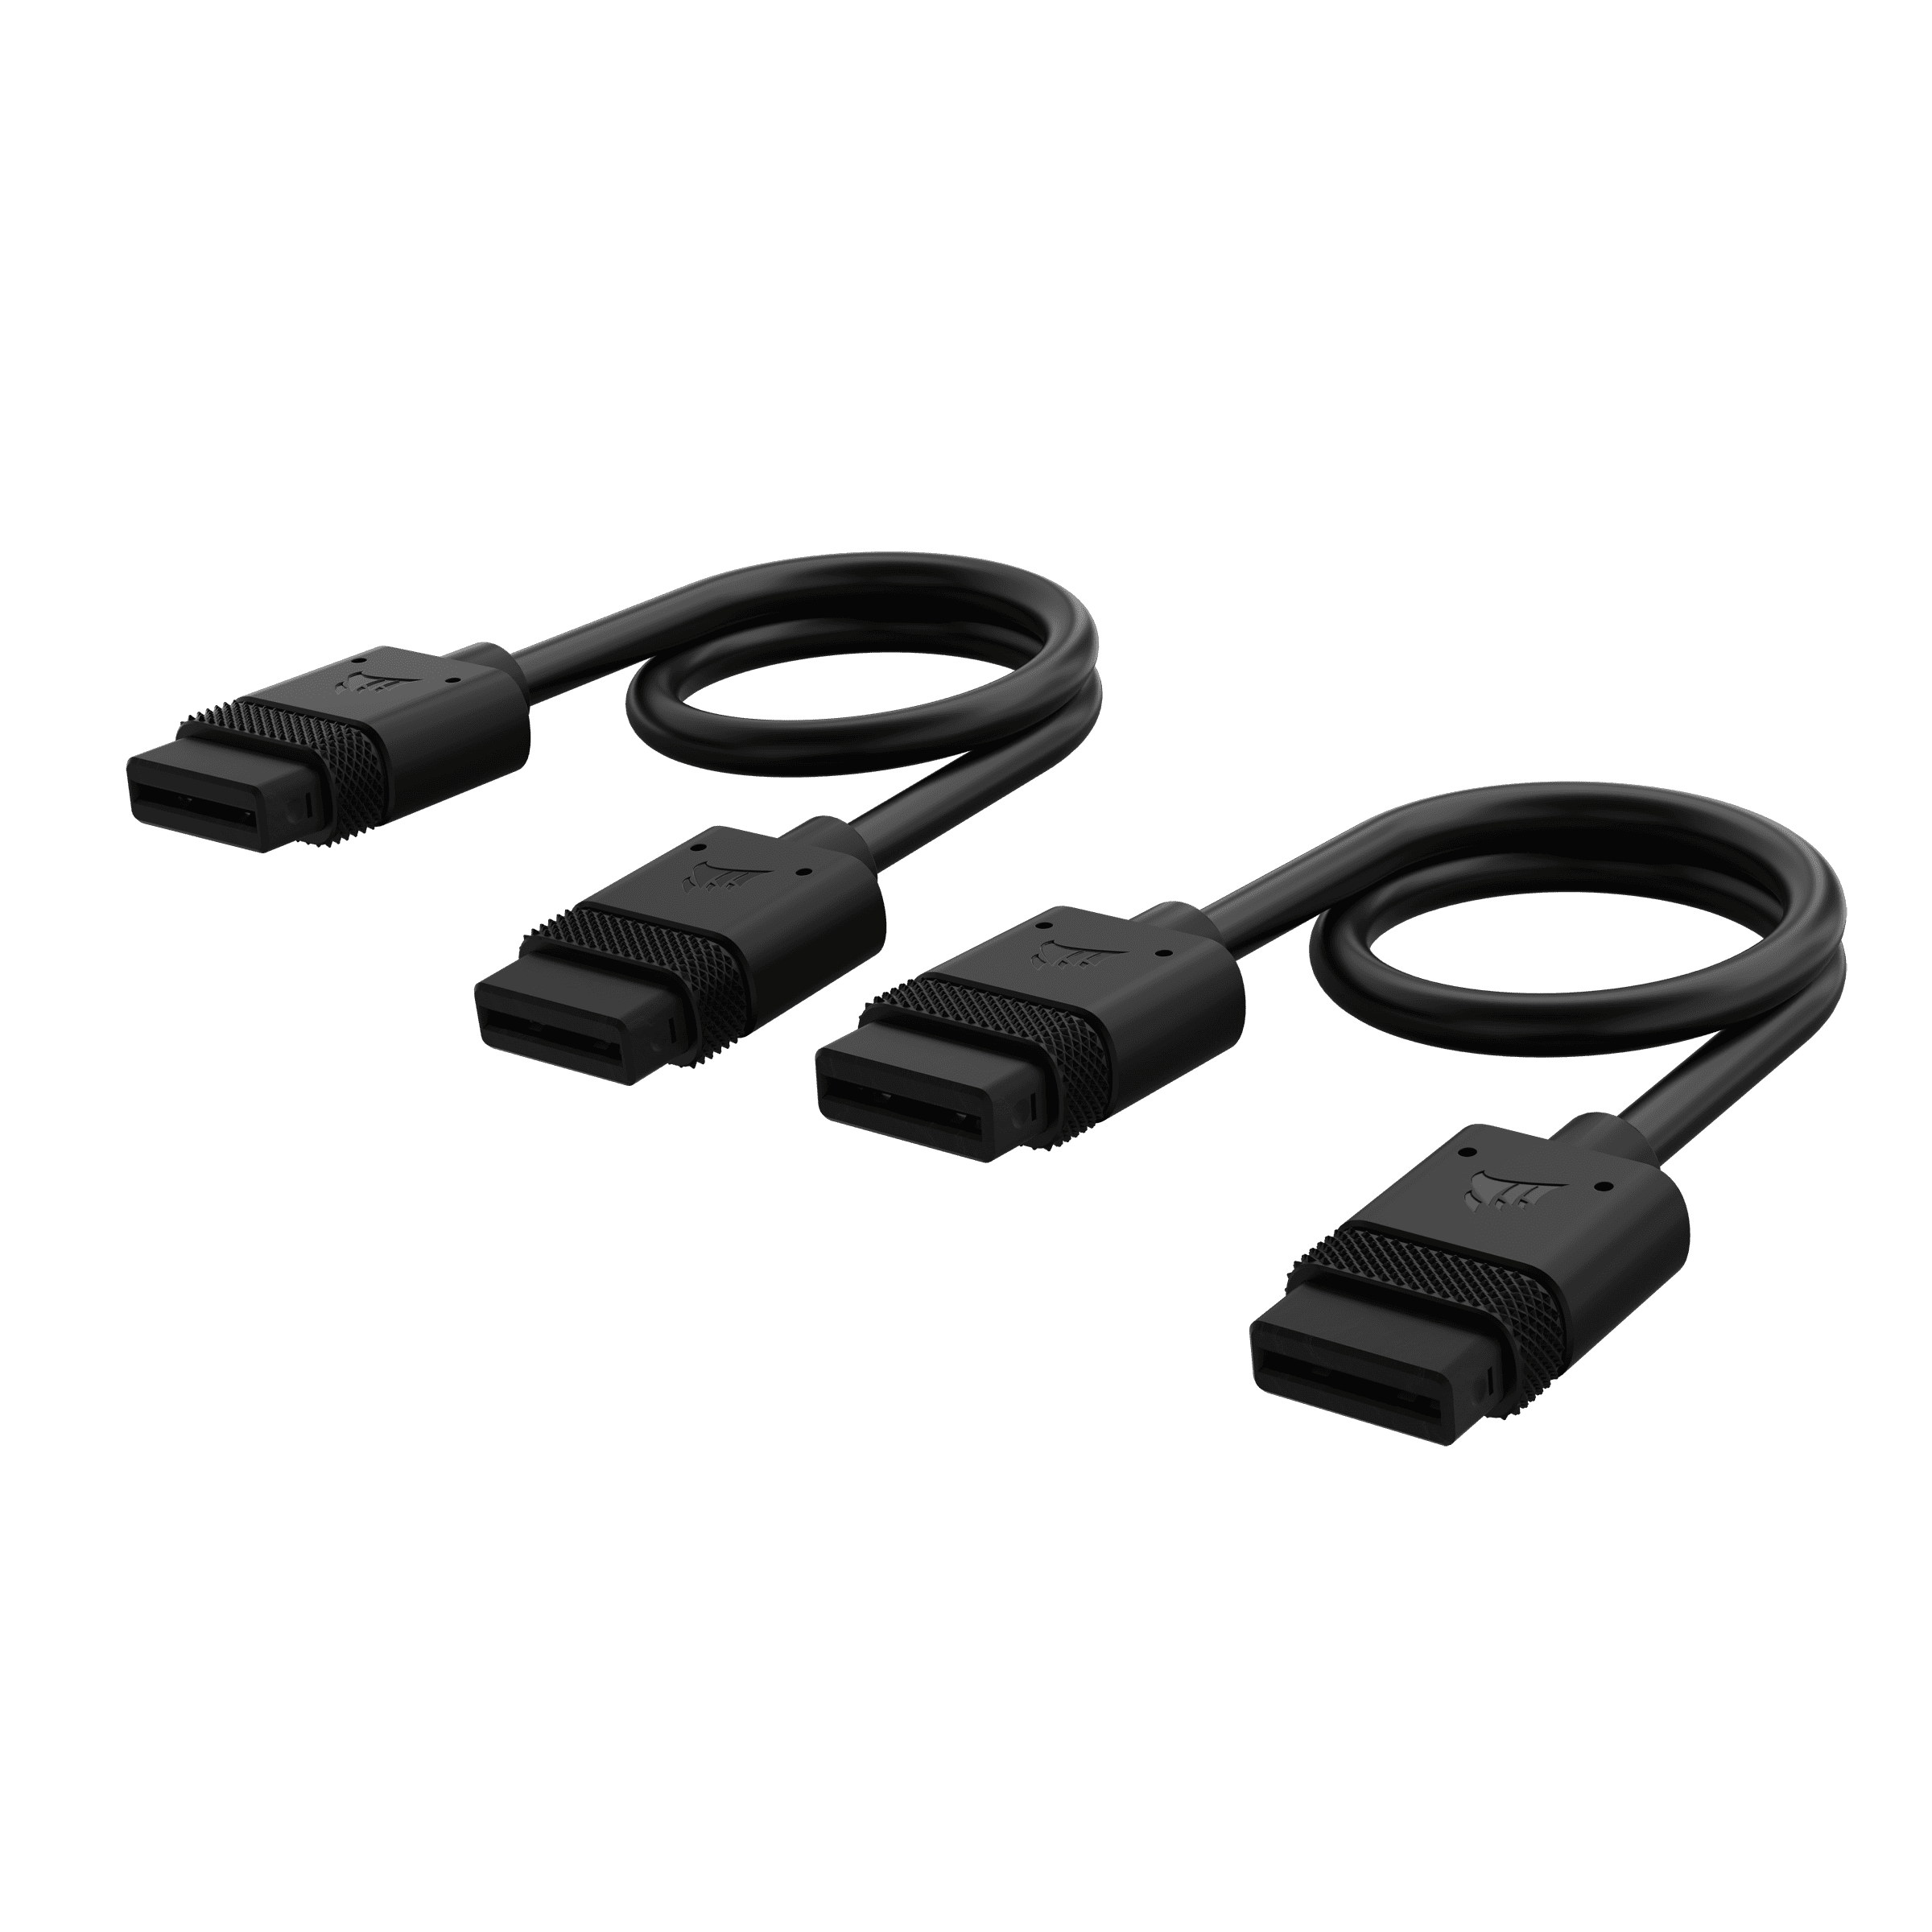
Cable 1
1x 600mm Straight
Cable 2
2x 200mm Straight
Cable 3
2x 100mm Straight
Corsair Vengeance RGB Pro 16GB (2x8GB) DDR4 4000MHz
Capacity
16GB (2×8)
Frequency
4000MHz
CAS Latency
19
Samsung 960 PRO Series – 2TB PCIe NVMe – M.2 Internal SSD

Putting it together
If you’ve ever built a PC before then you shouldn’t have any issue with building a back-connect rig, at least with this 2500X case anyway. The case performed admirably, with plenty of gaps to run cables through out of sight, plus ample holes through which cable ties etc. can be looped around in the back section to aid in cable management. For a not-so-big case it felt quite roomy inside.
Fitting the AIO and fans


As the GPU would be taking up much of the bottom of the case, we placed the 360mm iCUE LINK H150i AIO radiator on the top, with the end with the protruding cooling tubes facing the rear of the case so as to improve the aesthetics when looking through the glass front panel. We loosely fixed the radiator to the top rail with four screws only at first (in case some adjustment was required – which it was) then affixed the water pump on top of the CPU. Following the installation of the GPU, we tucked the liquid tubing behind it as neatly as possible. Prior to this though we added the other case fans.
Besides the AIO radiator, we used five additional 120mm fans in total – originally we were planning on using six but we had to remove one from the bottom of the case to allow the vertical GPU mount to fit. These newer Corsair RX120 RGB fans are constructed with a glass fibre reinforced liquid crystal polymer that improves airflow, providing up to 2,100 RPM and 74.2 CFM of airflow / 4.38mm-H2O static pressure. They’re also nice and quiet, in part thanks to their magnetic dome bearing, and can be set to ‘Zero RPM Fan mode’ within the software, allowing them to switch off ‘during low load periods for near-silent operation’. Along with the cooler they’re fully integrated with the iCUE LINK ecosystem, which you can read more about by clicking the link to our dedicated guide.
The new connectors these Corsair fans come with make wiring the whole thing significantly easier than it used to be, with a single connection powering the fan and the RGB on it. The fans can all be interchangeably fixed together using little stubby connectors, in a sort of Lego-like fashion; these connectors also move power between the fans, so you only need one cable running from the end fan of a bank of three that have been connected together, in order to power the whole lot. The fan casings are magnetised so have a degree of stick when you press them against the case; you’ll still need to screw them on to affix them properly, but it makes doing so that much easier.
To note: the part of the build we had to think about most was connecting all of the fans and AIO together onto the small square iCUE LINK System Hub located in the back chamber (see its picture under the ‘back compartment’ section below), which has two compatible connection ports. You can daisy chain all of the fans and AIO system together, with the final component linking to the hub, and they should all work: each of the two connections is capable of supporting up to seven different devices, so the hub can support fourteen in total. We found the neatest solution to be to connect the bottom fans to the side fans with a longer cable running along the bottom of the case (with the excess length tucked away into the back compartment), and a shorter cable connecting the side fans to the hub around the back. We also connected the rear fan to the AIO radiator, which then ran its cable through the back to the hub’s other socket.
The GPU


Given the draw of this setup is what the case looks like from the front, we took a more pragmatic approach to cable management round the back: prioritising ease of access for upgrades and modifications (including to the iCUE Link hub) rather than tightly clamping everything down for aesthetics purposes. You could get better results if you took longer, though it’s always going to be a bit cramped on a back-connect build of this size.
Ultimately, given the amount of cabling that ends up in the back compartment in back-connect builds, you’re going to have to deal with a fair amount of wiring, although the additional space offered by the dual-chamber construction of the 2500X did help considerably. If you want more space for a tidier setup, then we’d recommend the larger Corsair 6500X, which is almost the same case, just bigger.
As ever it’s a good idea to make sure all your case wiring is fitted to the motherboard before putting in the PSU, and we fitted all the power cabling to the PSU before we screwed it in.
The back compartment


Given the draw of this setup is what the case looks like from the front, we took a more pragmatic approach to cable management round the back: prioritising ease of access for upgrades and modifications (including to the iCUE Link hub) rather than tightly clamping everything down for aesthetics purposes. You could get better results if you took longer, though it’s always going to be a bit cramped on a back-connect build of this size.
Ultimately, given the amount of cabling that ends up in the back compartment in back-connect builds, you’re going to have to deal with a fair amount of wiring, although the additional space offered by the dual-chamber construction of the 2500X did help considerably. If you want more space for a tidier setup, then we’d recommend the larger Corsair 6500X, which is almost the same case, just bigger.
As ever it’s a good idea to make sure all your case wiring is fitted to the motherboard before putting in the PSU, and we fitted all the power cabling to the PSU before we screwed it in.
Starting it up


Assuming you’ve gone through the process of installing Windows on the SSD/HDD you’re using and installed all the necessary drivers, the next step to get your fans and AIO running correctly is to make sure that the iCUE LINK software is installed and (this is important) fully up to date with the latest software and firmware (you can check this within settings by clicking the cogwheel icon in the top right). If you don’t do this you may find elements of the RGB do not work correctly, particularly if you’re using a mix of components. After doing this, we recommend restarting the computer, then opening up the software again.
Once the application is up to date, navigate to Home > Lighting Setup (under the Link System Hub section) and follow the setup wizard.
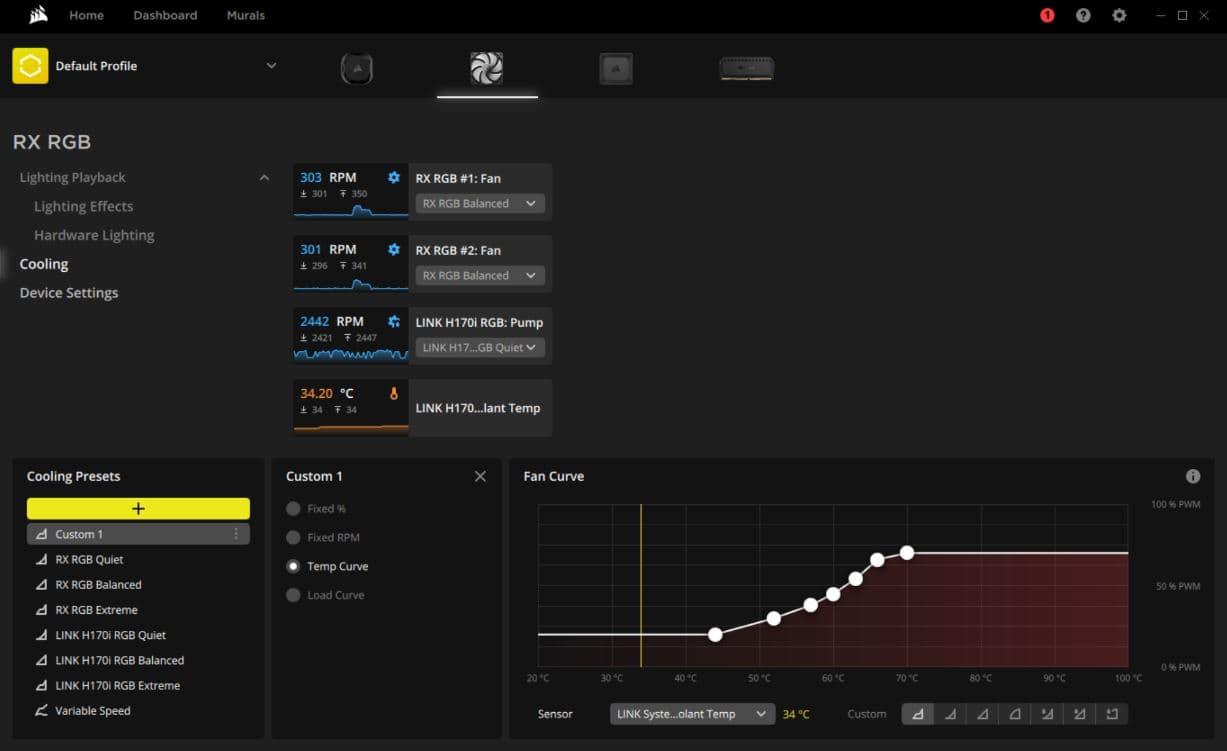
From here you can setup various animations, layers, and groupings for the different fans and components. Under Hardware Lighting you can also set some more limited effects that will operate even when the iCUE application isn’t running. Fan Control will also let you setup custom RMP curves and profiles for different scenarios.