How to screenshot on iPad
The different ways to take a screenshot on iPad devices
WePC is reader-supported. When you buy through links on our site, we may earn an affiliate commission. Prices subject to change. Learn more
Learning how to screenshot on iPad doesn’t have to be difficult, no matter which model (old or new) you may have. We’re going to take you through all the methods available to you for screenshotting on iPad, so you’ll come away with the easiest method for you! There’s both a video guide and step-by-step instructions to follow along with. Make the most out of your Apple tablet.
READ NOW: You can’t miss the best big-screen tablets here
Today we’re going to teach how to screenshot on iPad using the iPad’s external buttons, without using buttons (useful if they’re faulty), with the Apple Pencil, and how to screenshot an entire page and save it as a PDF. Read on for all the information you need to know.
So, if you want to know how to screenshot on iPad devices, we’ll tell you the various methods you can use to accomplish this:
Step
Find the Power button on top of your iPad and hold it down.

Step
If you’ve got an iPad with a Home button, press this whilst holding down the Top (Power) button. If you have a 2018 or 2020 iPad Pro or 2020 iPad Air then you will not have a Home button, so instead press the Volume Up button. You should now hear the noise of a camera shutter, plus see a flash on your screen.

Step
Find your saved screenshot in Photos
All screenshots are saved to the Photos app, where you can edit them if you wish.

If your Home button or volume buttons are broken, there is another way you can take a screenshot without having to click them, through the magic of AssistiveTouch. This app gives you an on-screen menu that you can use for various tasks, including taking a screenshot. Simply follow the steps below to activate and use AssistiveTouch.
Step
Tap on Settings > General > Accessibility > AssistiveTouch (or, for iPadOS 14 users, Settings > Accessibility > Touch > AssistiveTouch).

Step
Turn AssistiveTouch on
Make sure AssistiveTouch is toggled on within the menu.

Step
Assign Screenshot
Click on Doubtle-Tap under custom actions (or whichever action you prefer) and then select Screenshot. Now whenever you double-tap the gray AssistiveTouch button, a screenshot will be taken on your iPad and saved to Photos.

Save a full-page iPad screenshot as a PDF
Most iPad displays are substantially smaller than the pages you view on them, be they webpages, pages of a document or an email, so if you want to take a screenshot of a full web page to save for later, the conventional method won’t work. Instead however you can take a full, scrollable screenshot of an entire page on an iPad, which can be saved as a PDF file.
Step
Take the screenshot
First, take the screenshot using one of the above methods.

Step
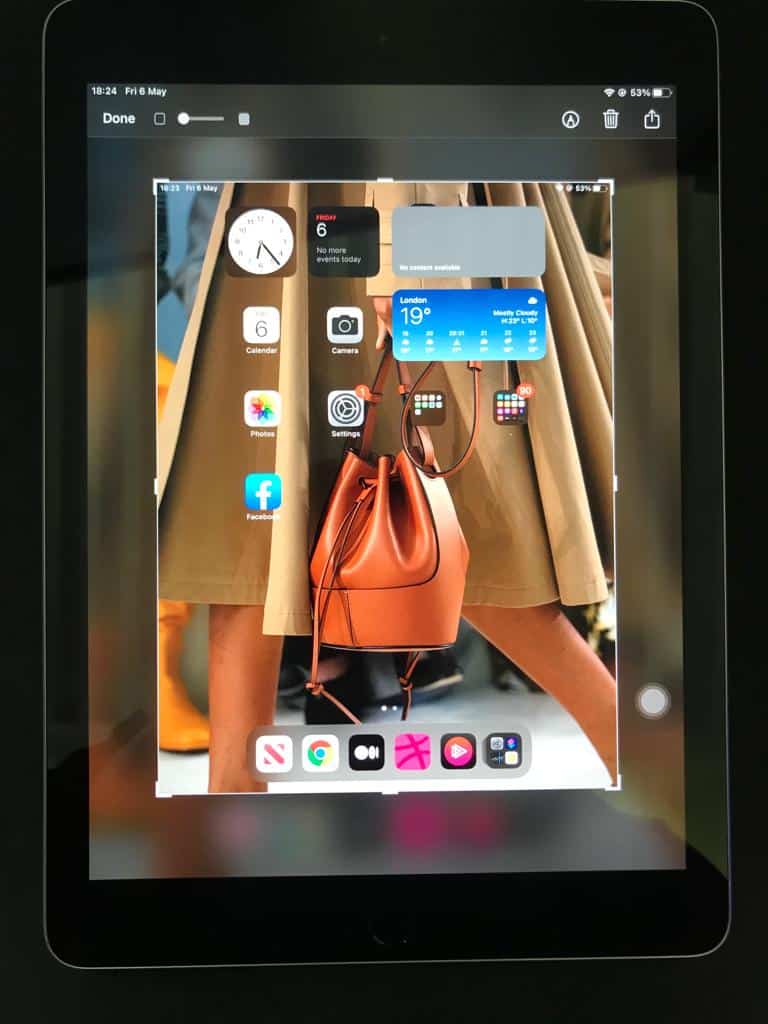
Select Full Page
Select the screenshot by tapping the preview, then tap Full Page at the top, then press Done.

Step
Save As PDF
Finally select Save PDF to files, choose a location to save the file, then click Save.

How to take a screenshot with an Apple Pencil
If you use an Apple Pencil in conjunction with your iPad (it is, after all, one of the best drawing tablets around) then you can take a screenshot with a simple gesture followed by a click.
Step
Swipe from the bottom corner with your stylus
Use the Apple pencil to swipe upwards from either of the bottom corners of your screen towards the centre.
Step
The Screenshot Editing Tools menu should now appear – simply click on the option to take the screenshot.
Final Word
Do have a looksie at our other tablet pages for more helpful guides, across iPads, Windows Surfaces, and Android tablets.