How to factory reset Windows 11
How to do a clean re-install of Windows 11 to the factory settings
Share this article...
WePC is reader-supported. When you buy through links on our site, we may earn an affiliate commission. Prices subject to change. Learn more
We’re going to show you exactly how to factory reset Windows 11. There are a few different methods to talk you through, ranging from the quick and simple to the more intricate and thorough.
There are a range of reasons why you may want to factory reset your PC – corrupted files, malware / virus infection, or just a simple cleanup to help you start afresh (hard drives can get messy and slow after all, even with a speedy SSD).
READ NOW: Want a completely fresh copy of Windows 11? Here’s where to look
Much like with Windows 10, there are several different ways you can reset your installation of Windows 11 back to the default setup. Each of these is slightly different and wipes your existing Windows 11 configuration to greater or lesser degrees. So without further ado, let’s get to the task at hand.
Fresh start your PC to reset Windows
The Fresh Start method is the least destructive way of resetting Windows. Using this method should keep all of the files saved on your PC intact, whilst uninstalling any and all software, besides Windows App Store applications. This method is the first one recommended by Microsoft themselves which you should try before all others for the simple reason that it is the least invasive and liable to erase your potentially important files.
That being said, it’s still usually a good idea to save any and all files you deem important on an external hard drive if possible, prior to going ahead and refreshing your installation. This includes any precious save game files.
We would advise using this method in particular if you’re only experiencing one or two minor issues with Windows.
Note: This method is now known as ‘Reset your PC‘ – which we’ll cover further down the page. It was formerly known as ‘Fresh Start’ in older versions, so this method may not apply to you if you’re more up to date. You can learn more about it here.
Step
Open Windows Security
Search for Windows Security in the search bar or Start Menu in the bottom left of your screen.
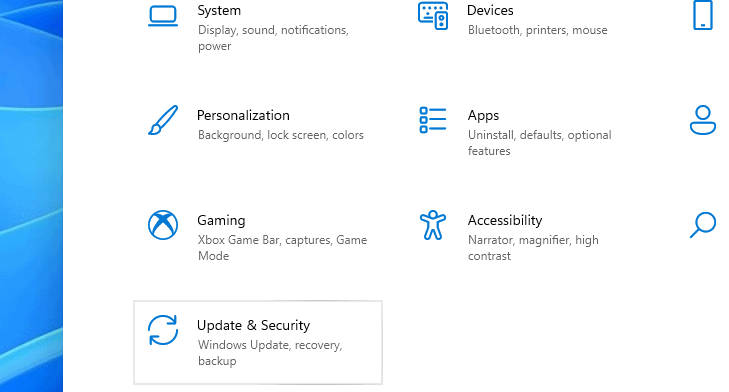
Alternatively, go to Settings > Update & Security > Windows Security
Step
Find the Fresh Start screen
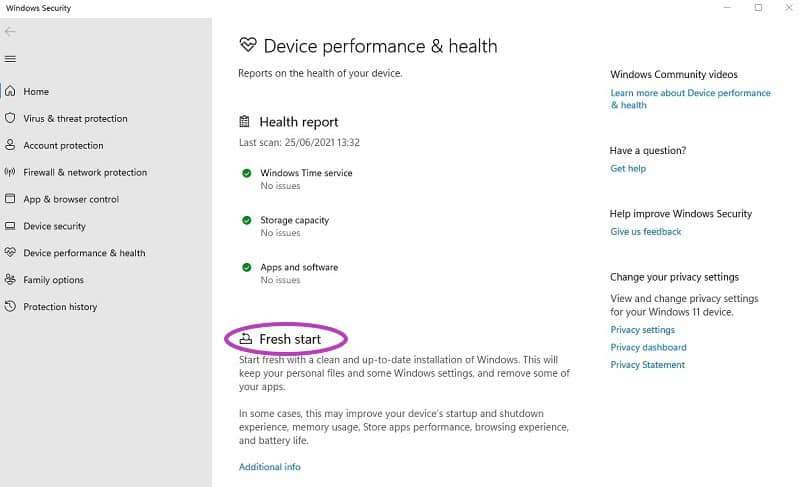
Within Windows Security click on the Device performance & health tab then select Additional info from the Fresh Start section which will take you to the Fresh Start screen.
Step
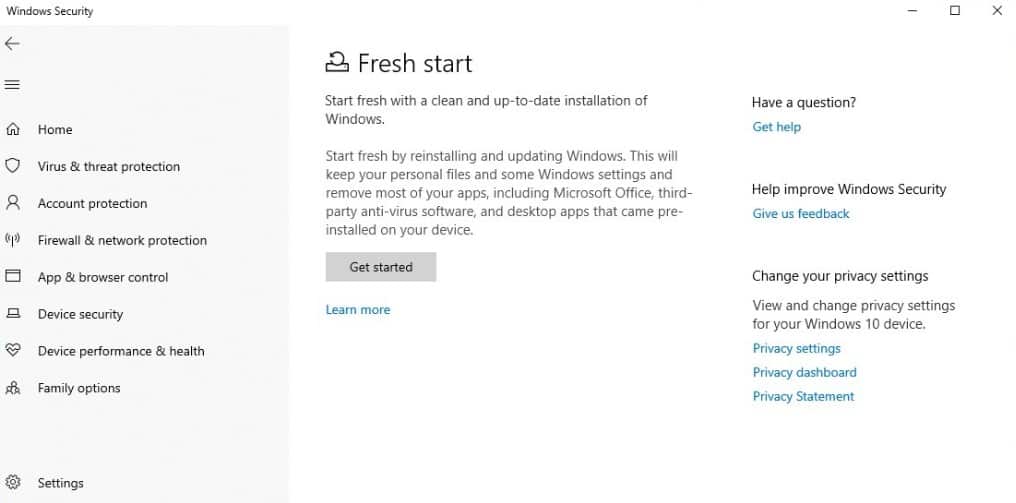
Click on Get Started
Once on the Fresh Start screen, click on Get Started and follow the steps which will take you through the process.
When the steps have completed, you should have an installation of Windows which has been reconfigured to factory settings and cleaned of any potential malware. If you want a more comprehensive system wipe, follow one of the below methods instead.
Use System Restore to reset Windows 11
System Restore enables you to go back to an earlier version of Windows 11, without having to wipe anything from your PC. You will be able to revert to an earlier installation at a specific point in time (before you experienced any system issues) and all the software and updates you have installed on your system since this time will be removed. This is the most useful option if you’ve got a good idea of the time frame in which your issues first began, and if the issues are relatively recent.
Note: to better protect yourself in the future you can manually make your own system restore points, which are useful if you are planning on installing any software that might cause issues.
Step
Use System Restore to create a restore point
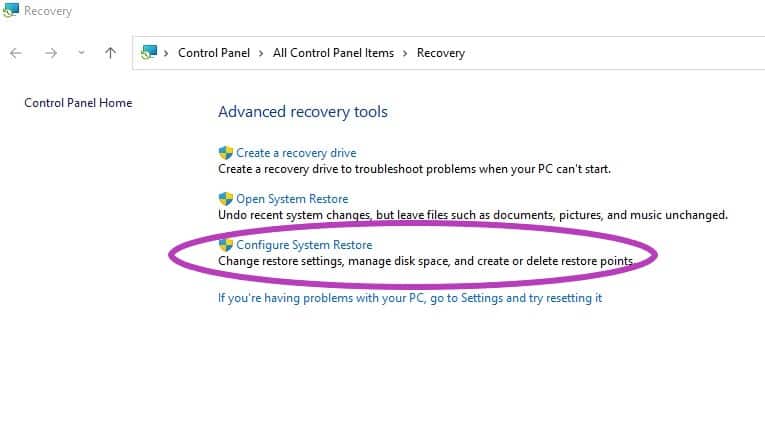
Navigate to Control Panel > All Control Panel Items > Recovery and select Configure System Restore underneath Advanced recovery tools.
Click on the option that will let you create a restore point and follow the steps of the wizard.
Step
Use System Restore to revert to a previous a restore point
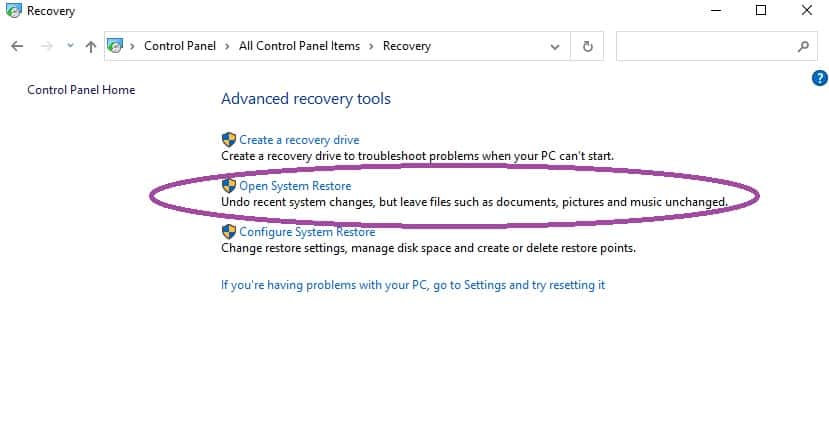
Navigate to Control Panel > All Control Panel Items > Recovery and select Open System Restore underneath Advanced recovery tools.
Your computer will require a reboot, following which it should have reverted back to the Windows 11 installation as it was at the selected recovery point.
Reset your PC to reset Windows 11
Resetting your PC is a more complete method when it comes to factory resetting Windows 11. Unlike the old ‘Fresh Start’ it will give you the option of removing all the files stored on your hard drive, and restore Windows 11 to the state it was during the first installation. This includes all files, programs, documents, images, videos, audio files etc.
The advantage of this method is that it will give you option to fully purge any junk files, Malware, and the like from your hard drive which could be causing issues with your Windows installation.
Important: If you choose to completely reset your PC, you will need to backup the important contents of your PC, either to another hard drive or to a USB drive.
Step
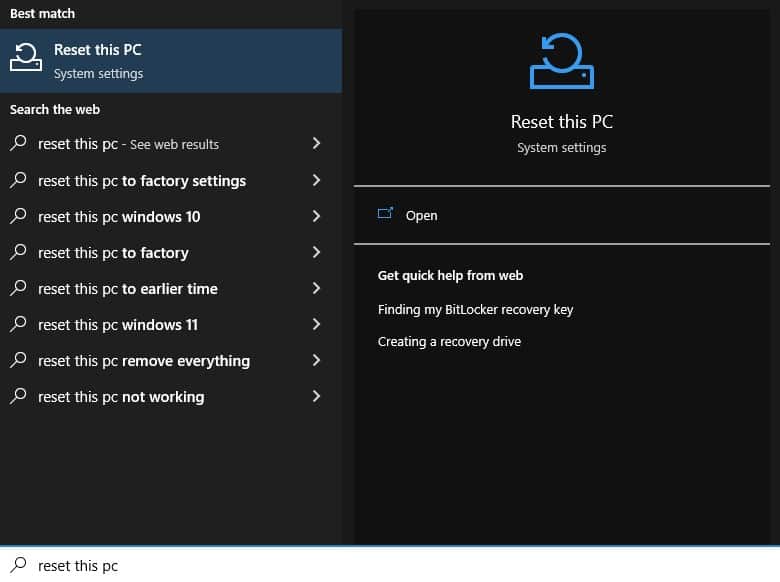
Go to the Start Menu or search bar in the bottom left of Windows and search for ‘Reset this PC‘
You can also navigate to this by going to Settings > System > Recovery > Reset this PC
Step
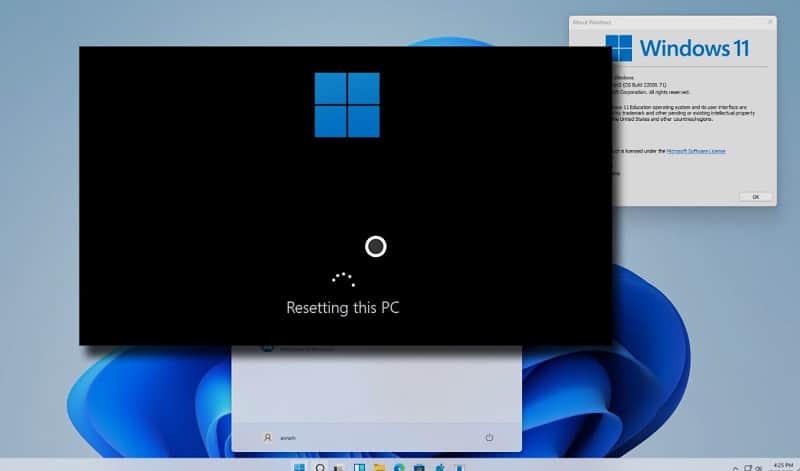
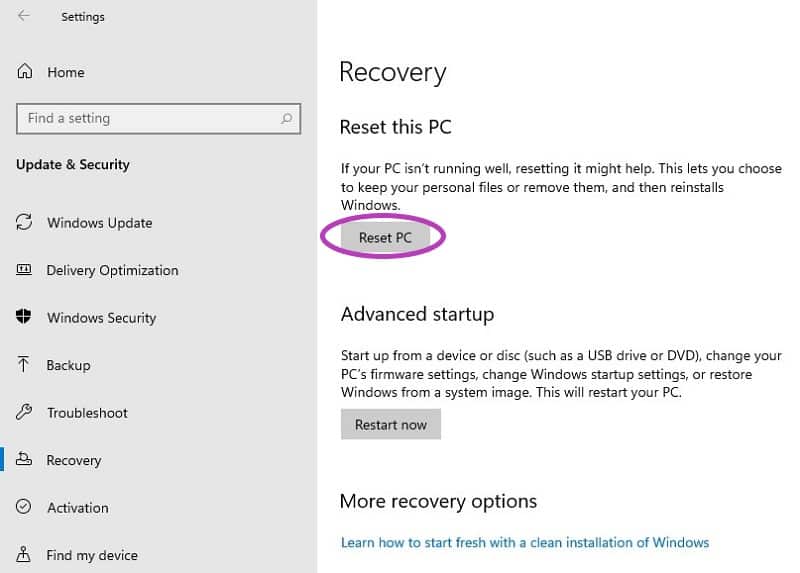
Reset your PC
Click on Reset PC underneath the heading.
You will be asked whether you want to keep your files or not – this is up to you. If you’ve already backed up the files you know you need, then it’s worth doing a full reset and removing all files.
Complete a re-install of Windows 11 from external media
This is basically the nuclear option of how to factory reset Windows 11, and is similar to Method 3 except it does not use the usual installation wizard within Microsoft to accomplish it.
Instead, you install Windows 11 to a USB / external hard drive / DVD, insert the media into your computer, then overwrite the existing media on the hard drive your current installation is on.
This is the most time-consuming method but is the most thorough way to reinstall Windows 11, and ensure all of the configuration files, along with everything else, are erased and reset to default.
As before you need to ensure everything is fully backed up onto a separate hard drive before undertaking this method.
Step
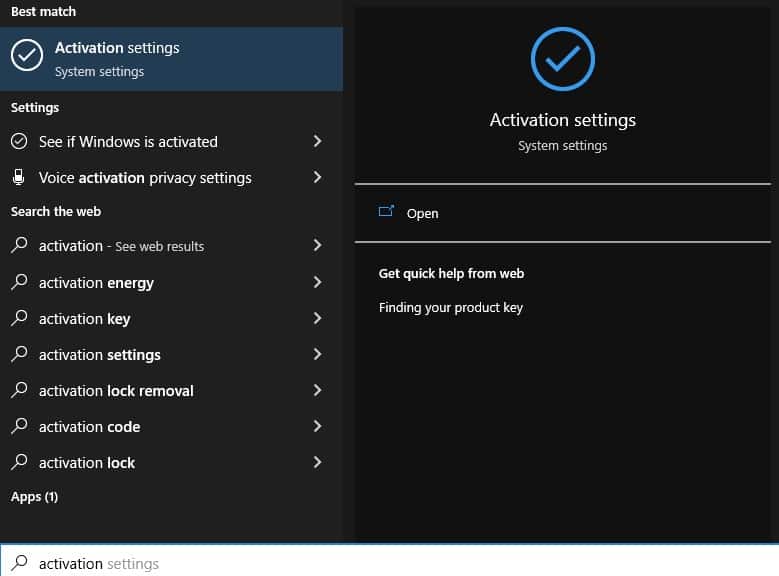
Link your Windows product key to your Microsoft account
Linking your Windows product key to your Microsoft account can be done within settings. You can go to the Start Menu / Windows search bar and search for ‘Activation Settings‘ to find this.
To find more about your linked Microsoft account, search for ‘Your Account Info‘.
This will help when installing Windows 11 onto a separate media device.
Step
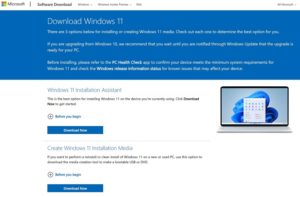
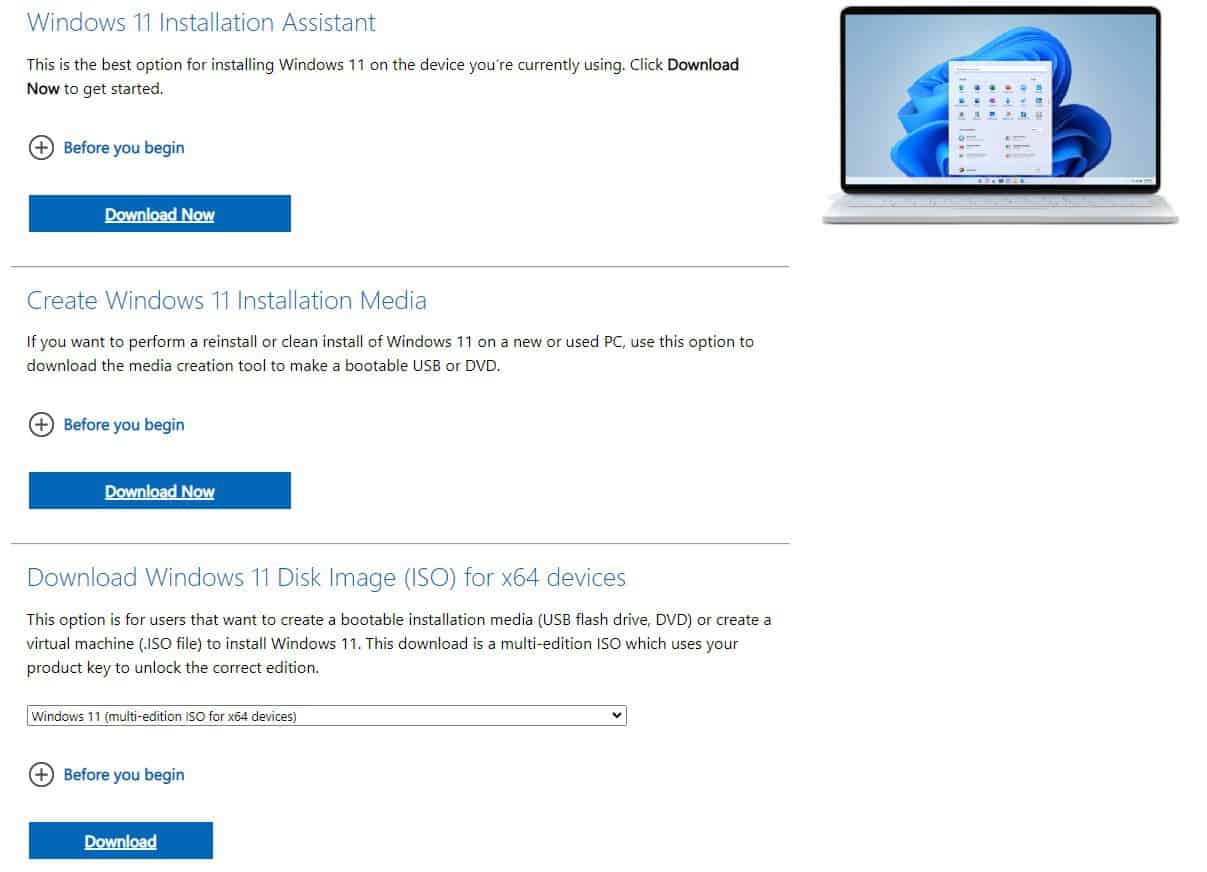
Create Windows 11 installation media
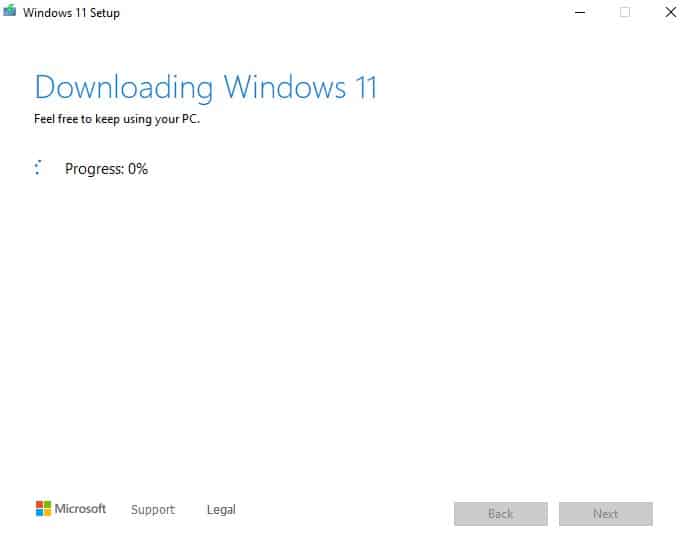
Navigate to the relevant page on the Microsoft website then follow the installation wizard to install the operating system on your chosen form of media.
Step
Insert the external media and install Windows 11
Simply shove the ol’ media into your PC and follow the installation wizard, making sure you install Windows 11 onto the drive you want to reset to factory settings.
Following the installation, the whole drive should have been wiped and then have reinstalled the operating system to the factory settings.
Final word
We hope you have found this guide useful in helping you work out the best method to factory reset Windows 11.
For other information pertaining to the new Microsoft operating system, check out our Windows 11 hub page.