How to enable TPM 2.0 in BIOS for Windows 11
A simple step-by-step guide on how to enable TPM in your BIOS
WePC is reader-supported. When you buy through links on our site, we may earn an affiliate commission. Prices subject to change. Learn more
Windows 11 is here and many Windows users need to look at whether or not their existing hardware will be compatible with the operating system. Alongside a slew of system requirements, one of the major requirements needed for the installation of Windows 11 is TPM (Trusted Platform Module) version 2.0. Luckily, almost any piece of hardware created after 2015 should have TPM 2.0 support – and enabling it isn’t all that difficult either.
For those that aren’t familiar with the process of enabling TPM, we’ll be going over how to enable TPM 2.0 in this simple step-by-step guide. Alongside screenshots and clear steps, we’ll also be outlining any useful information as we go. So, with plenty to get through, let’s dive into how to enable TPM 2.0 in BIOS.
Windows 11 Home
Windows 11: How to enable TPM 2.0 in BIOS video
Is TPM Version 2.0 enabled on my PC?
One of the big questions we’ve been asked since the official unveiling of Windows 11 is: is TPM enabled on my PC? Luckily, there’s a pretty easy way to check, requiring little effort and with quick results. See the steps below:
Step
Run TPM
Start off by pressing WIN + R whilst on the desktop to open up Run. Once inside Run, simply type tpm.msc and press enter.

Step
Check if you have compatible TPM
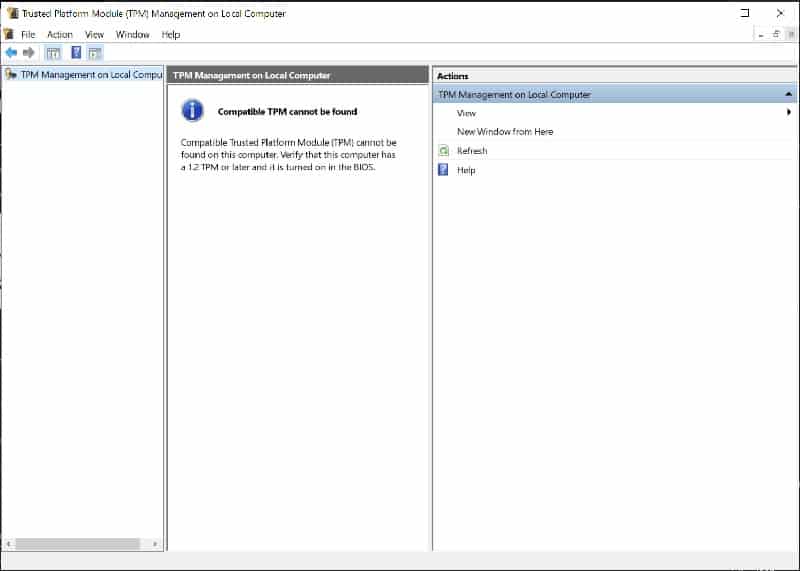
You should now see the Trust Platform Module Management window that will let you know whether or not your motherboard has a TPM chip – and whether or not it’s enabled.
Here’s what it’ll look like if you don’t have a TPM 2.0 module on your motherboard:
Step
If you already have it enabled…
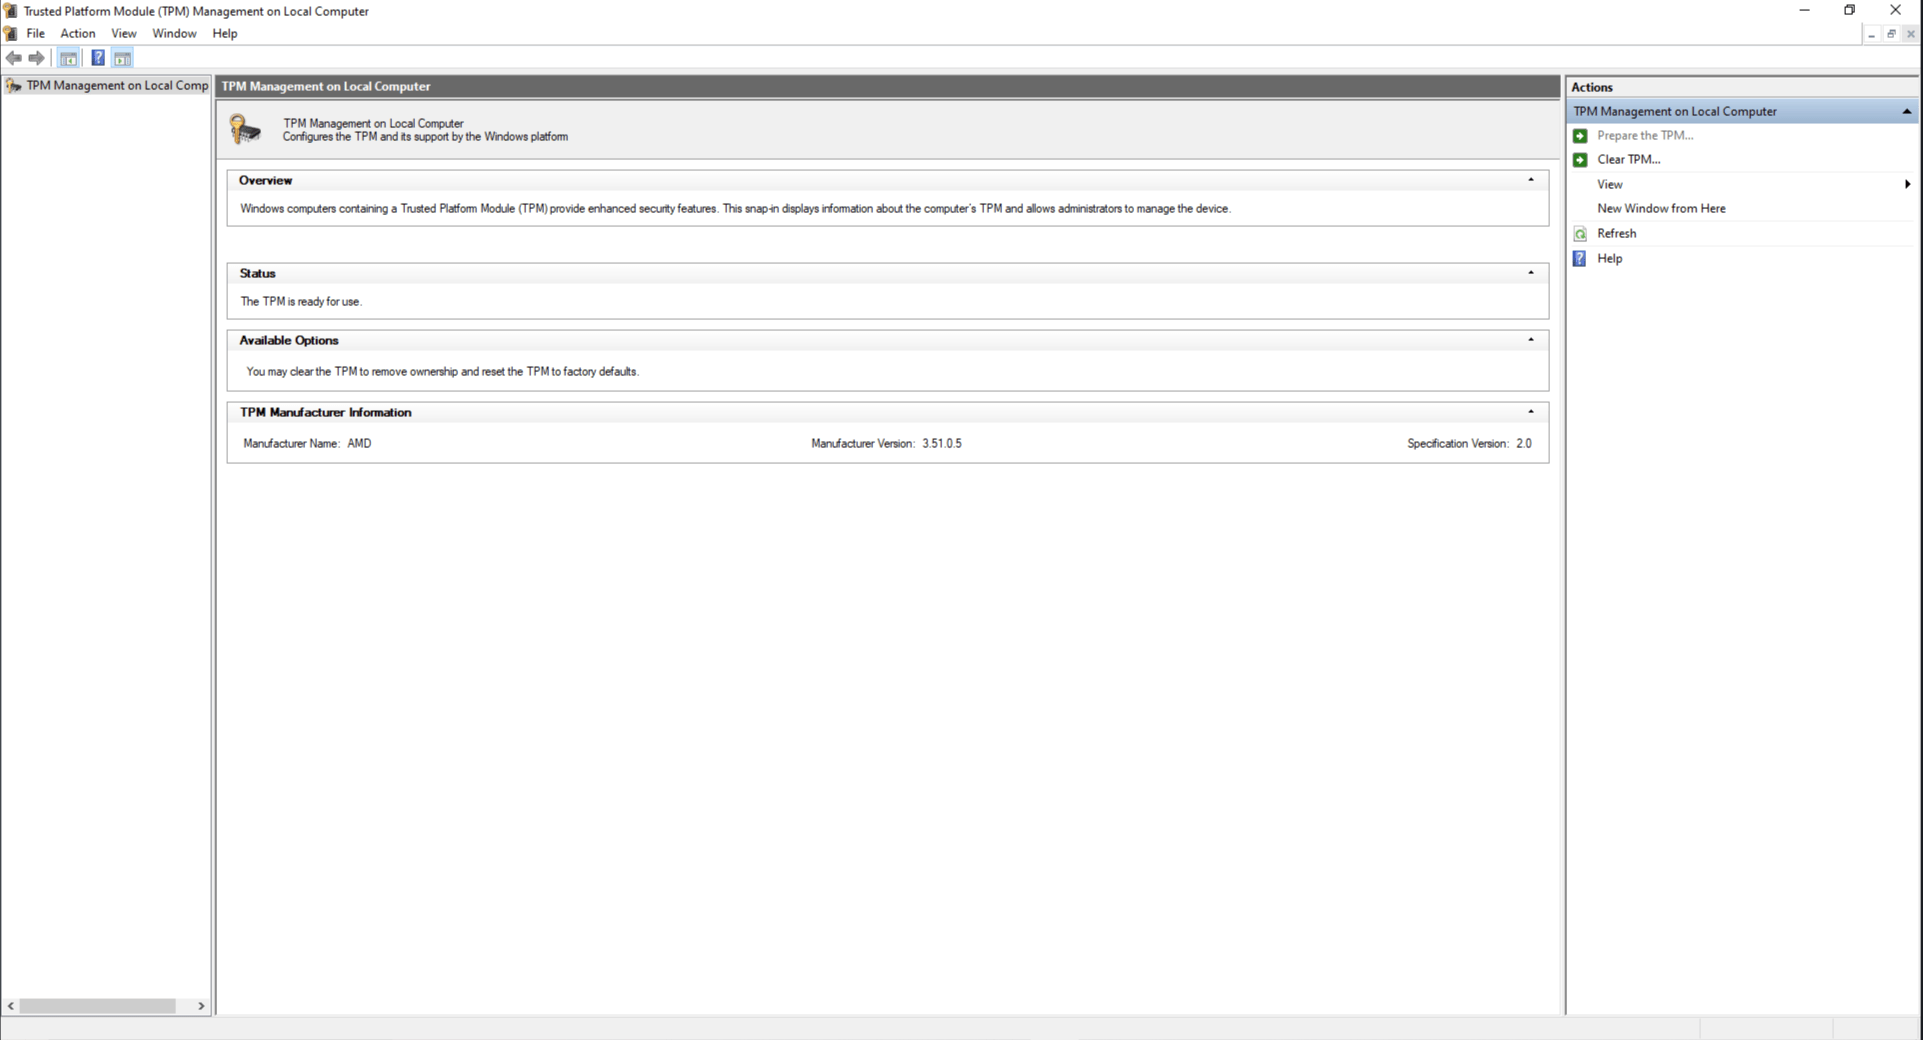
Alternatively, if you have a TPM 2.0 chip and it’s enabled, you will receive the following message. If your PC showcases this message, you should need to enter it for the installation of Windows 11.
Our test system
For the purposes of this tutorial, we’ll be using the following computer and hardware:
- Gigabyte Z590 AORUS Pro
- Intel 11th Gen i7-11700K
- 16GB XPG 2666MHz DDR4 RAM
It’s worth mentioning that, even though the Gigabyte Z590 AORUS Pro has a TPM 2.0 chip, the Trusted Platform Module manager said otherwise. So, whilst it’s a handy tool to let you know whether TPM 2.0 is enabled, it won’t let you know if you’re motherboard has the facility.
How to enable TPM version 2.0 in BIOS
This is our quick step-by-step guide on how to enable TPM version 2.0 on your current motherboard. Whilst both Intel and AMD differ in terminology (Intel PTT, AMD fTPM), the technology – and method – are still pretty much the same.
That being said, we’ll be using an Intel CPU and motherboard for this explanation.
Step
Enter the BIOS
Start off by entering your motherboard’s BIOS. You can do this by pressing ‘DEL‘ or ‘F2‘ during startup. If you reach the Windows load screen, you’ve gone too far.

Step
Change the BIOS into Advanced Mode
If your BIOS menu is set to ‘Easy Mode’, you’ll want to change that into advanced mode. You can do this by pressing ‘F2‘ inside the BIOS or clicking the option within the sidebar.

Step
Inside advanced mode, simply navigate to the settings bar by clicking it. Inside settings, you’ll see a ‘Miscellaneous‘ tab. Double click to enter.

Step
Inside miscellaneous settings, enable TPM Version 2.0
Inside Miscellaneous, you should see an option for ‘Intel Platform Trust Technology (PTT)‘ – this is Intel’s TPM feature.
Simply click it and select ‘Enable‘ from the drop-down menu.
At this point, you can simply restart your PC by navigating to the ‘Save & Exit‘ tab.
However, the following steps are also required for the safe installation of Windows 11.

How to enable Secure Boot in BIOS
Alongside enabling TPM in the motherboard’s BIOS, you’ll also have to enable Secure Boot as well. This will enable you to complete a full installation of Windows 11 successfully. Here are the steps required:
Step
Enter the BIOS
If you aren’t already in the BIOS, jump into it by pressing ‘F2‘ or ‘Del‘ during startup.
Step
Select Advanced Mode
Again, you’ll need to select the ‘Advanced Mode‘ to enable Secure Boot. Do this by pressing ‘F2‘ or selecting it from the side menu.
Step
Select the Boot option in BIOS
When using the advanced mode, simply click the ‘Boot‘ option from the top menu.

Step
Select Secure Boot from the options
Simply navigate to the ‘Secure Boot‘ tab and select it.

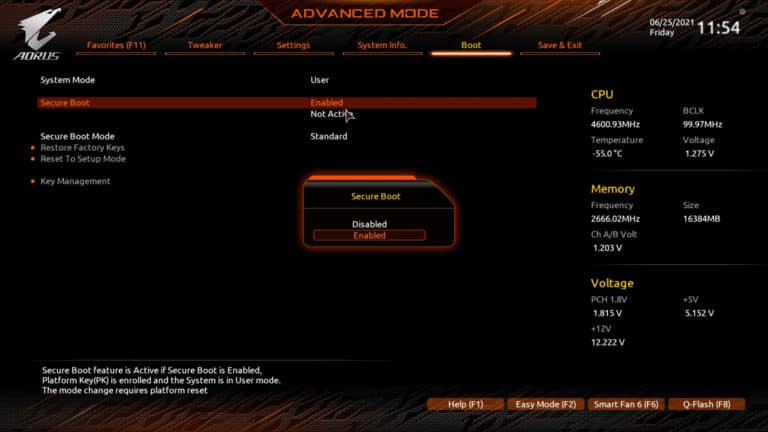
Step
Enable the Secure Boot feature
Finally, click the ‘Secure boot‘ option and change it from ‘Disabled‘ to ‘Enabled‘. Once you’ve finished this, simply click the ‘Save & Exit‘ option and restart your PC.
This will enable both TPM 2.0 and Secure boot on your PC.
Once you’ve fully enabled TPM 2.0 in the BIOS, you’ll be able to install Windows 11. Unfortunately, if you’re system doesn’t support (or have) a TPM 2.0 module, you’ll either have to purchase a TPM module and install it – or purchase a completely new motherboard.
You can check ASUS’s motherboard compatibility list here.
How to enable TPM 2.0 FAQs
Can I use Windows 11 without TPM 2.0?
Windows recommend have a TPM 2.0-enabled motherboard before upgrading to Windows 11. Upgrading normally will require you to do this. However, there is a way around it. Our Windows 11 TPM 2.0 bypass guide shows you how.
Can I enable TPM 2.0 on my PC?
For most relatively modern hardware, you should be able to enable TPM 2.0 on your PC via the BIOS. You can check whether your motherboard is TPM 2.0-ready within Windows, though this isn’t always accurate. Follow our steps to see if you can enable it.
Final word
That’s all there is to it! Luckily, enabling TPM 2.0 and Secure boot isn’t that difficult of a task – only requiring a few simple BIOS steps to do so. Windows 11 has been available for some time now. As the years have passed, the number of people that still need to enable TPM or purchase a TPM module is dwindling. However, for those on older hardware – we’ve got you covered.