
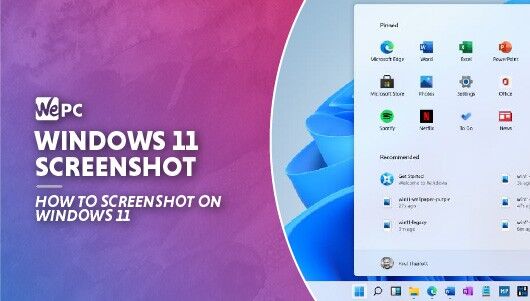
How to take a screenshot in Windows 11
Taking a screenshot on Windows 11 couldn't be easier - here's the complete guide.
Share this article...
WePC is reader-supported. When you buy through links on our site, we may earn an affiliate commission. Prices subject to change. Learn more
If you’re new to the operating system and have been wondering how to take a screenshot in Windows 11, then you’ve arrived in exactly the right place. Maybe you’ve just completely forgotten how screenshotting works and need a quick refresher – no problem. Microsoft have made taking screenshots in Windows 11 easier and more refined, thanks to the Windows 11 screenshot feature.
Many of the methods in this guide will also work in Windows 10. However, if you do want to start afresh on Windows 11, here are the best Windows 11 deals.
It doesn’t matter whether you’re browsing the internet for the best gaming PC, researching the latest technology, or wanting to show your friends a hilariously overpriced GPU – taking a screenshot on Windows 11 is simple and quick.
In the following article, we’ll be showcasing the easiest ways of taking a screenshot with Windows 11 – listing all the most popular methods and exactly how to do it. A quick video guide and simply how-to should do the job.
So, with plenty to get through, let’s waste no further time and dive straight into it!
How to take a screenshot in Windows 11
There are multiple ways of taking a screenshot in Windows 11. Whilst not all features are new, there are some interesting additions to Microsoft’s new operating system that we’ll share with you below.
Screenshot by using Print Screen
Step
Press The Screenshot Button (PrtSc)
The quickest and easiest way to take a screenshot in Windows 11 is to simply press the Print Screen (PrtSc) button on your keyboard. Whilst this won’t save your image to your PC, it will add it to your clipboard – allowing you to paste it into various places like Paint or Word.

Whilst there are easier ways to save a screenshot in Windows 11, you can paste the image into Paint and save it for future use.
Step
Press PrtSc + Win
As mentioned above, there is a quicker way to take a screenshot and save it to your hard drive – and this is the way. Pressing the Windows key (WIN) and Print Screen key (PrtSc) at the same time will automatically save your screenshot to your drive. The location is set to Picture>Screenshots and all screenshots will be saved as PNG files.

If you want to change the file type from PNG, simply open the image in Paint and save it as any file type you like – JPEG, GIF, etc.
Step
Press PtrSc + ALT
If you’re looking to take a screen of a particular window instead of the entire screen you’re viewing, don’t worry – simply pressing ALT alongside PrtSc will only capture the active window you’re viewing.
Unfortunately, this won’t save the image to your hard drive but it will copy it to your clipboard where you can paste it various areas.

If you want to save the image, simply paste the image into paint and select ‘Save As’.
Screenshot by using the Snipping tool
A slightly more advanced way of taking a screenshot is to utilize the Snipping Tool feature in Windows 11. Seemingly, most of the features are the same from Windows 10 – however, the old snipping tool has been replaced by a more intelligent version.
That said, you can still easily save, edit, and draw on screenshots using this great little tool.
Step
Type ‘Snipping Tool’ into Windows search
To open the application, simply type ‘Snipping Tool‘ into your Windows search and click the launch open from the menu.

Step
Create New Snip
Inside the application, you’ll see the option to choose a new snip in the top right-hand corner. Simply click it to start a new snip.

Step
Capture A Specific Area
You’ll notice that your mouse cursor has changed to a crosshair of sorts. Simply click and drag the snipping tool over the area you’d like to capture.

Step
Edit & Save Your Snip
At this stage, the captured area will open up into a paint-like window – where you’ll be able to save and edit the picture to your likings.
If you’re taking a screenshot of some text and want to remember a particular section, simply highlight or underline the text using the various tools available.

Screenshot by using the Snip & Sketch tool
This is the successor to the Windows 10 snipping tool. It features in Windows 11 and should offer some additional features for editing.
The Snip & Sketch tool is incredibly easy to use and allows you to save, edit, and customize any screenshot you take.
Note: Windows 11 has now merged the Snipping Tool and Snip & Sketch into one tool.
Step
Open Snip & Sketch
You can do this by clicking the ‘Try Snip & Sketch Feature‘ button in the snipping tool or pressing Win + Shift + S to quick start the feature.

Step
Select New Snip
Like the snipping tool, you’ll be able to select a new snip by clicking ‘New‘ in the top left-hand corner of the Snip & Sketch window.

Step
Capture Your Screenshot
Your cursor will change into a crosshair. Simply click and drag the crosshair over the area you’d like to screenshot. This will take a screenshot of the area.

Step
Edit & Save Your Screenshot
At this point, the screenshot will load into the Snip & Sketch editor. At this point, you’ll be able to edit the image and save it to your hard drive.

What is a screenshot?
For those that are completely new to tech, a screenshot is a still image of a particular window or area on your display. It is a way of capturing exactly what your screen is displaying so you can share or use it in the future.
Screenshots are a great way of sharing interesting pieces of information or funny pictures with your friends, forums, or the internet in general.
How to take a screenshot in Windows 11 FAQs
What is the best way to take a screenshot in Windows 11?
Since there are a couple of different methods for screenshotting in Windows 11, there is a choice to make.
If you want to screenshot the entire screen, using the Print Screen method.
If you want to capture a certain area of the screen, using the Snipping Tool.
We explain how to perform both these methods in the guide above.
Can I use 3rd party programs to screenshot in Windows 11?
Windows 11 has plenty of great options built-in for taking screenshots. However, there are 3rd party tools you can use to take screenshots too.
We would recommend ShareX if you know your way around Windows and want a screenshot tool that also provides additional features such as file sharing. There are also other great options out there such as Snagit and PicPick.
More Windows 11 guides
Here are some of our most popular Windows 11 pages, discussing features, how-to’s, bugs, and tips:
Final word
So, there you have it, our quick guide on how to take a screenshot in Windows 11. There are a tonne of different ways you can take a screenshot using Microsoft’s new operating system, allowing you to quickly copy, save, edit, and even customize your latest screenshots. For me, I’ll probably always stick to the good old PrtSc button – but for many, that simple isn’t enough. Luckily, there are several more advanced ways to take a screenshot in Windows 11.
If you have any questions regarding the new operating system and its features, feel free to drop us a comment in the section below and we’ll get back to you as soon as we can.


