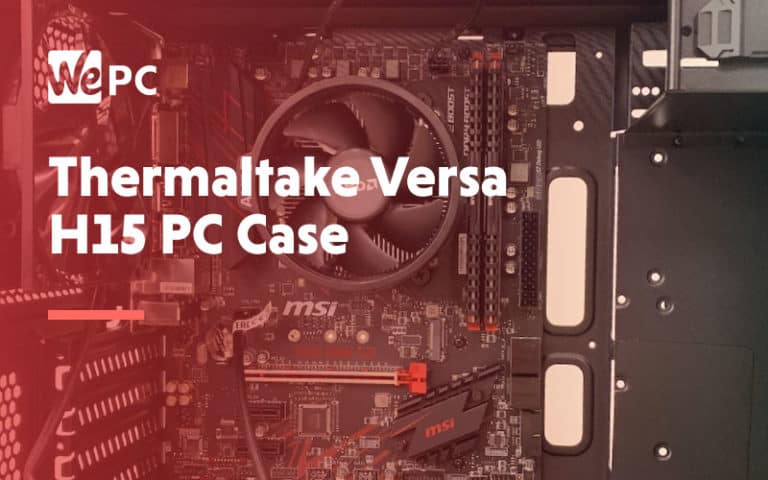
Thermaltake Versa H15 | PC Case Review
A more comprehensive look at the Thermaltake Versa H15 PC case to see how it stacks up in price, performance, and overall build quality
Thermaltake has a huge selection of cases that vary from this budget case to massive tempered glass table-like cases designed for the slickest water cooling PCs.
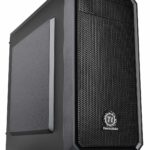
The H15 sits as part of Thermaltake’s Versa range which has a multitude of budget options at its disposal. The first thing to note when it comes to the H15 is this is not an aesthetically pleasing thing to look at, rather the opposite. It does come very cheap, and it will do the job of holding your components all the same, though.
First impressions were OK. With some cases, you might find misaligned sheet metal or bent plastic, but the H15 looked like a solid case that had been constructed with some care.
Performance-wise it’s okay, but due to its small size and build materials, you really wouldn’t want a PC in this case unless it came under $1000.
Let’s jump in and go over our first thoughts and why this could be a great budget option for cash-strapped gamers.
Specifications
- Small form factor and lightweight
- User friendly drive bays
- Adequate cable management room
- Great value
- Cable management options could have been better
Packaging & Contents
As usual, there isn’t really a lot to say about the packaging, other than the fact it came tightly packaged with no dints or scuffs. The sturdy box features an image of the product on two sides, but there is nothing out the ordinary here, so let’s move on.
It’s standard procedure inside, with two polystyrene blocks protecting the case along with a thin plastic bag to keep the dust away. Along with the Thermaltake Versa H15 case, you’ll find a pre-installed 120mm fan at the rear and, of course, your screws and bits for installing your components.
Inside & Outside
Overall
One thing you notice upon unboxing the Versa H15 is the fact it is a budget case; there is no hiding from that, it’s obvious. But for the budget builder, it’s a reliable little option constructed of steel with no noticeable blemishes on our model. The overall design is plain with a mesh front panel being the only flair, which is simply there to take in some air.
We have the version without a window as we were only sticking a budget build inside that doesn’t feature a GPU or any RGB lighting. So the window didn’t appeal to us for this particular build. However, it’s good there is an option for a similar price.
Front & Rear
As mentioned the front is entirely mesh-like metal which does add a few style points to this rather bland case, but it is mainly to serve an airflow function. The front has room for two 120mm intake fans and has support for a radiator up to 240mm, but you may have to remove the drive bays.
The front panel comes off with ease revealing the wiring and internals. This case features a 5.25″ drive bay so you can install a DVD-Drive if you desired but if not it’s a great place to hide some cables at the end of your build.
To the rear, I can’t say there is much to report other than the pre-installed fan previously mentioned. Normally around the I/O port is where budget cases reveal poor craftsmanship. However, the Versa H15 managed to do fine at the back. Just below the I/O port sits the four expansion slots for your graphics cards or WiFi cards. The thumbscrews are of decent quality and don’t shred your hand, and all four sit at the back of the case.
It is worth noting that to the rear of the case, underneath sits a dust filter. This dust filter is to help protect your PSU as it will be installed upside down, drawing air from beneath the case. You can remove the filter for easy cleaning, but it is quite rudimentary in its design and may feel a bit fiddly.
Side Panels
Both side panels on this version are sheet metal with outward dents to accommodate for cable management at the back and component clearance at the front. Normally on cheaper cases, things don’t quite fit together correctly sometimes, but the panels were well made also and slide onto the case with little effort required.
The thumbscrews didn’t require a screwdriver to get off, which is a bonus, and once they are unscrewed, the panels slide off relatively easy. This is a light case, so it was of no surprise to feel that the side panels weighed barely anything and will definitely bulge if your cable management isn’t great.
Roof
The top of the case is bog-standard, and we see the main front panel buttons feature on the top rather than the front of the case. There is a slight downward angle where the switches sit, and the switches actually felt pretty nice to press showing semi-decent quality for such a low price case.
The only feature to the top section of the Versa H15 is for mounting fans or a radiator. The top will accommodate two 120mm fans with enough space for a radiator of up to 240mm.
Let’s take a look inside..

Now we have completed the tour of the external parts of the case it is time to step inside and see if the Versa H15 has good build potential.
The Versa H15 features a removable drive bay located near the front that may not be needed by many as you can mount SSDs to the back panel. The drive bay fits two HDDs in and uses the caddy system (you clip the caddies to your HDD and slide in). The drive bay slightly restricts PSU clearance, and it felt a little tight in there. But, it was still easy to cable manage, and if you are using a non-modular PSU, you can use the drive bay to stash some unused cables.
The top right we see the 5.25″ drive bay which features plastic clips meaning you don’t have to screw your drive in if you don’t want to. I would always recommend screwing your drives in if your system will be traveling around at all, though.
The case is pretty much just sheet metal with holes in, but the routes for your cables seem well thought out enough, and the oval cutting does look quite nice overall. Being a budget case, there are no rubber grommets or PSU shrouds in here so cable management will be quite significant but not major seeing as there is no window.
On the back, you will see two spots to mount SSDs, which will neatly screw directly into the back panel, and there are extra cutouts to support this configuration. One thing to note though if you do plan on mounting more than one SSD is that they will restrict your cable management options and the conventional route may be off-limits due to the small amount of room where the holes are cut.
Another small issue is the lack of a CPU cable cutout at the top left meaning you will have to route your CPU cable underneath your GPU and run it vertically.
Features
The case doesn’t exactly burst with features, but it has enough to tweak a range of builders interests. Sadly the low price isn’t a feature, but Thermaltake has tried to make building simple.
- Tool-Free Installation – To minimize hassle, the 5.25″ drive bay uses a locking clip to secure your drive, meaning you don’t even need to use the screwdriver. The drive bay cage comes out with thumbscrews, and you can use the caddie clips to install your HDDs, again meaning no need for the screwdriver.
- 1 x Rear Fan – If you are building a budget PC, then a rear fan could be all you need, so at least Thermaltake has included the 120mm exhaust fan. If you were putting a powerful GPU inside though it may be worth grabbing an intake fan to push as much as thorough as possible.
- Easy Cable Management – The large cutouts provide adequate routes for beginner builders to manage their cables a bit easier. The back panel has a slight hump to it for extra room, and you get plenty of room near the SSD mounting section. Easy cable management means more can enjoy the benefits of a happier system.
The features or pros and cons to a case may tweak many peoples interests but when it comes to a basic budget computer case like the Versa H15 you just need to know how it is to build in and how it performs.
The cases bits and bobs come in a plastic bag along with the manual, and this was expected for a budget build. A detailed box with separated screws would have been delightful, but this is no $100+ Fractal Design case after all.
Strangely the “tool-free” installation didn’t last long though with the standoffs needing screwing in and the motherboard too. What impressed about the motherboard installation was the adequate room for my hands to access every screw with ease.
Once the motherboard was screwed in with no issues, it was time to decide where the SSD was going to sit and to be honest; there was only the option on the back that made sense. Once the SSD was screwed in, it became clear that there may be an issue with the power cables later on.
Being an M-ATX case, space was limited, but it was actually really easy to build in. Often with cheap cases, we see components and screws not aligning properly, but Thermaltake has done the minimum to ensure some level of quality with this case.
Our Verdict
So what’re the scores on the doors? Well, it is clear that this case won’t be winning any design awards, but the small, simple things it does well are what make this budget case so appealing for the budget builders out there.
Whether you buy this or not is ultimately down to you and your budget, but there is a reason we feature this in a lot of our budget builds and that is, yes price, but also its solid construction and reliability.
This isn’t one of the best cases out there and doesn’t have the aesthetic appeal of tempered glass cases, but it does its job and is perfect for those looking to save money or when the design isn’t important.
WePC is reader-supported. When you buy through links on our site, we may earn an affiliate commission. Prices subject to change. Learn more