
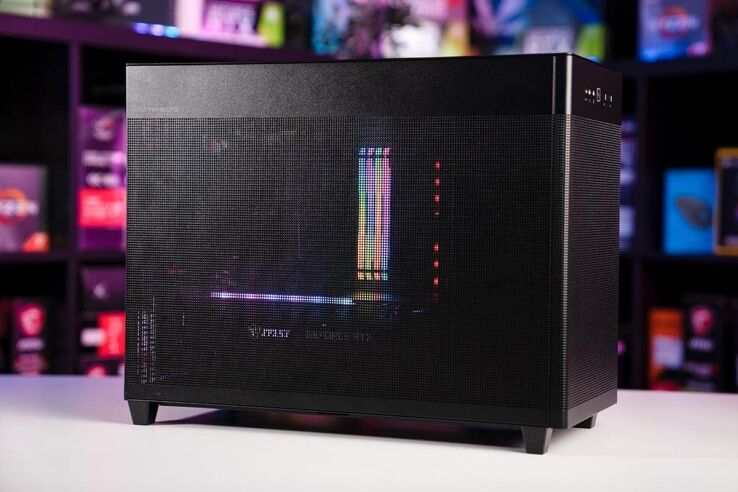
ASUS Prime AP201 PC Case review
Small yet powerful, can the holey case not choke?
Share this article...
WePC is reader-supported. When you buy through links on our site, we may earn an affiliate commission. Prices subject to change. Learn more
ASUS is more known for its other components like graphics cards, laptops, and PC parts. But it is slowly expanding its PC cases, so we now look at the ASUS Prime AP201 PC case review. Adding to its lineup of ROG and TUF cases, it has introduced a Prime selection. Revealed in June 2022, it brings the simplicity and more affordable price range offered by the Prime series as seen in ASUS’ motherboards.
The case is a mATX case, a move away from large big cases we’re used to seeing from ASUS. Moving from grand to small, it has a volume of only 33L. Also made from pure mesh you don’t have to worry about airflow possibility. Although with only one provided fan it might need a bit more help. But it does provide plenty of area for cooling, even with the power supply mounted to the front. So we look at how well it does with it.

Type
Small tower
Motherboard Support
Micro-ATX, Mini-ITX
Dimensions
460 x 205 x 350 mm (LxWxH)
Included Fans
1x Prime 120mm
Materials
Steel
Expansion Slots
4 full height
Maximum GPU size
338mm long
Case Drive Bays
4 (1x 2.5″, 3x 2.5″/3.5″ combos)
Radiator Compatibility
120mm, 140mm, 240mm, 280mm, 360mm (top)
Main features
- 33 Litre MicroATX volume
- Quasi-filter mesh panels
- Support for up to 360mm radiators and/or five more fans
- Tool-free side panels
- 1x Prime 120mm fan included in back
- 1x Drive sled, 3x storage mounts

The Outside
Looking at the case from the outside it’s hard to make out anything that stands out. Apart from the IO at the front, the mesh blends into one creating an almost illusion.
Not ideal, for someone with trypophobia, it is a good option for airflow with little impedance. The trims around the edges of the panels do break it up to not make it one big unified mesh.
They also cover some of the shame, but the back won’t cover your cable shame. It also comes in white which may offer some more contrast to the rest of the parts.


The Rear
There isn’t too much at the rear of the case. It’s a fairly simple back without many features. Featuring is a kettle plug connector, IO cutout, 120mm fan mount, and PCIe slots. One of the changes in the case is that away from the norm, the power supply is not in the back. Instead, you mount it at the front and have to use an extension. So make sure to not leave your PSU off.
The single fan is also mounted to the back. With some vertical space, there is some adjustment, but you are limited to a 120mm fan in that space. Then lastly you have the PCIe slots. Where you will only find four full slots from the mATX case. No vertical mount either from the compact case.


The Sides
Looking at the sides of the case there isn’t much that stands out. You get a meshed side with a slither of trim at the top, likely to cover any cooling on top. The trim also features the words “ASUS Prime Case” to remind you of what your PC is in. But in all fairness, it does break up the black hole of darkness style the case offers.
Since it is all mesh you can see through it to each of the sides. Unbuilt in, you can find the pack of accessories, whilst with a build, you can still get a good look at your RGB. But that does also mean you can see the shame in the back. So any unmanaged cables will likely stick out at a closer look. But the side panels do easily come off when you need to sort out the insides. You just have to pull on the sides and the top ball joints will pop out and you can slide the bottom out.


The Top
From above you get mostly the same look as the rest. There is a trim around the outside but it is otherwise filled with a mesh. There is a simple tab at the back to help with opening up the top. As the tabs holding it in can be on the stiffer side.
This is also where you can fit a lot of cooling components into the case. The top can hold up to two 140mm fans, three 120mm fans, or a 360mm radiator. A radiator would be a great choice as there is plenty of space until the components below for clearance.

The Front
From the front, we do see some features to break up the mesh. On the trim, you’ll find the I/O ports. What’s included is:
- 1x USB 3.2 Gen2 Type C
- 2x 3.5mm jacks, one headphone, and one microphone
- 1x power button
- 2x USB 3.2 Gen 1
Although you may be able to mount any fans to the front, that is where the power supply goes. With a detachable mount, there is some flexibility in where you can mount it. There are three height levels you can attach it to. Gives you flexibility if you plan to have a radiator on top or a storage drive mounted towards the bottom. It does limit the size of the PSU to between 140-180mm which is fine for the majority of picks. But does offer them the coolest air to keep them going in the long run.


The Bottom
Apart from the included design mesh, there is in fact a magnetic mesh included on the bottom of the case. Covering the whole area does provide an extra barrier to dust if you use it as an intake. Although the GPU is likely to already be taking in air from the bottom. And the feet do stand tall to allow all that airflow., with a height of 2.7cm/1.06”. The area does also allow two 120mm fans at the bottom. Or up to two storage drives to expand your needs.
The Inside
Opening it up you do find a spacious opening. There are no separations and it’s all open, just not as tall as some. That’s why you’ll find the motherboard tray only support Micro-ATX and Mini-ITX motherboards. More focused on small size there is always a concern for fitting in components and good cooling. But here you can fit a surprising amount.
It supports a graphics card up to 338mm in length. So even our MSI RTX 3080 Gaming X Trio fits in with some gap to the PSU. Although getting thicker cards may limit what else you can add to the bottom of the case. As fitting a four-slot ASUS Noctua RTX 3080 is going to get right close to the mesh bottom.


This does limit the extra cooling and storage you can put in but it shouldn’t hinder it too much. As the card will be able to easily get good air in by itself. Another size concern could be the CPU cooler height. But the case supports a maximum cooler height of 170mm. Which should be enough for most of your choices.
In terms of cooling, one issue you might come across is the bottom fans and clearance. Where installing a fan at the bottom can come across some issues with the fan hitting the USB 3.0 cable. This can cause some worry about breaking anything. There are also the GPU power cables to worry about. We did route them at the bottom, which is less advisable, as there is the possibility of hitting the GPU fans while in use.
So it may be easier just to route them over the top as long as you can fit them in the back channel. Then at the front is where we find the biggest difference in this case to other options. This is where you can hang your power supply. There is a bracket that requires the extra side bracket to be removed and more screws from the front. Then you can attach the PSU and hang it on three different heights. Allowing some play with the extra space above and below.
As it is at the front, you do get an extension that is right-angled and aims towards the case. Making it slightly harder to manage the cables. Another thing to consider is where the cables from the PSU have to go through the bottom. And with a longer power supply, you will find it harder to manage those. The benefit of placing the component there though is the access to fresh air. With the fan pointed out front, it makes sure they can keep cool. Although then the hot air has to go somewhere and it will be expelled into the case unless it can escape through the top.


The Back Panel
Now looking at the secrets of the back, there is not too much to look at. There are a lot of cutouts for management with little else. There is one sled for a 2.5” drive in the bottom right corner, held in with a singular thumb screw. And that’s the only feature round there. But you do get to see all the cutouts and helpful routing options. Towards the front, there is a lot of option above and below the power supply to bring the cables away from the PSU. Although it lacks dedicated tie-down spots for the best management.
Next to that is a dedicated cable channel. 32mm in size it does give you someplace to hide away the cables. With included velcro ties it does help with the mess, but without rubber grommets, there is no fully hiding it. Although with mesh side panels it may not be too obvious on the dark side. But it does mean you can get a good reach to most of the ports your cables need to reach. Across the top, you do get tie-down spots for the power and power extension. Along with another row below for all the other cables, like if you had more cooling on top.
At the bottom is where we came across some issues. The SSD cables are routed with ease but the IO and other bottom cables do get bunched up. Tying them to the same spot des creates a bundle, which lines up with the bottom edge. This is where the side panel slides on to fix it so it can be a bit of a fight to get it back on. But with some more time and effort, it can be spread out to give yourself an easier time. But overall it is a tidy although cramped back.


Performance
Now looking at the performance we see how well it does to keep our parts cool. The first test (red line on the graph) was just with the one rear 120mm Prime fan. Then we added two Corsair ML120 Pros to the build. One intake on top and an intake on the bottom. Introducing some more airflow to see if it makes any difference to CPU and GPU temps. We use HWinfo to gather the information as well as a thermal probe for the case temperature. One placed below the GPU and one behind the CPU cooler.

From the graph, we see that the CPU stats roughly at the same temperature at around 40°C. Putting on the load we see the temp shoot up, and both find the same limit of 90.3°C. The additional fan in front of the cooler does not provide any additional cooling. Even after the load is removed, there is no real difference. Although the extra fan does smooth out the experience and slightly improves the cool-down rate.
Although we didn’t record frequency, we see the CPU power decrease for the no single fan option. Which could mean it has throttled and needed to reduce the power consumption. In terms of the graphics card, we immediately see the difference. With a 0db option, the extra fan blowing over the card means it starts 12°C lower than without.
This also means it takes longer to reach the peak temperature. Which is 1.5°C lower than without the fan. Offering just slightly better cooling. And overall system power we see the fan option average lower than the stock configuration.


Final Thoughts

ASUS Prime AP201

Overall, the ASUS Prime AP201 is an interesting and different PC case option that some might enjoy. With an open design, there is plenty of room for all your components. And with all the mesh on the panels, there are great options for airflow. Which we do recommend adding. If not an AIO for your CPU you do want so cool air for it.
As the singular back fan doesn’t quite provide enough ventilation. As the passive emissions won’t cut it, especially with the GPU heating the CPU. There is some lack of cable management options at the back and it can get a bit tight otherwise there is good consideration of cable routing. For an mATX case, it is a pretty good option.


