How To Setup Donations On Twitch
Going full time on Twitch requires some kind of monetary income - here's how to setup donations for your Twitch channel
Share this article...

WePC is reader-supported. When you buy through links on our site, we may earn an affiliate commission. Prices subject to change. Learn more
If you’ve been streaming on Twitch for a while now and have been seeing some success, it may be time to figure out how to setup donations on Twitch. For many people, streaming is just a pastime and a way to broadcast to friends. However, many people have found great success on Twitch and turned it in to a full-time job.
There is great potential for big earnings on Twitch, so if you’ve earned a Twitch partnership or affiliation, it may be the time to start seriously considering your Twitch income. Top-tier streamers are making more money than you could probably imagine, and if that’s your goal, then this guide is perfect for you. Give another way of your viewers to support you by setting up donations on Twitch.
If your newly set-up donations do start to flow in, then you can check out the best stream decks and best streaming PCs to help you up your production value.
So, without further ado, let’s get into all the details and walkthrough the process – while giving you some helpful advice along the way.
How to setup donations on Twitch video guide
Setting up donations on Twitch from Bits and Subscriptions
The official methods for users to donate via the Twitch platform include Bits and Subscriptions. Here’s how to utilize them on your channel.
Step
Become a Twitch Partner or Affiliate
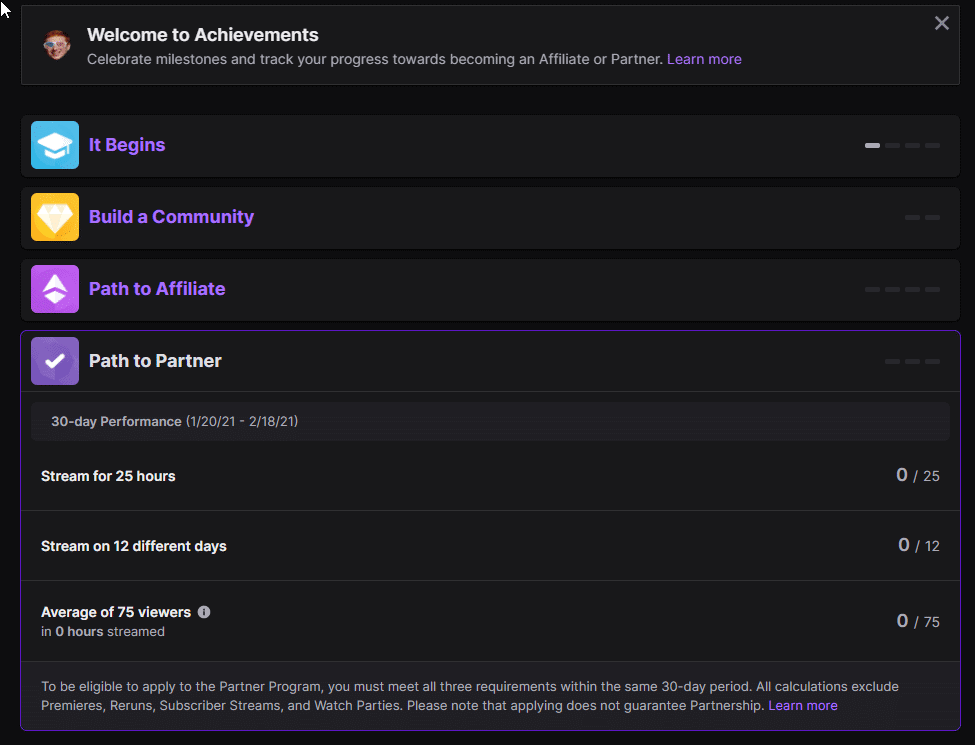
Twitch bits and subscriptions can only be received by Twitch affiliates or partners. That means you’ll have to become one or the other in your quest for additional revenue.
To get partnership status, you must signup via the Twitch program (click here) and ensure that you meet the guidelines. A full list of guidelines are available on the website, but for the most part you, you must show:
- Have at least 50 followers
- Get 5 people chatting at the same time
- Stream for 25 hours
- Stream on 12 different days
- Average 75 viewers
If you can demonstrate these achievements, you will be able to apply for the Twitch partner scheme – allowing you then to receive subscriptions and Twitch Bits.
There are a number of different services that will allow you to create donation buttons for your Twitch panel. Whether you’re using Streamlabs, Muxy, Paypal, or PeachPay, the end goal of a donation button is pretty much the same.
For the purposes of this article, we’ll be using Streamlabs.
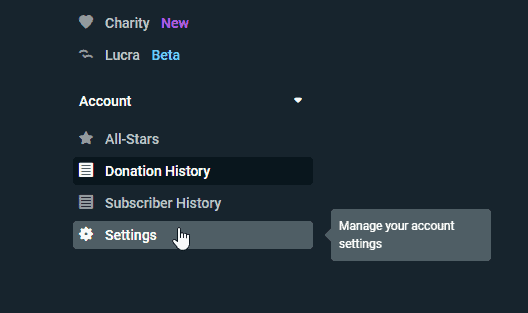
Step
You’ll need to go directly to the Streamlabs settings menu to enable PayPal donation drops. This can be found on the navigation bar underneath the subscriber history.
Step
Add your payment details to Steamlabs
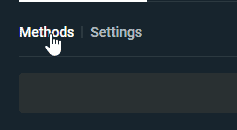
Inside settings, ensure that ‘Method’ is selected. This tab will allow you to add all the relevant payment details to your Streamlabs donation link.
Step
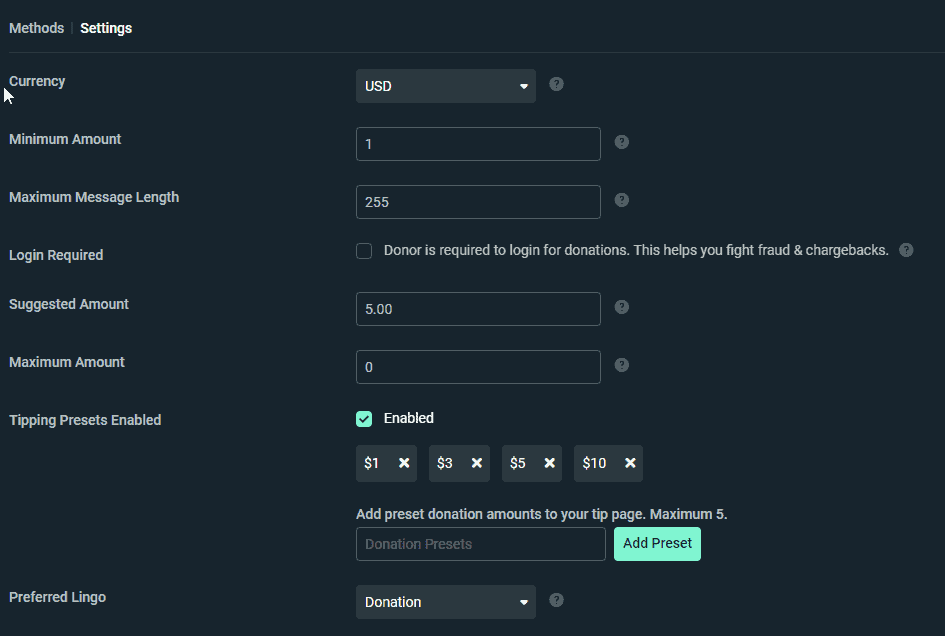
Alter your payment settings
Once you’ve added your payment details under the ‘Method’ tab, you can then click the ‘Settings’ tab to ensure the donation settings meet your requirements.
Step
Save settings and add your link to your Twitch channel
Once you’ve preferred settings have been entered, simply save them by clicking the ‘Save settings’ button at the bottom of the screen.
Once you have confirmed this, you can add a button to your Twitch profile that links you directly to this donation page.
There are a ton of different platforms that allow you to set up similar donation links – however, for us, Streamlabs is one of the easier options.

Final word
So, there you have it, our quick rundown on how to setup donations on Twitch. Getting up and running can be tricky in this extremely competitive platform – utilizing donation pages is the only way some streamer can survive.
If you have any questions regarding the process, feel free to drop us a comment in the section below. Better still, you can head over to our Community Hub where you can discuss everything Twitch-related with like-minded individuals.