How To Get Bits On Twitch
We show you how to get free Bits on Twitch and how to buy them!
WePC is reader-supported. When you buy through links on our site, we may earn an affiliate commission. Prices subject to change. Learn more
If you’re new on Twitch, you may have heard about ‘Bits’ – but do you know how to get Bits on Twitch? In case you don’t know, Twitch is the go-to platform when it comes to livestreaming, especially for gaming. Despite that, there is a wide range of content available to you on Twitch, with many features to enjoy. One such feature is Twitch Bits, which act as a currency you can donate to your favorite streamers to show support.
READ NOW: Make the most of Twitch by linking your account to Amazon Prime
Aside from direct donations, you can cheer your streamer on with Twitch Bits. A big side of Twitch is the social aspect, meaning you can interact with your favorite streamer and even contribute to support the content you love. Cheering has been a feature on Twitch since the middle of 2016 and is essentially a virtual commodity, with donations giving you access to all kinds of nice little extras like sub-only chat rooms and badges.
What are Twitch Bits?
Cheering with Bits is another way to show your support for streamers and they let you celebrate certain moments with the community of viewers. A cheer is just a chat message that uses Bits, which can be used one at a time, all at once, or somewhere in-between.
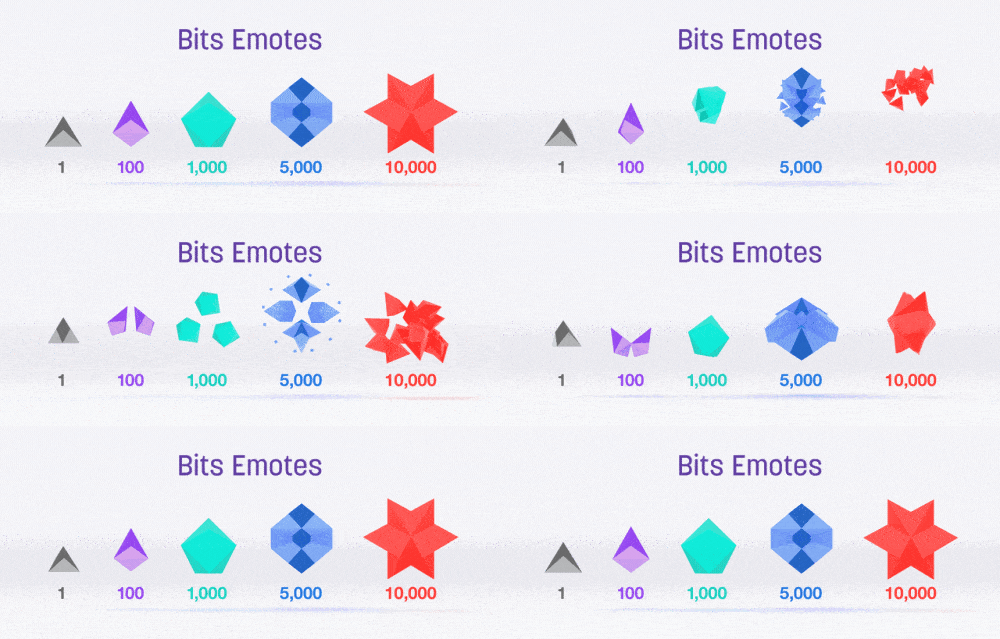
When you decide to support a partner or affiliate, Bits work similarly to subs, so as you cheer in a certain channel, you will earn chat badges. A chat badge will last forever once you have it but will only appear in the channel you were cheering.
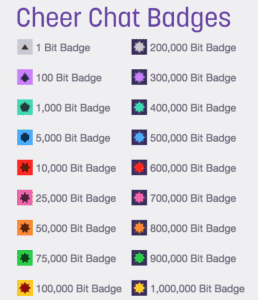
So, if you want to be recognized for your Twitch support, Twitch Bits are a great way to go.
How to get free Bits on Twitch
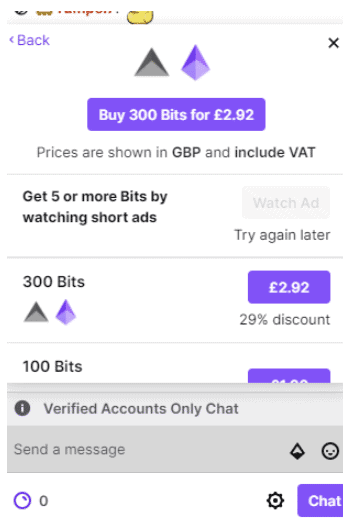
When you are in a Bits-enabled channel, you can earn five or more Bits by watching advertisements.
- Sign in and visit a Bits-enabled channel
- Click on the cheers Icon in the bottom right corner of the chatbox
- Click “Get Bits”
- Click “Watch Ad”
After you have watched the Twitch ad (which is usually 30 seconds long) and the bar at the top says “done”, you’ve just earned yourself some Bits.
How to get Bits on Twitch
First things first, make sure you have twitch.tv open in your browser. Then we can get started on getting some Bits on Twitch.
Step
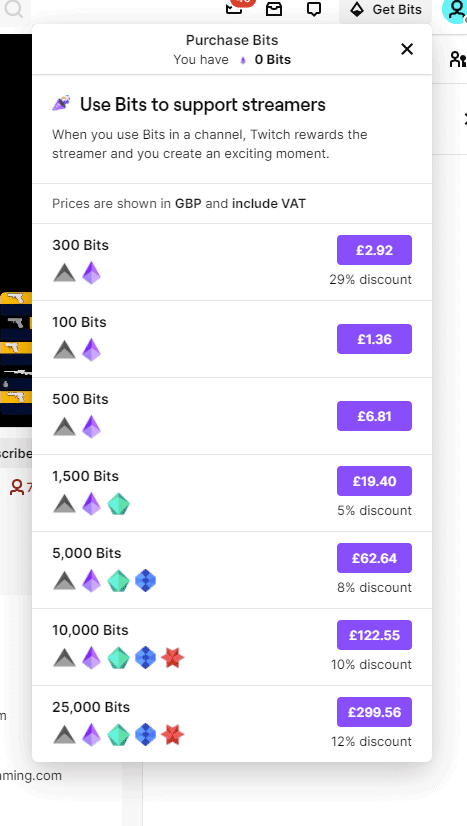
First click “Get Bits” in the upper right corner of the video player or click the Bits icon in the chatbox that appears when you are watching a Bits enabled channel.
Click “Buy” and select the bundle of Bits you would like to purchase.
Step
Add payment method
Now choose your desired method of payment: Paypal, Amazon Pay, or by card.
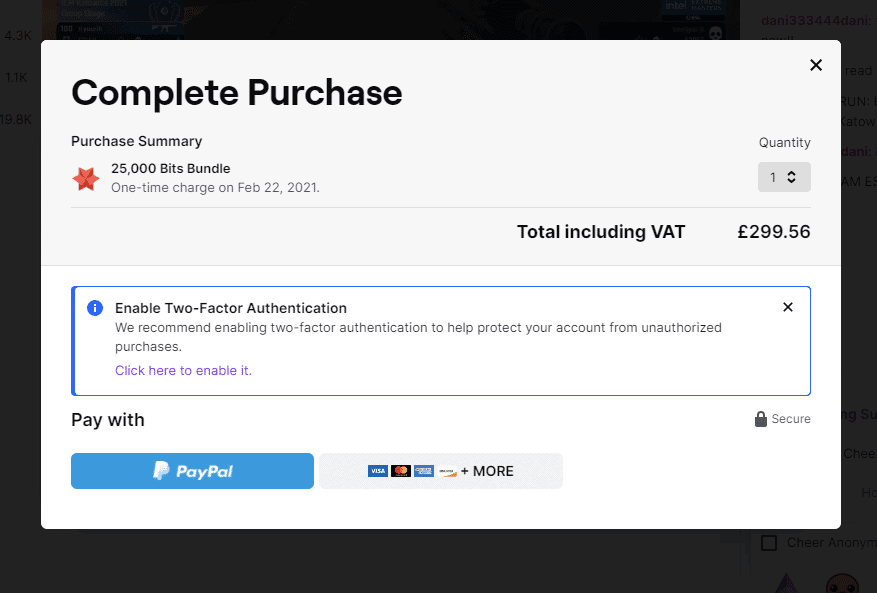
Step
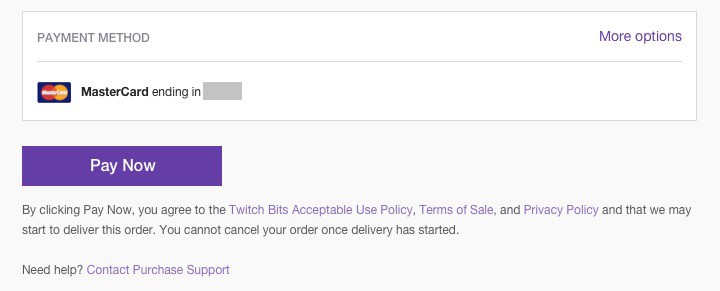
Confirm payment details
Click “Continue” to review your purchase and then click “Pay Now”
Purchase complete! You now have Twitch Bits!
How to set up Auto-Refill Bits
For those who already purchase Bits monthly, did you know you can set these to auto-refill?
Step
Click “Setup Auto-refill”
Follow the same process as we talked you through earlier.
At the end of purchasing Bits, click on “Setup Auto-refill”
Step
Choose amount of Bits
Once on the Bits Auto-Refill page, you can now select the amount of Bits you would like to add monthly.
Your account will be limited to an inventory of 250,000 Bits at any one time, with the maximum amount available to be purchased at 500,000 per day.
Step
Add payment method
Review your settings and the total amount, then click “Authorize Payment”.
Final word
With our guide on how to get Bits on Twitch, you can now support your favorite streamers in a more interactive way. Don’t forget, you don’t have to buy them, with Twitch offering free Bits for watching ads on the site. However you get your Bits, your support towards these streamers is going to enable them to keep producing more content you love, so sit back, relax and start cheering!
