How To Install Windows | The Complete Guide for 2023
We take you through the steps needed to install Windows
Share this article...

WePC is reader-supported. When you buy through links on our site, we may earn an affiliate commission. Prices subject to change. Learn more
Everything you need to know about installing Windows in one place – how to install Windows. It’s no secret that Microsoft’s Window operating system is the most popular for computers around the world, but what do you need to do if you want to install Windows on a new or even existing PC. Well, it’s time to get around to writing this definitive guide.
READ NOW: Want to upgrade to Windows 11? Here’s where to look
The process the installing Windows has remained much the same over recent iterations, which makes sense – it’s nice and easy. Our handy guide will walk through the process and leave you with a clean Windows installation at the end of it.
Our team of PC enthusiasts is well drilled in this area and has answered hundreds of questions relating to failed Windows installations. We’re going to try and answer a lot of those questions in this article while giving a clear and easy-to-follow guide on the best ways to install Windows.
So, without further ado, let’s get straight into it and see what’s coming up in this article.
How to install Windows – a brief summary
As stated above, this article is going to cover some of the most commonly asked questions when referring to Windows installations. Alongside that, we’re going to show you a number of different installation methods and exactly how they are done. Below, is what you can expect from the following guide:
- Things to consider before installing Windows
- How to install Windows from USB/DVD
- How to install Windows for free
- How to install Windows on a new drive
- Re-installing a clean version of Windows
- Can I install Windows on Mac?
- Windows Vs. Linux
We’re going to try and be as comprehensive as possible, so let’s waste no time and dive into it.
Things to consider with Windows
Let’s be honest; you’re here because you’ve already made your mind up on Windows, and you want help with the installation process. That’s great news, and you’ve come to the right place. However, before we go any further, there are a few areas that need to be considered when choosing Windows.
Which version of Windows?
Firstly, what version of Windows have you chosen to run on your system? Now, you’re probably thinking at this stage, why does it matter? And for many, it won’t matter, and they’ll just choose the latest version. Having said that, some of the older versions of Windows have better compatibility with certain games and applications. Furthermore, a lot of people still prefer the old design of Windows 10 or even Windows 7.
Windows 10 remains popular, but the latest version is Windows 11 – with rumors of a Windows 12 release date on the horizon.
One of the major areas to consider if you are thinking about Windows 7 is the security and support it receives. Microsoft ended support for Windows 7 back on January 14, 2020, so we can’t recommend installing this anymore unless required to.
32Bit or 64Bit?
One of the big questions we get asked here at WePC is whether you should install a 32-bit or 64-bit version of Windows. If you’re new to computers, then how are you supposed to know?
Well, don’t worry, modern technology has made that answer a lot easier.
If you’re buying a new computer, nine times out of ten, it will come equipped with a 64-bit compatible processor. The 64-bit version of Windows is much more efficient than 32-bit and handles larger amounts of RAM more effectively.
Unless you’re reinstalling Windows on an old computer, you’re going to be using a 64-bit version of Windows.
USB or DVD?
Many will remember the days of using a DVD to install your Windows. I remember losing the disk back in the day, and it was utter chaos in the household. However, thanks to modern technology pretty much eradicating the need for a DVD-drive, most people will be installing their version of Windows from a USB.
That being said, you can still install Windows from a DVD if you wish, and the method is pretty similar. We’re going to discuss how to do that as soon as we’ve explained how to install Windows from a USB.
Formatting your flash drive
Computers have been moving away from the need for Disk drives for some time now, so what are you to do when you need to install an operating system on a newly built PC? A bootable USB stick is going to be your best option.
Whether you have lost, scratched or broken disks in the past, that issue is no longer one to concern yourself with, as the portable USB stick is at hand to make your life easier. Almost all computers are compatible with a USB, making it an ideal way to install an operating system.
USB drives are also faster and will handle your installation quicker too. To install Windows 7, 8.1, 10, or 11, you’ll need a USB drive with at least 4GB size capacity. To be on the safe side, we recommend going for a minimum of 8GB of space.
Before you start your installation, you’re going to have to format your flash drive. So, let’s get to it.
Step
Start by plugging your USB into your computer
Use a free USB port in the front, or the back of your case.
Step
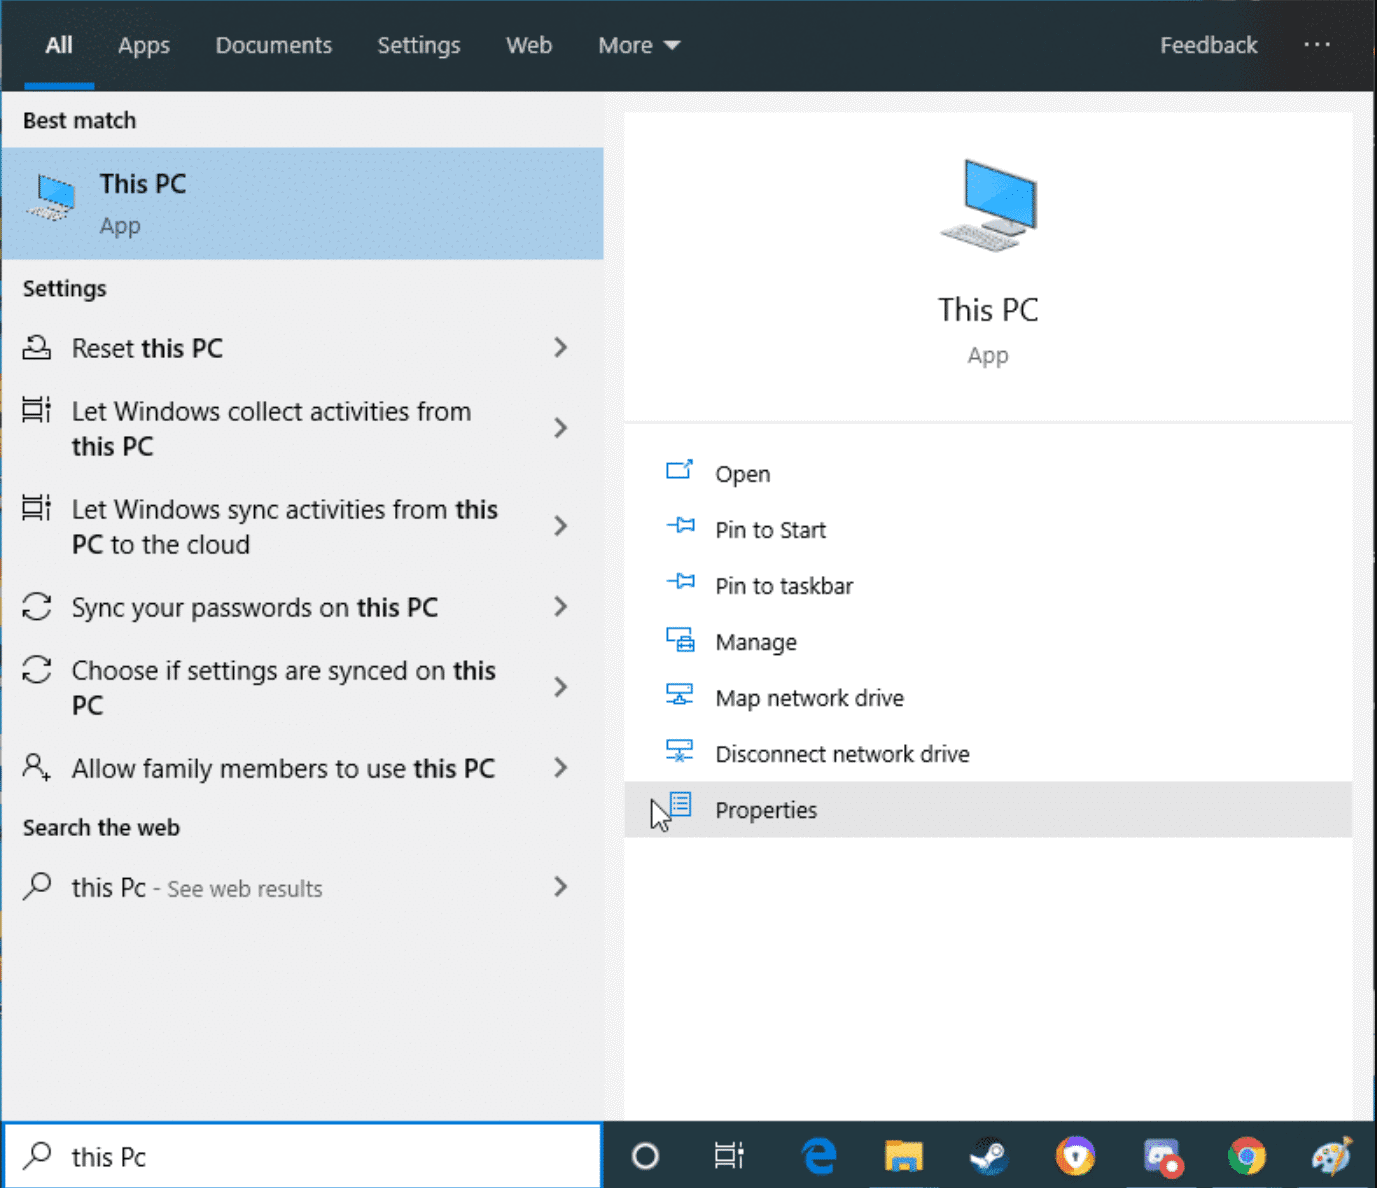
Next, open This PC
Simply go to Windows search, in the bottom right-left hand corner of the screen, and type This PC. Click the monitor-shaped tab which is labeled this PC.
Step
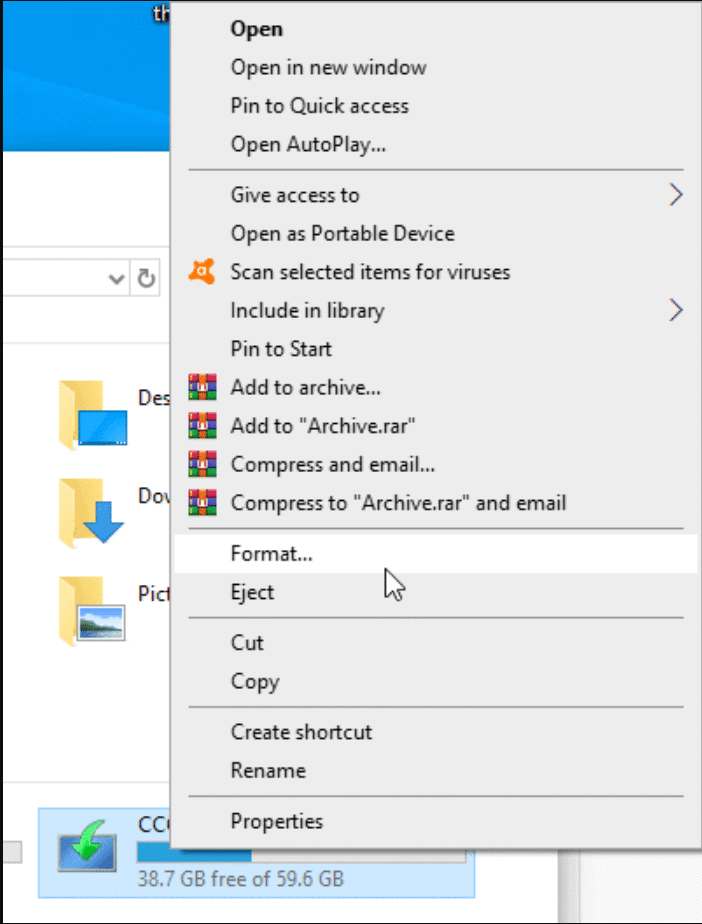
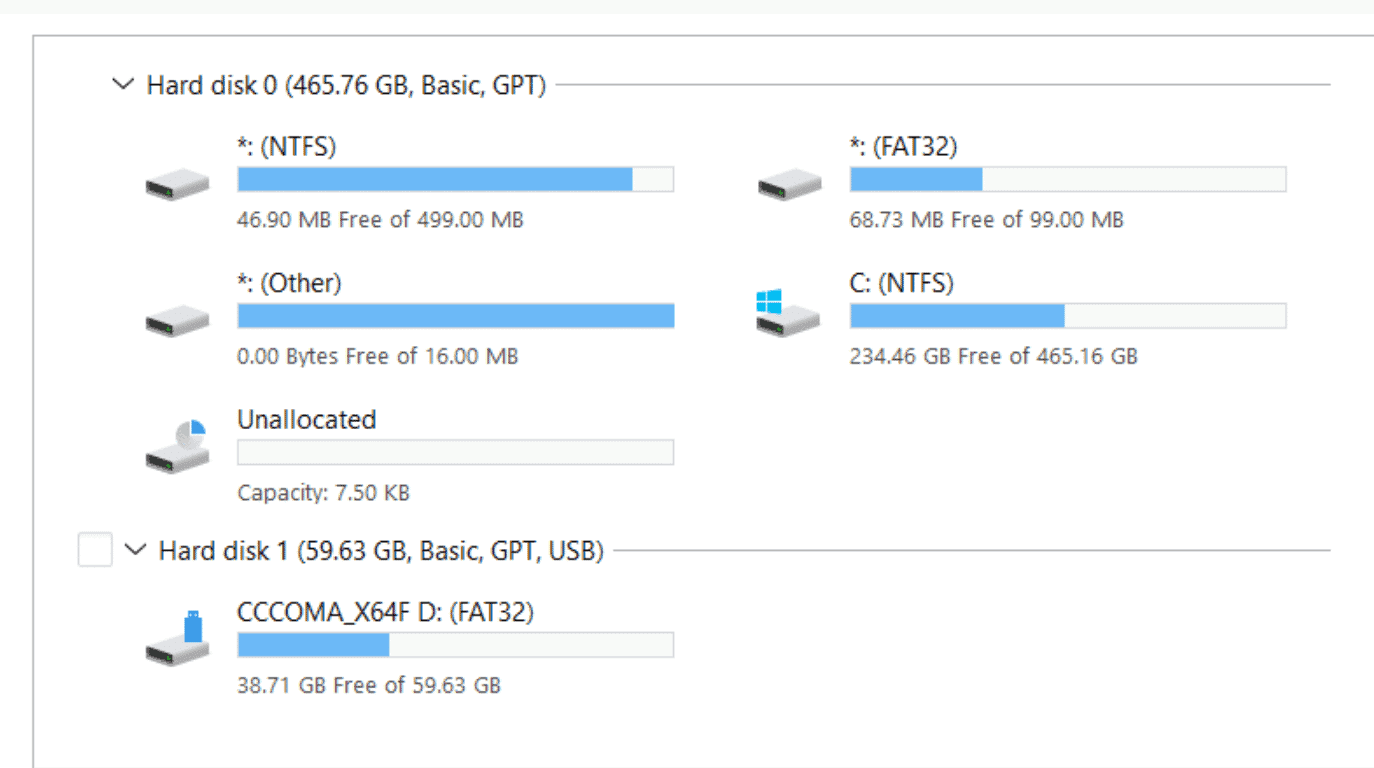
Locate your flash drive and format it
Inside this PC you should be able to locate your flash drive. It should be underneath your local Disk Drives.
Once found, simply right-click the drive and select Format from the drop-down menu.
Step
Format the drive
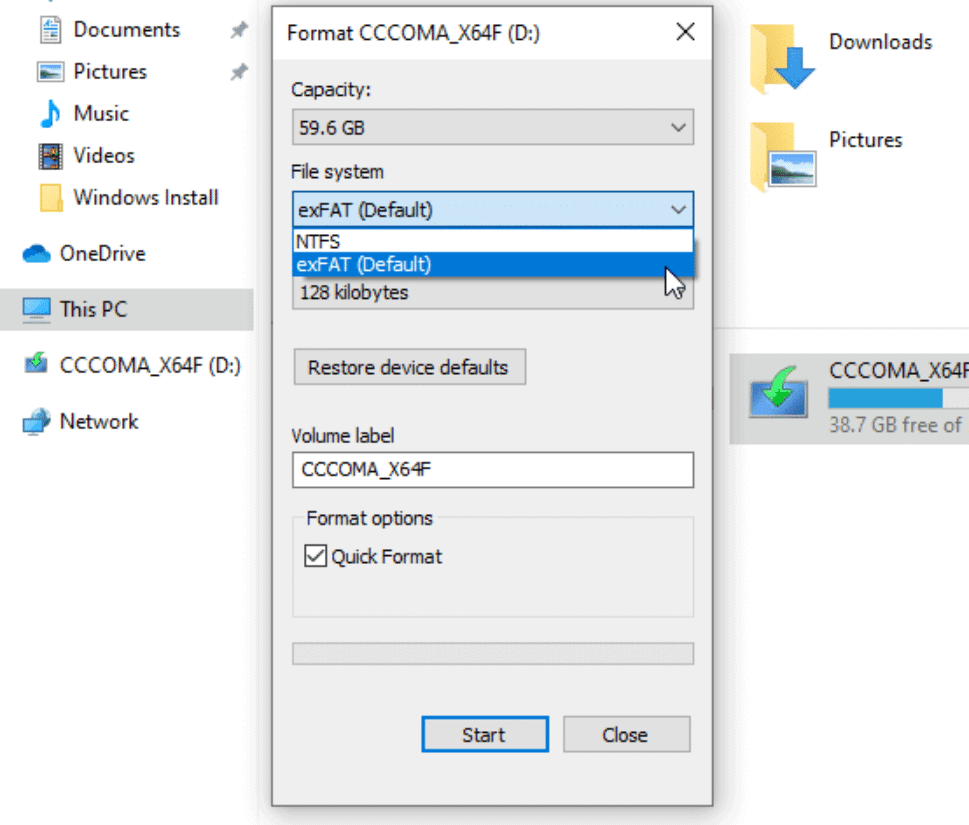
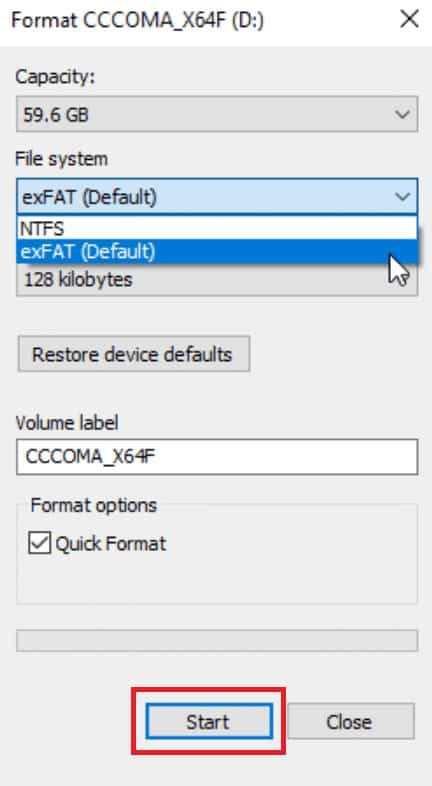
Make sure the File system is set to FAT32 or exFAT. You can do this by selecting the File system drop-down menu and selecting one of the other.
Step
Start the formatting process
Once you have selected Fat32 or exFAT as the file system, simply click Start at the bottom of the tab. This will start the formatting process, readying your flash drive for the installation tool.
WARNING – Formatting your drive will delete all the content.
That’s part 1 complete! Once the formatting is completed, you are ready to start the Windows installation process.
Setting your flash drive up for installation of Windows
Modern computers no longer require the need for a DVD-drive, and even though some users still use ROM drives, most people now rely on internet downloads or USB installations. But how exactly does one install Windows from USB?
Well, luckily it’s a pretty easy process. The following guide will show you exactly how it’s done on the most popular versions of Windows.
Step
Check what version of Windows to download
The first thing you need to do is find out whether your PC is going to run a 32-bit or 64-bit of Windows. You can check this by typing System in the Windows Search bar. Under the System Type tab, you will see 64-bit system or 32-bit system. This tells us what version of Windows to download.

Step
Ensure you have at least 4GB free on your flash drive
The size of the Windows installation is 4GB and thus you will need at least this on your flash drive.
Fortunately, flash drives are pretty cheap these days and you can grab a 16GB drive for around $10.
Step
Plug your flash drive into your computer
Start by plugging your flash drive into an available USB slot.
Step
Ensure your flash is formatted
As mentioned above, you need to ensure your flash drive is formatted before starting the installation process. If the flash isn’t formatted, go back to the format section, complete the tasks, then carry on with the setup.
Step
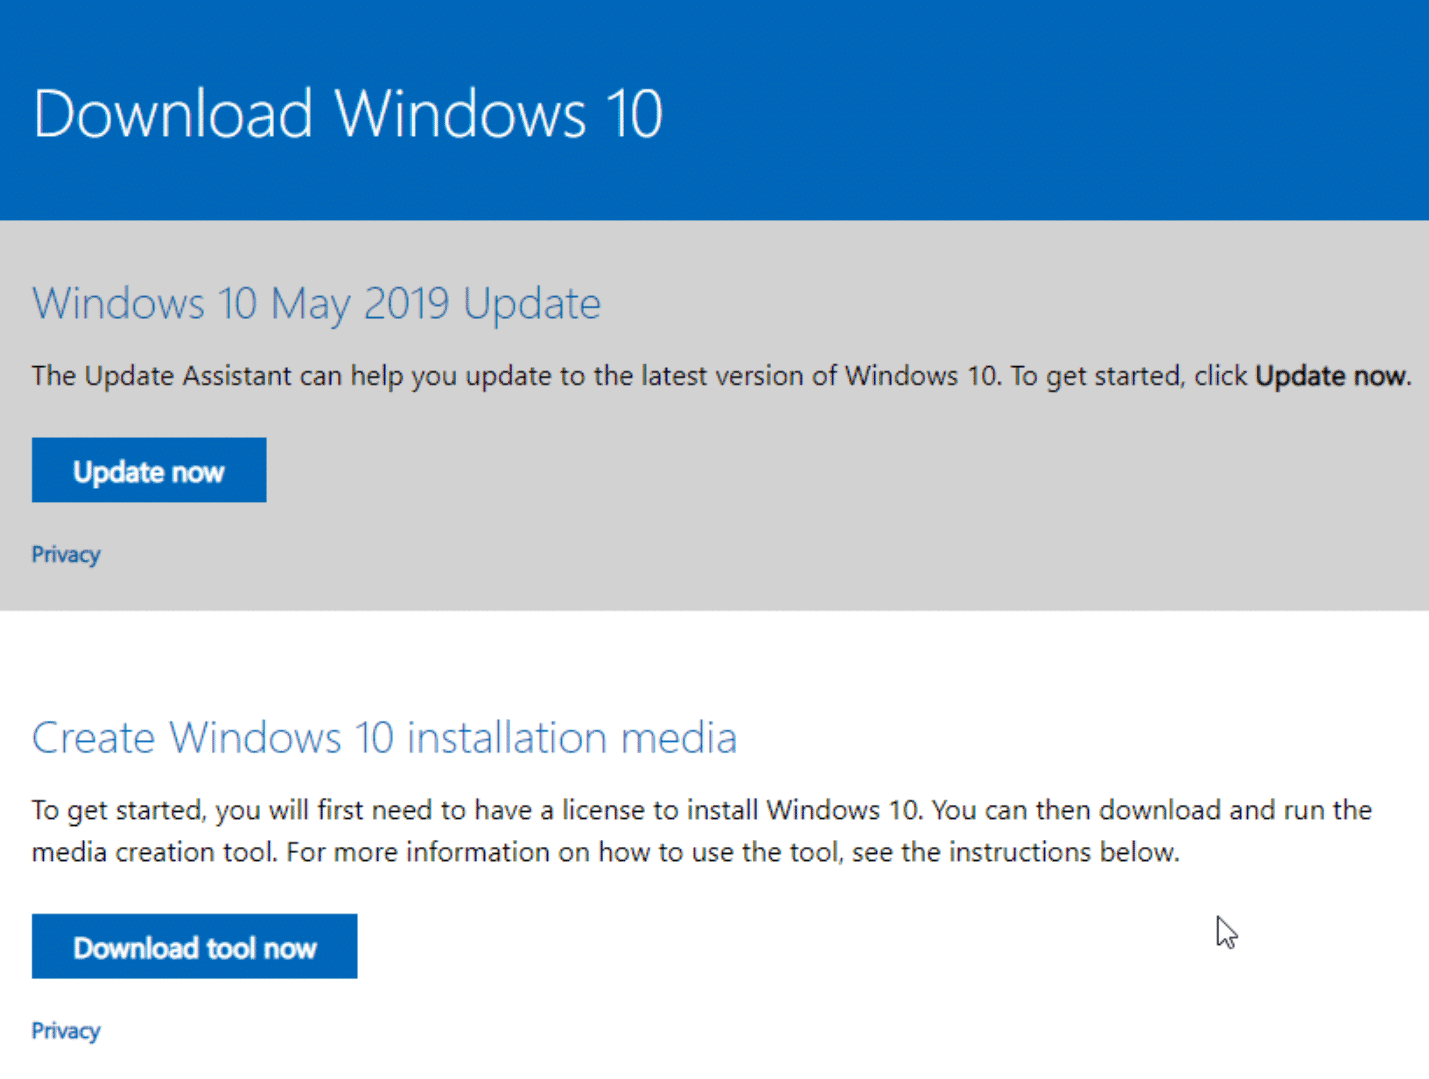
Download the Windows installation tool
Start by finding the Windows 11 or Windows 10 installation tool download page, then click Download tool now.
Step
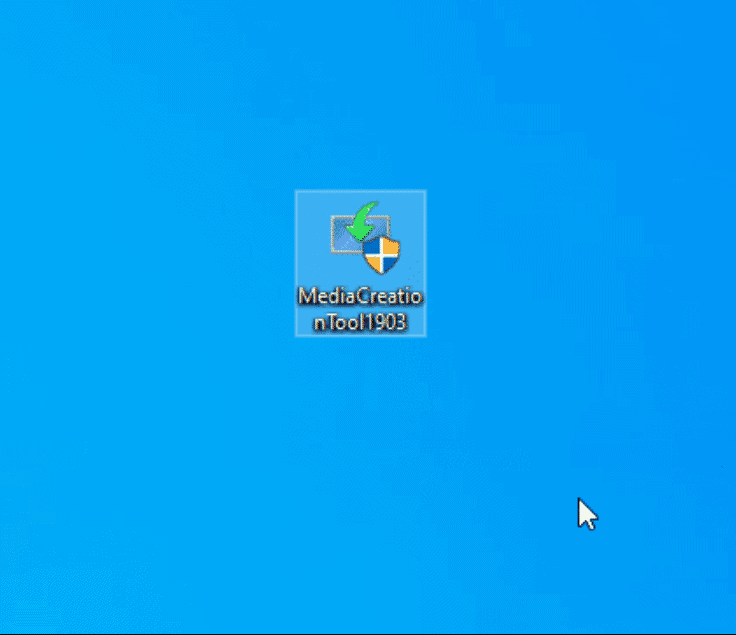
Once downloaded, run the installation tool
Find your download folder and double click the “MediaCreationtool” EXE file. When the file loads, simply install the tool and accept any terms.
Step
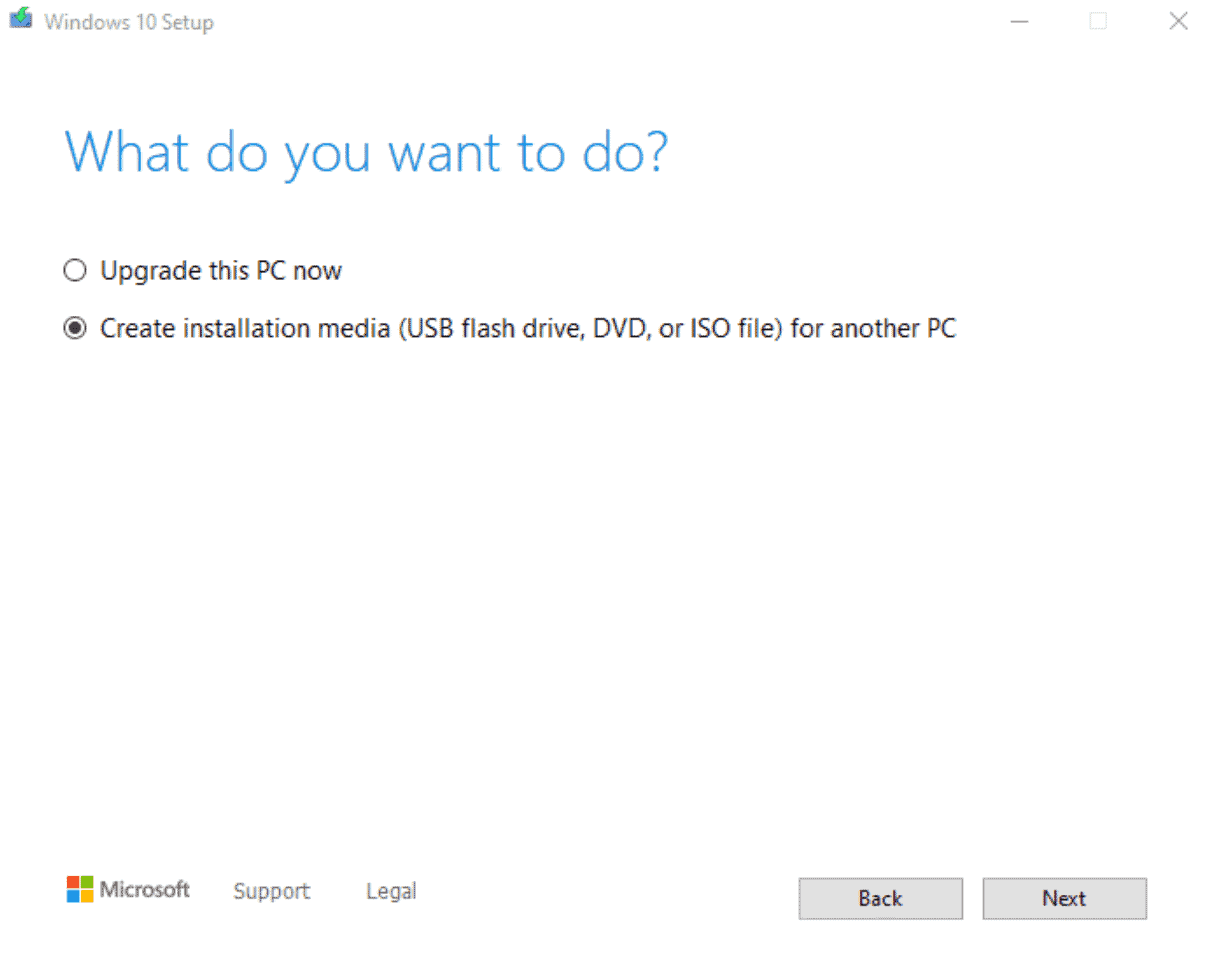
Creating your bootable drive
Once the installation tool has been installed, open the tool and click the Create installation media tick box.
Once selected, choose a language, Windows edition, and the architecture of the system. Click next and select your flash drive from the options available.
Step
Downloading Windows
This will start the Windows download process and will set your flash drive up for installation. This stage can take several minutes. Once completed, you are ready to change your computer’s boot order and start the installation process.
Changing your computer’s Boot Settings
To be able to start the installation process, you must first set your PC to boot from the flash drive. This will bypass your current installation of Windows and load the Windows installation tool from the flash.
Step
Enter the BIOS of the computer you wish to install Windows on
As soon as you press the power button to turn the computer on, start to mash the DEL or F2 button to access the BIOS. If Windows loads up or you didn’t get into BIOS, you need to re-do this step until you enter BIOS.

Step
Once inside the BIOS, locate boot options
All motherboard BIOS menus are different, but ultimately they have the same settings. In your specific motherboard BIOS find the boot options tab, and enter it.
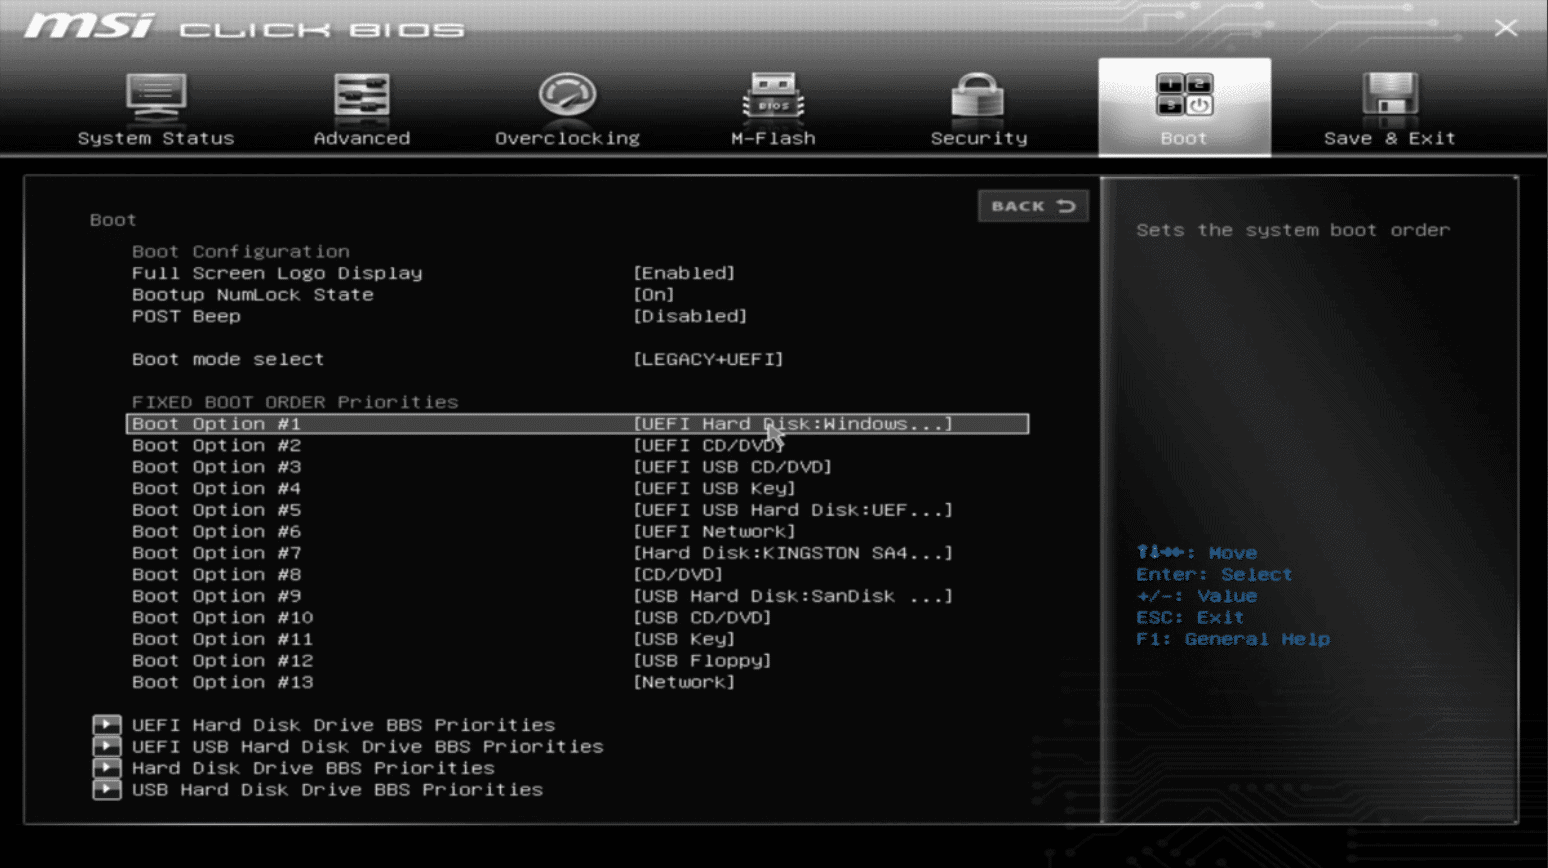
Step
Select your Flash Drive as primary boot
Inside the Boot options, you will be able to select the flash drive from a drop-down menu. You should be able to select it for primary boot, or boot option 1.

Step
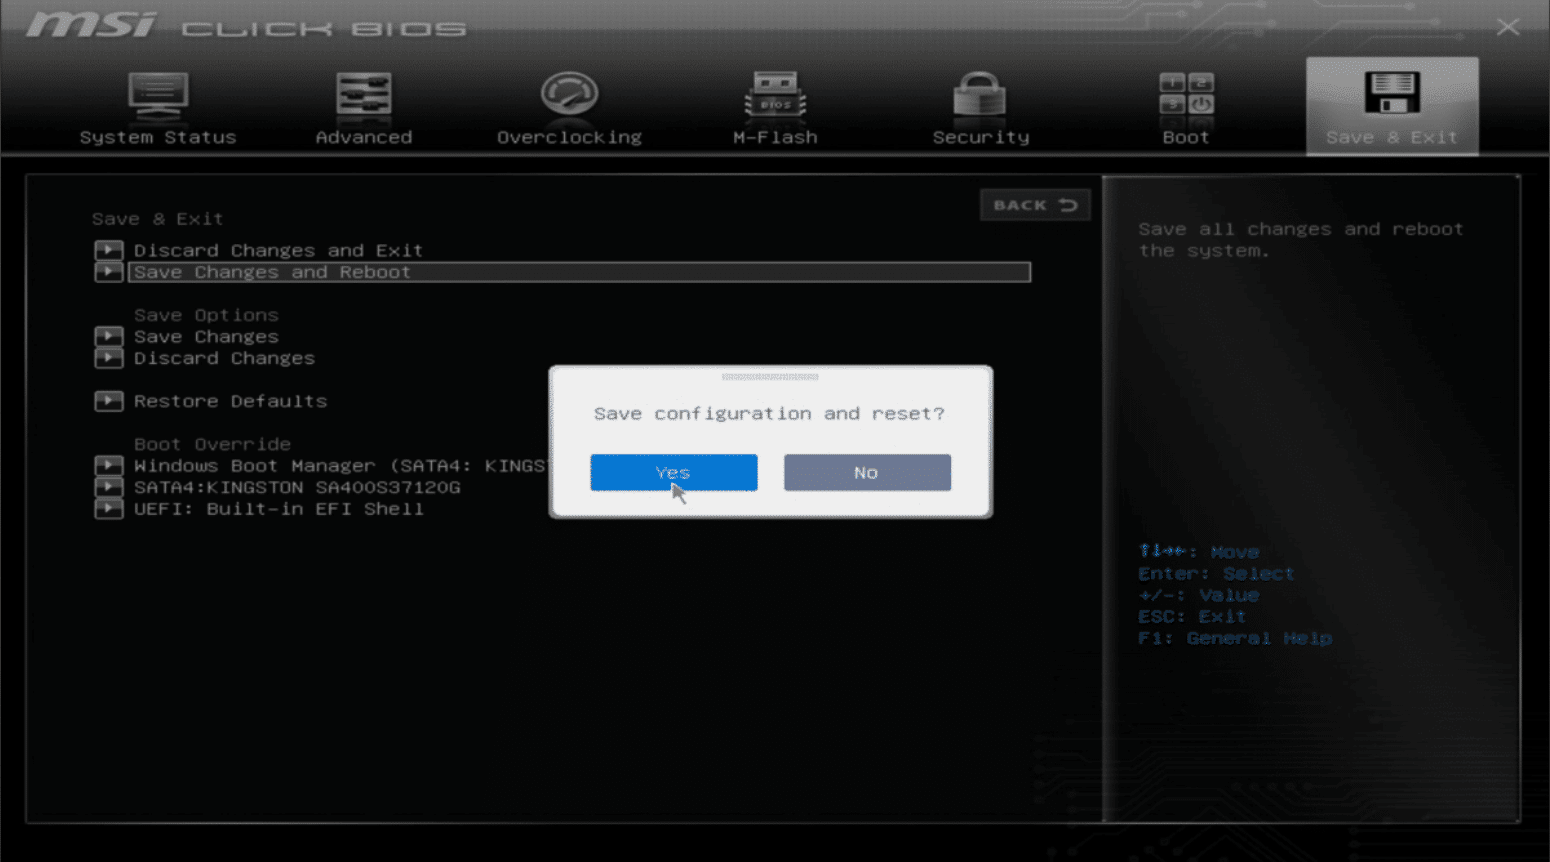
Save and restart your computer
Once you have changed the boot option to your flash drive, simply save your BIOS settings and reset the PC. This is usually done by pressing F10.
How to install Windows
So, by now you should have successfully formatted your flash drive, downloaded and installed the Windows installation tool, and set your boot options to load from your flash drive.
If you have done the above steps successfully, you should be ready to install Windows.
Step
Entering the installation process
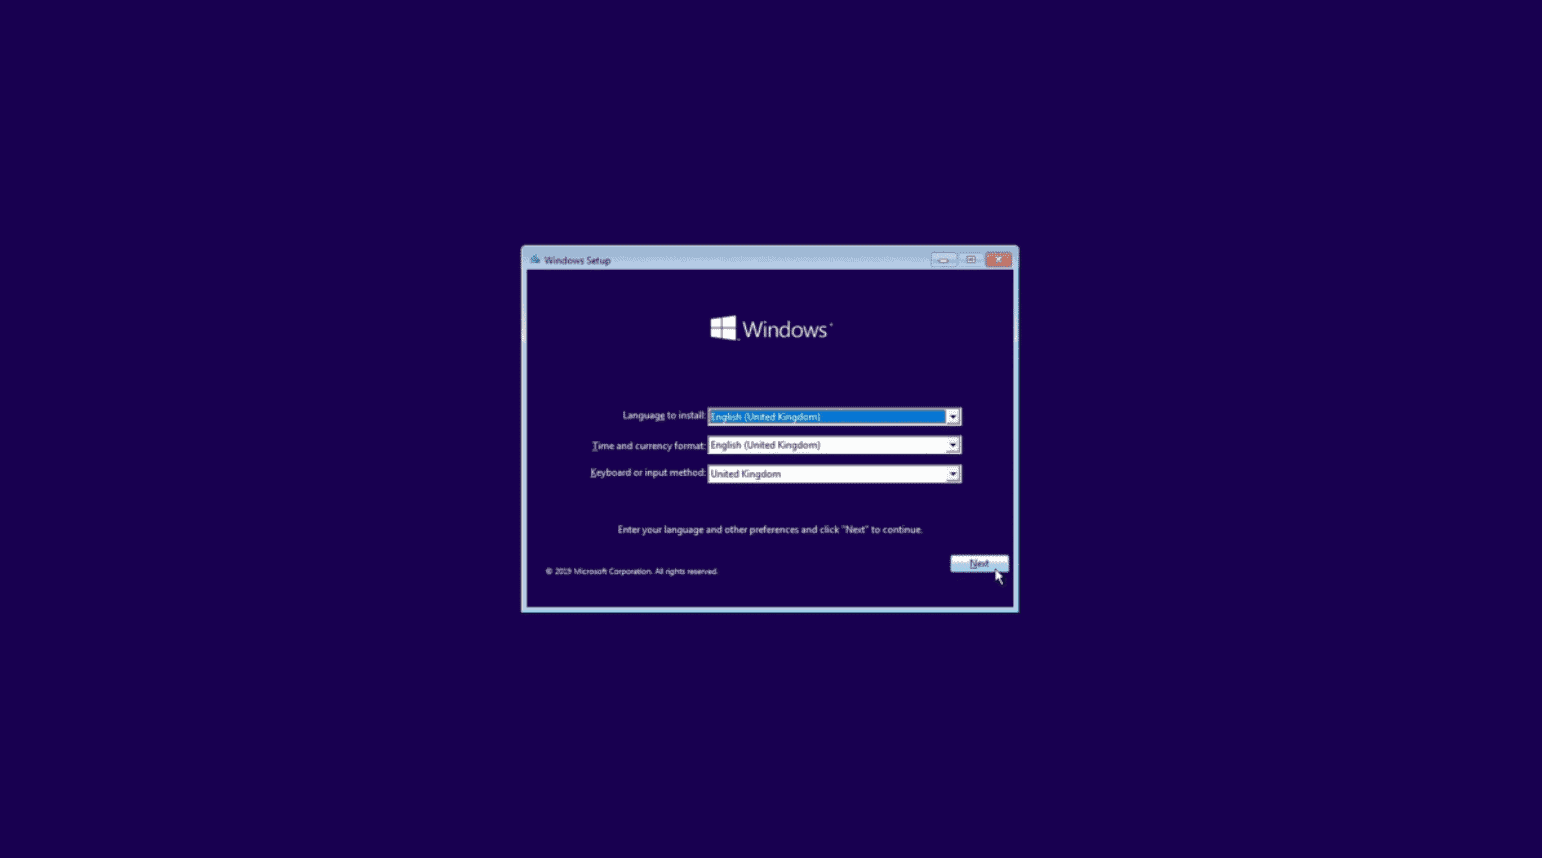
By now your computer should be set up for booting off the flash drive and your PC should be restarting. If so, excellent news.
If you have done all the above steps correctly, you will see the above screen. This is the start of the Windows installation. Simply start by selecting a language and clicking next.
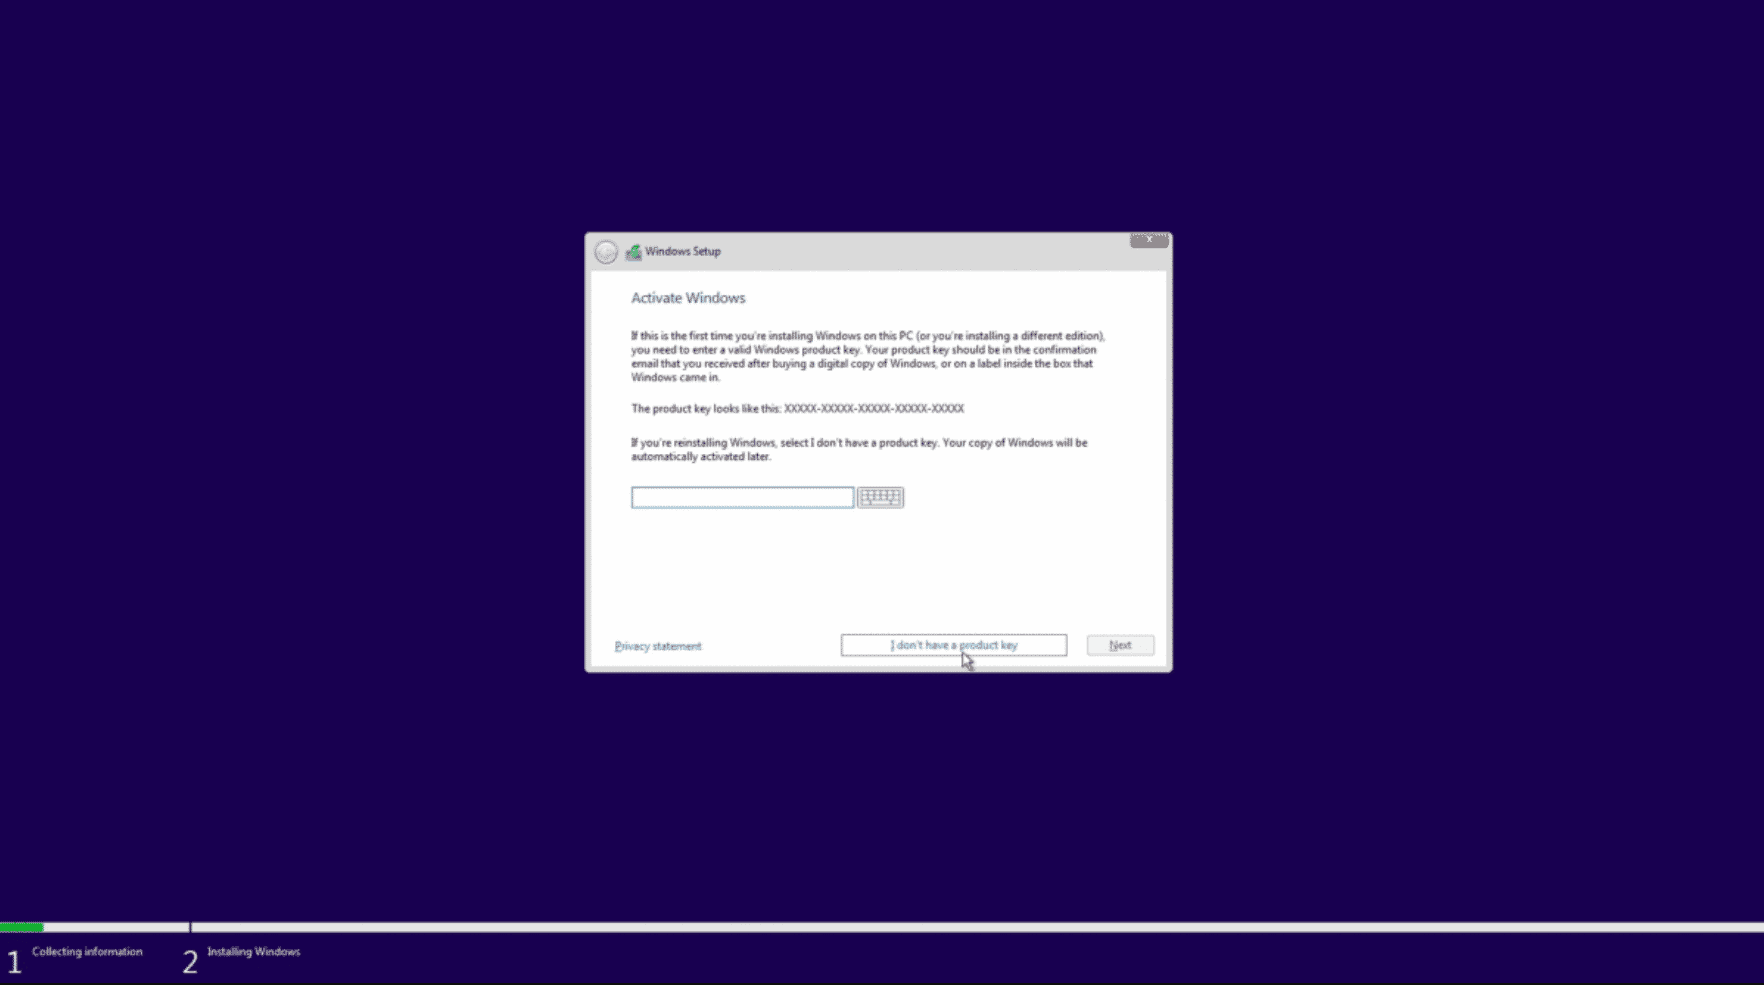
Step
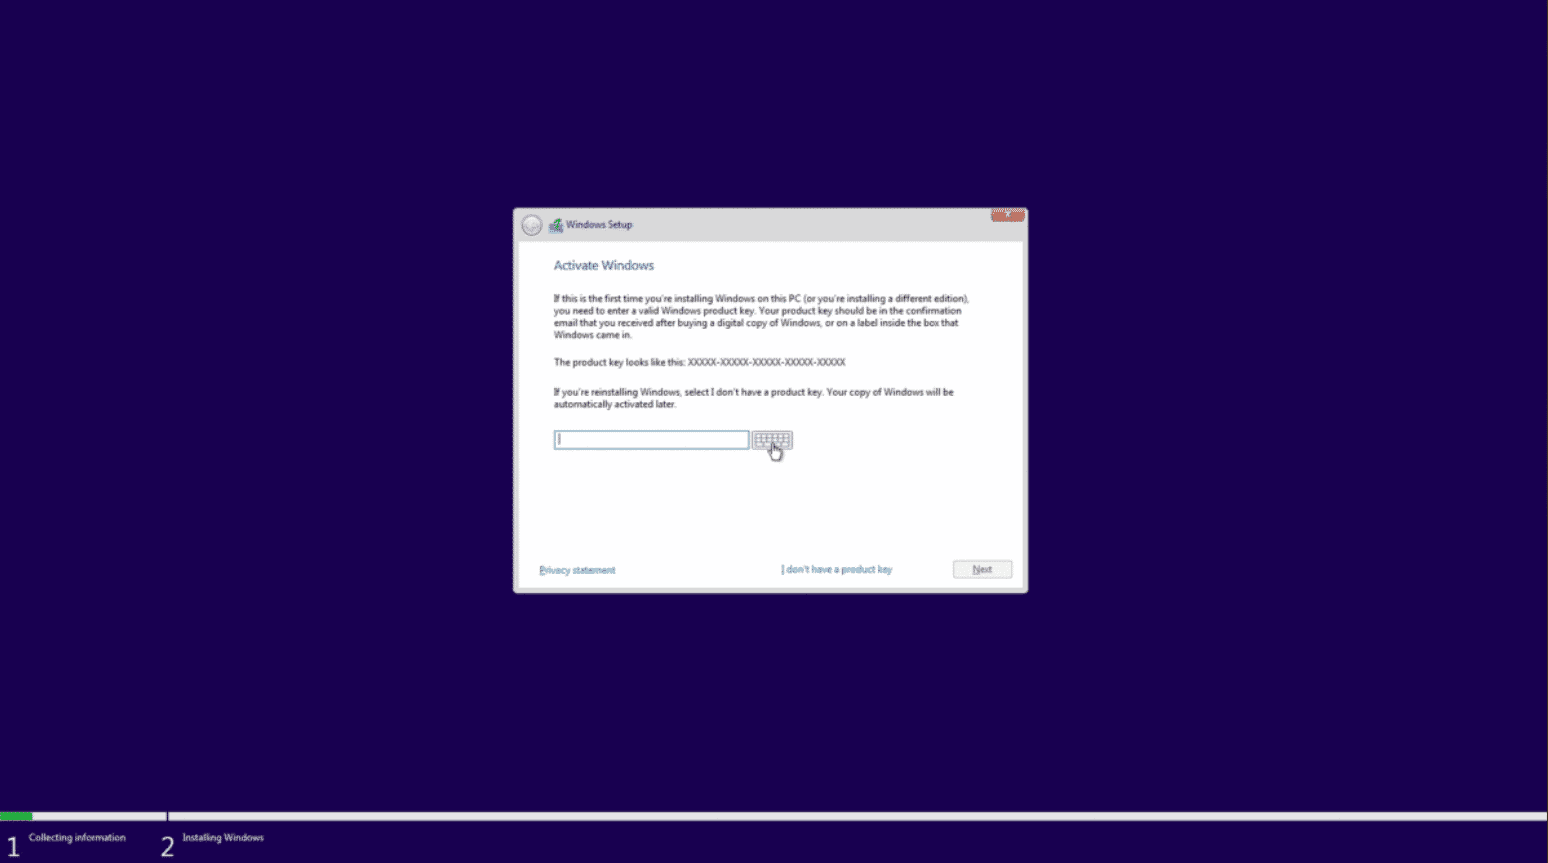
Start installation and activate Windows
Click the install now button which appears, this will take you through to the activation screen where you can enter your product key to activate Windows.
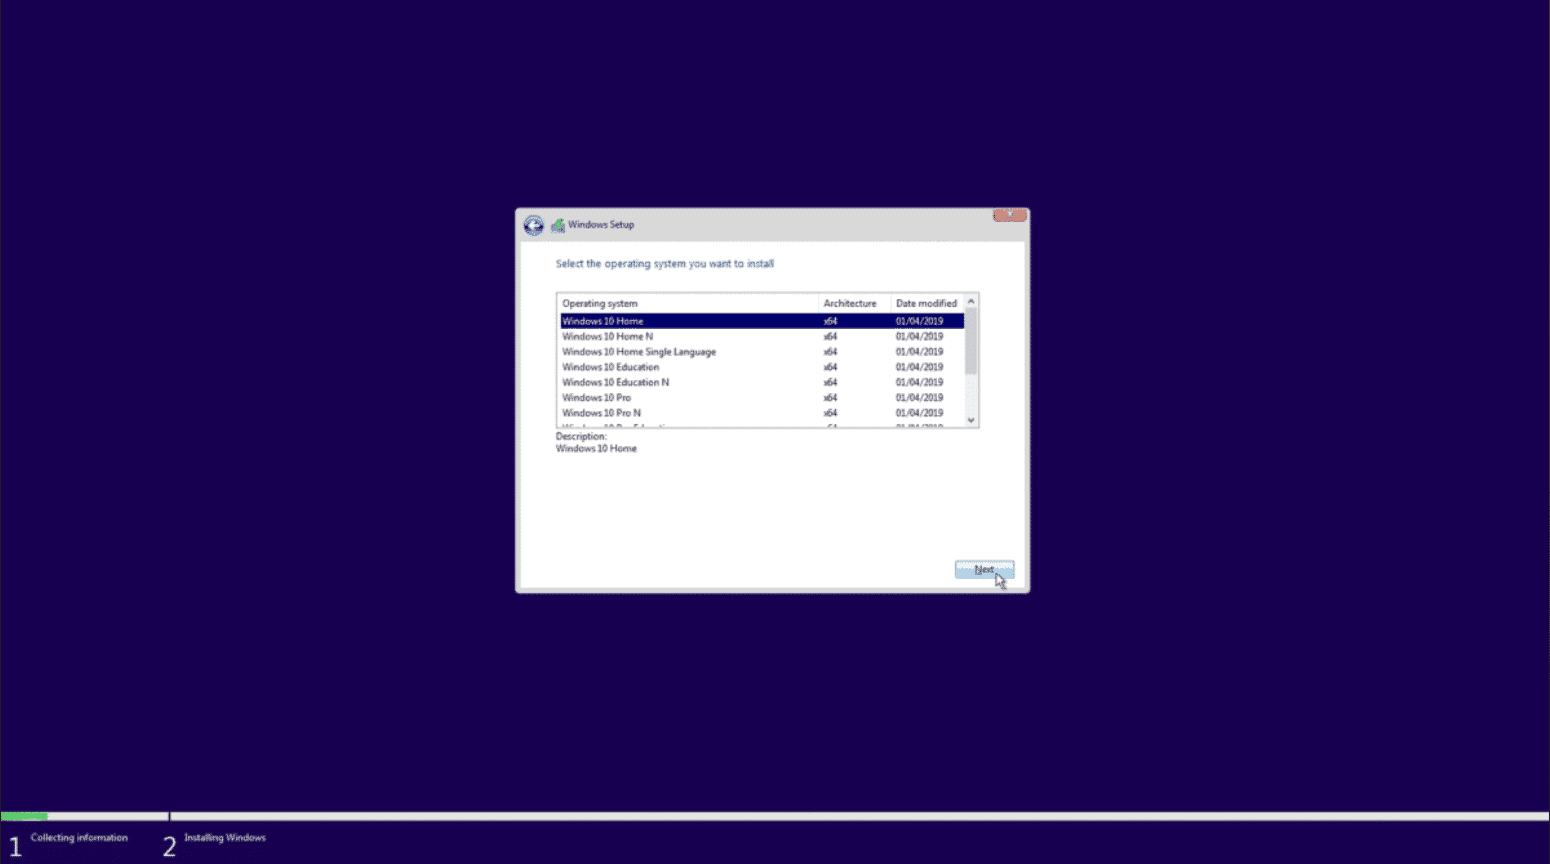
Step
Choose your edition
Next, Windows will give you a list of Windows versions to choose from. Choose the required edition of Windows and click Next.
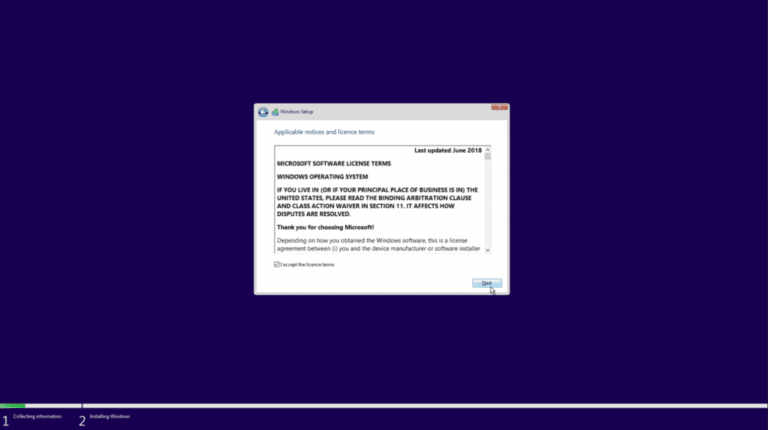
Step
Agree to the licensing terms
You will be asked to read and agree to the licensing terms. Simply read, or just scroll to the bottom of the text, and click next when you are satisfied.
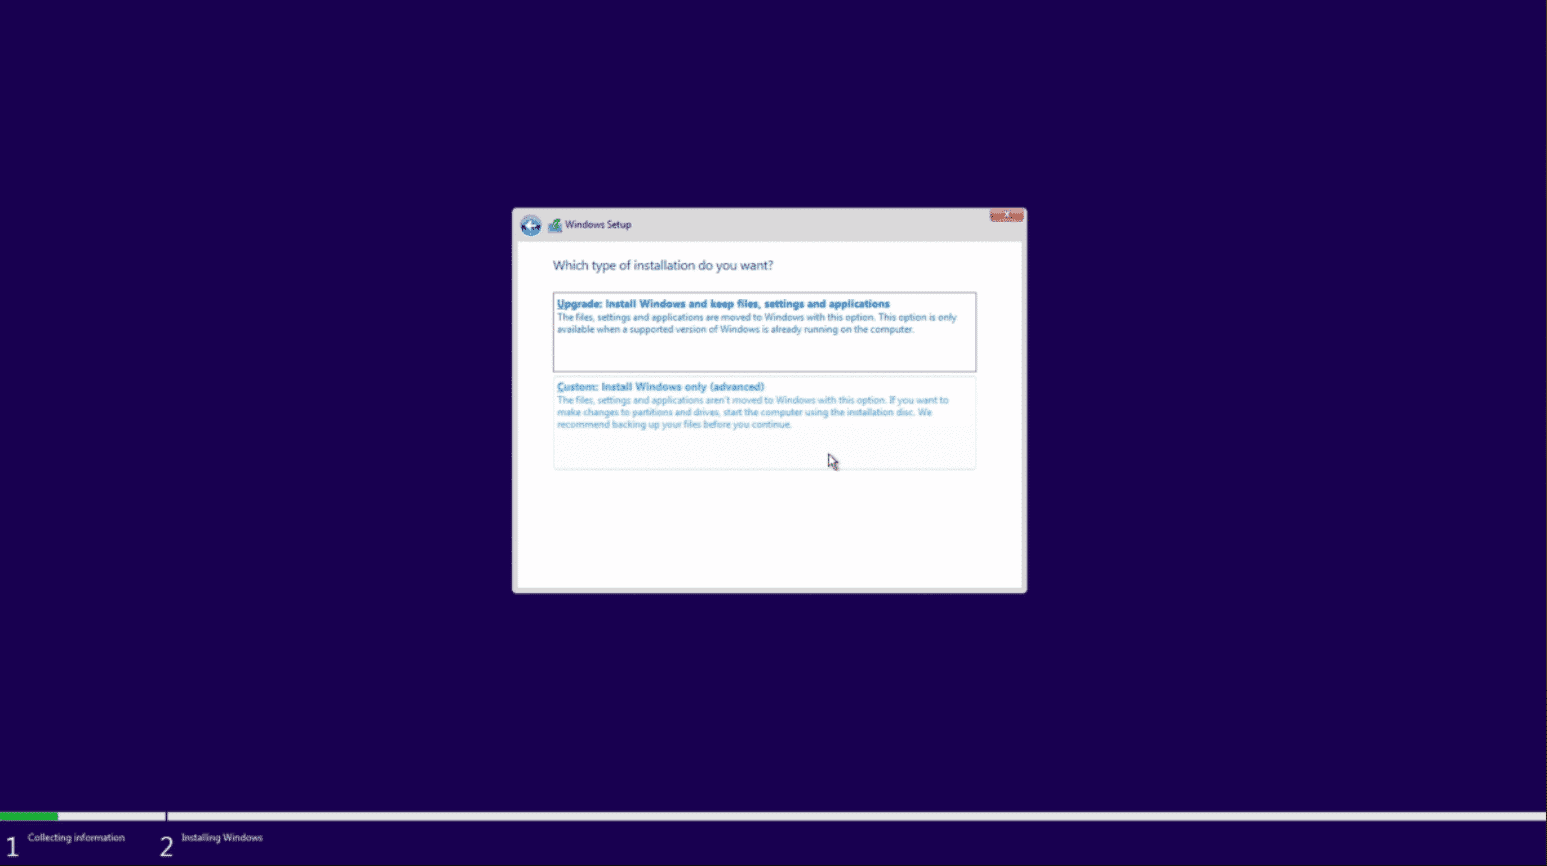
Step
Choose the Windows Setup type
You have two options to choose from, upgrade or custom. For new PC builds choose custom and click next.
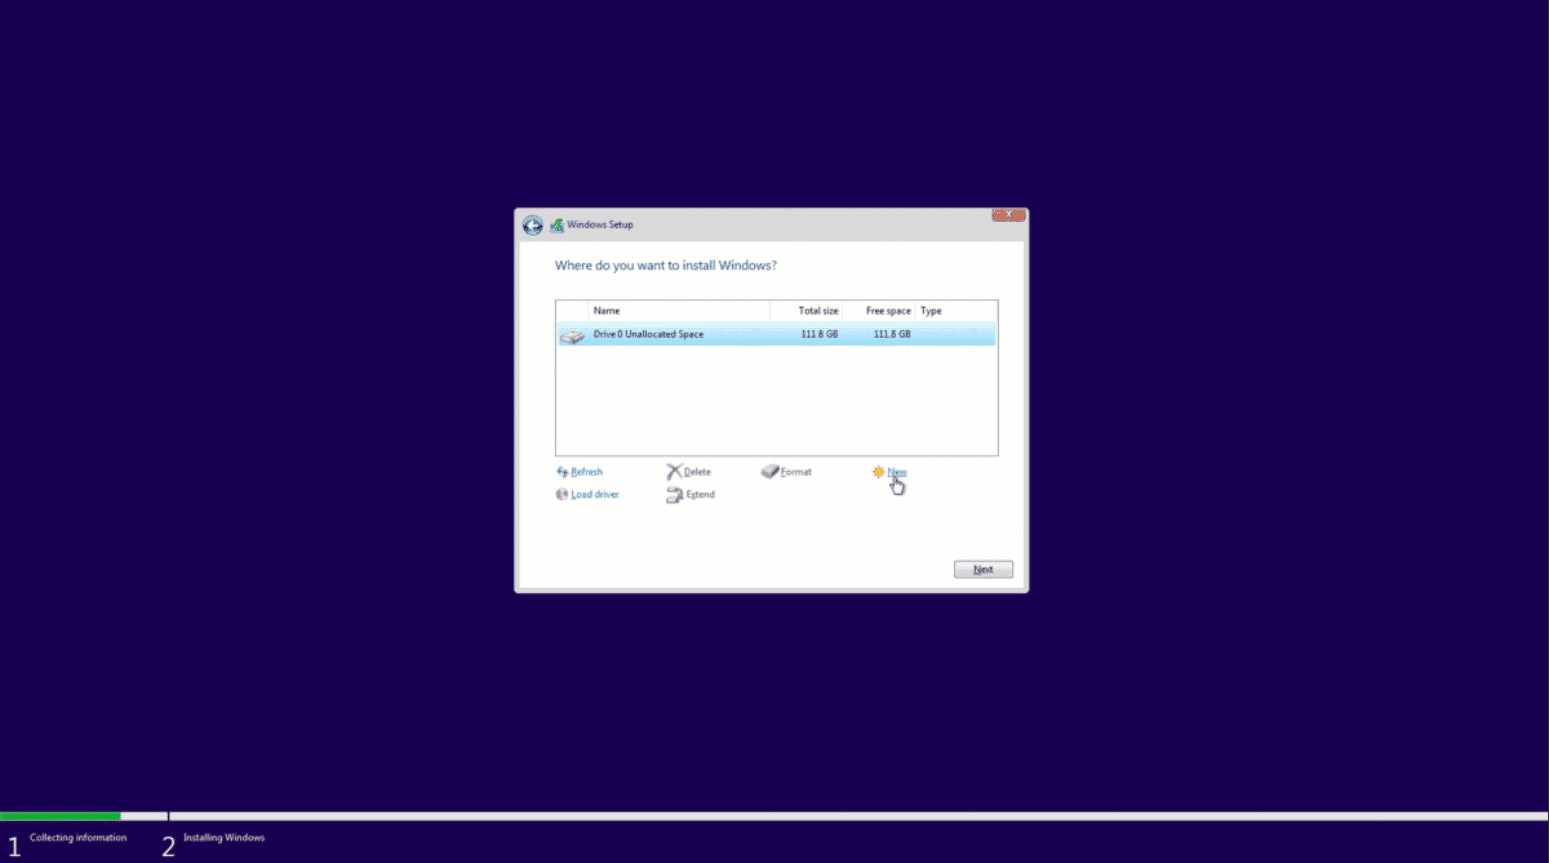
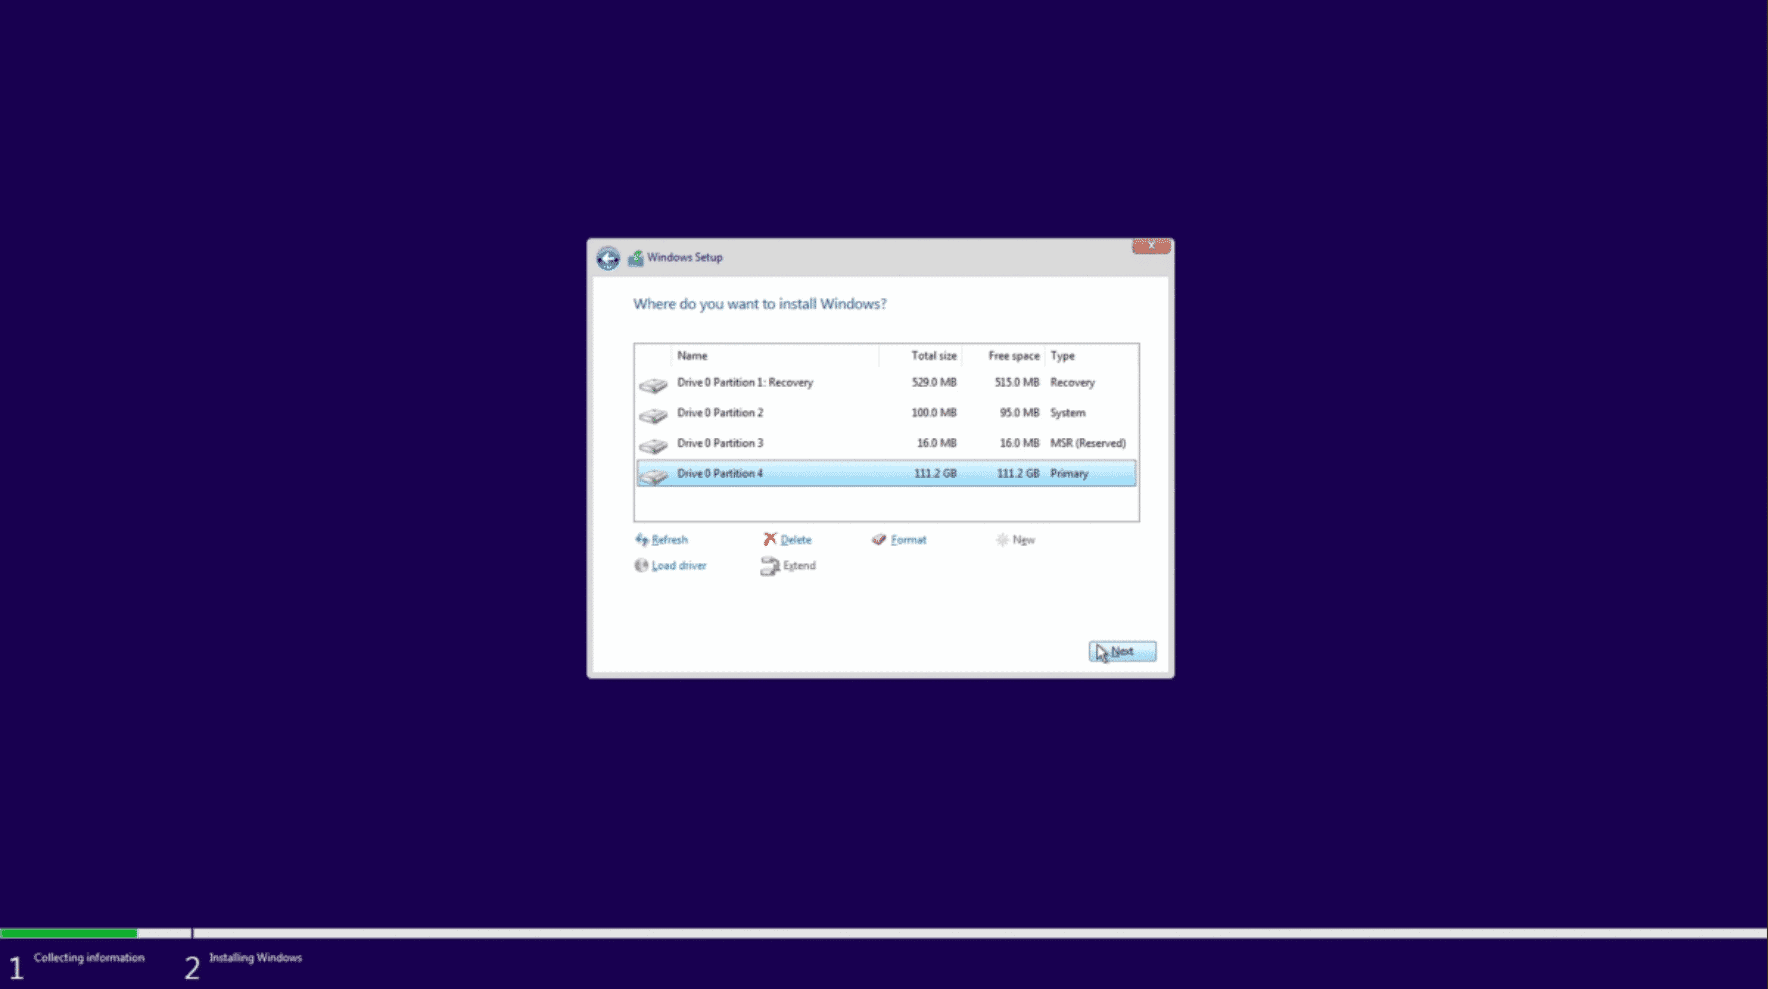
Step
Creating the partitions/drives
This is where you create the primary and recovery drives for Windows. Simply select new in the bottom right-hand corner of the page and click apply.
Step
Start the installation process
Once the partitions have been created, you can click next which will start the installation of Windows.
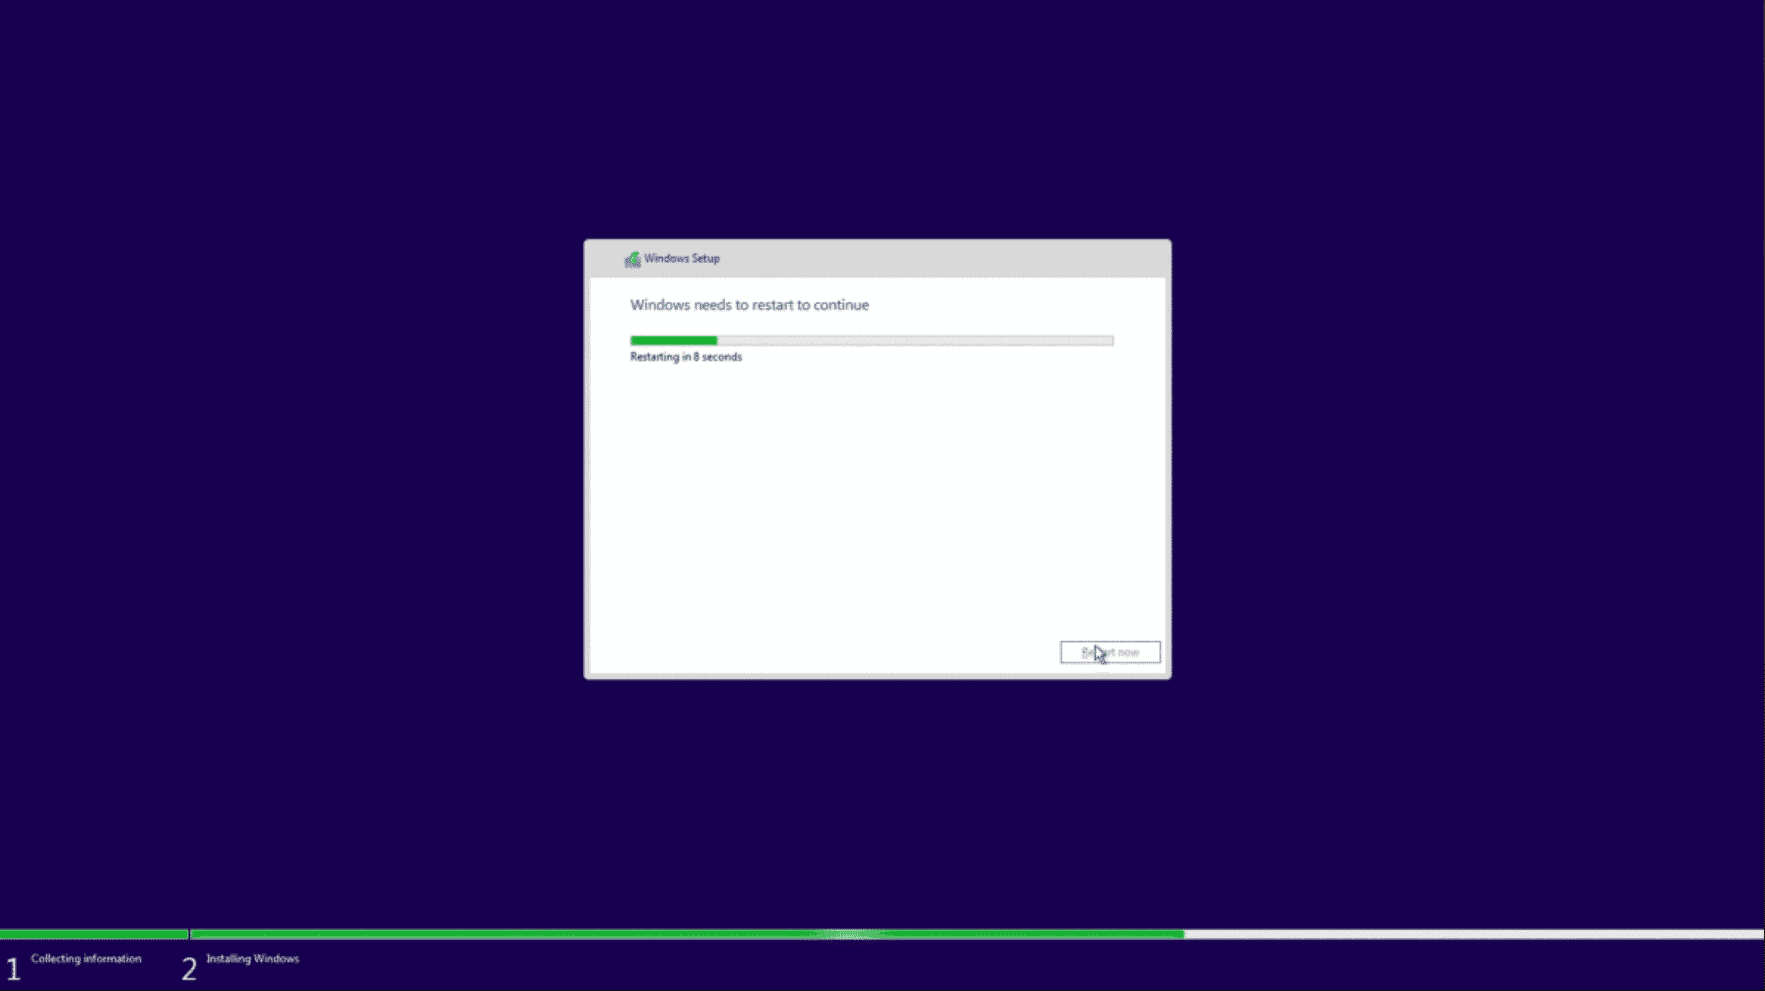
Step
Finalize the installation
Once Windows has finished installing it will automatically restart your computer. This signals the completion of Windows install. Once your PC reboots you will be following a setup guide. Once completed, Windows should be installed and ready to use.
How to install Windows for free
So, you’ve got this far and you’re pretty confident you can install Windows on to your new computer. The only problem is, you haven’t quite got the bankroll to afford a copy of Windows at this very moment. If that’s the case, don’t worry, there might be a alternative solution to keep you going until you can afford it.
We’ve decided to compile a shortlist of ways you can utilize Microsoft’s operating system for free.
Let’s take a look at how it’s done.
Step
Use Windows without activating it
The easiest and most practical way of getting Windows for free is to simply use it without activating it.
Ok, don’t worry, your system isn’t going to shut down after 30 days, neither will Microsoft lock you out of applications. The worst that will happen is a watermark will appear on your desktop asking you to activate your Windows. You’ll also be blocked from customizing your desktop.
Apart from that, you pretty much have a fully operational version of Windows.
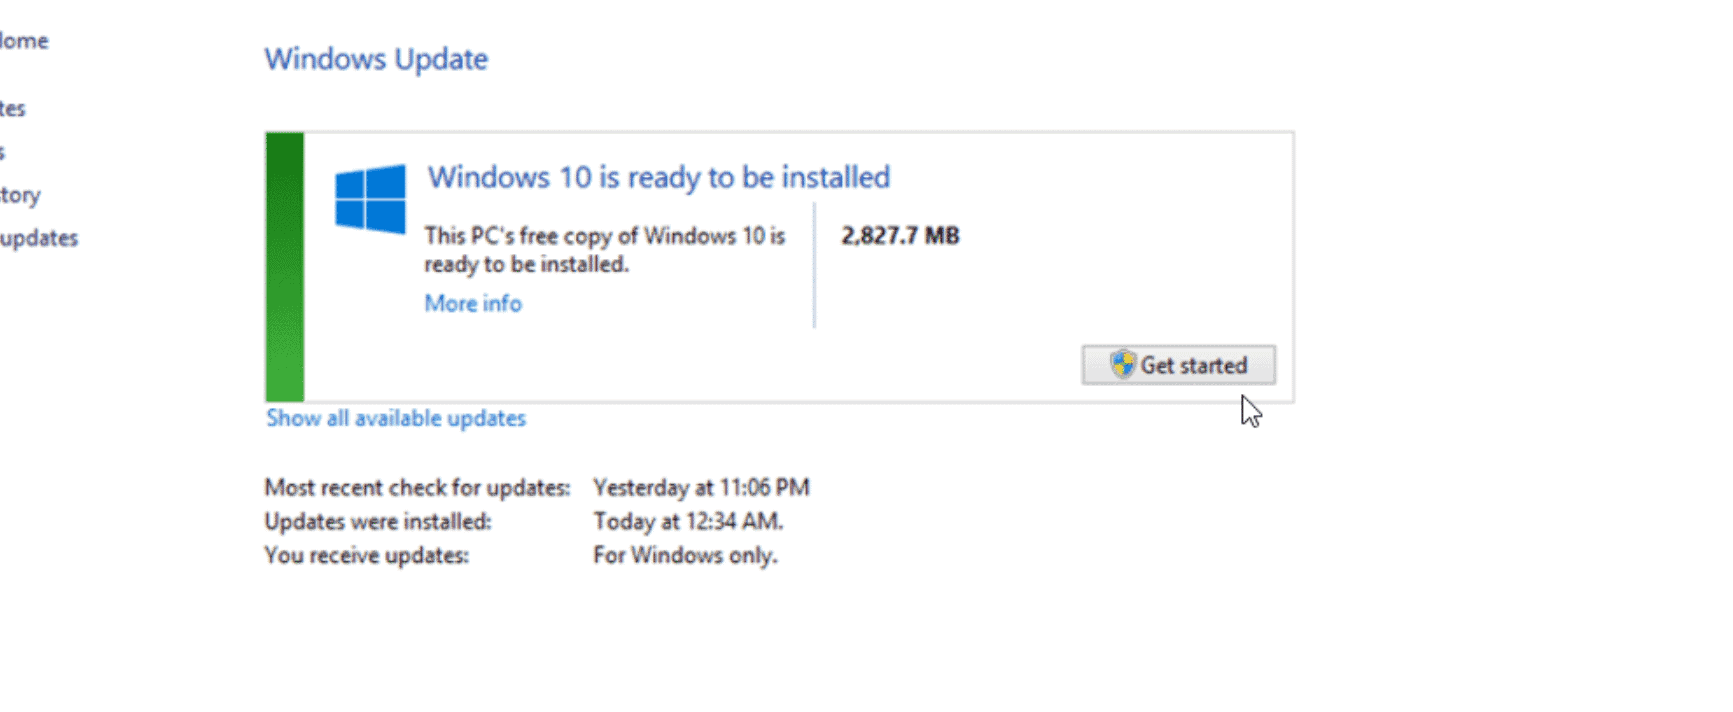
Step
Upgrading from an older version of Windows
If you’re looking to upgrade from an older version of Windows, try the old free upgrade route, I’m pretty sure it still works for some folks.
When Windows 10 was first introduced, Microsoft allowed users of old versions to upgrade to the latest version for free. They would simply run Windows update and it would prompt them to install the latest version of Windows, free of charge.
Luckily for some, this method still works. Try running your Windows update and seeing if you are prompted with the free upgrade. If so, great!
Step
Student’s free Windows
Microsoft has been offering free versions of Windows to students for a while now, and it’s a sure way of getting a copy at no cost. It may not be a fully-fledged version of Windows home, but it certainly does the job for most people’s needs.
You need to prove you are a student via the OnTheHub service, but when you do, you have the chance of snagging yourself a free copy of Windows Education. Well worth a go.
How to install Windows on a new drive
The majority of people reading this article will be searching out how to install Windows onto a brand new PC. Having said that, plenty of people find themselves in a situation where transferring Windows from one drive to another is essential.
For those people, we’ve put this simple guide together on how to install Windows on a new drive. Below is a list of scenarios where you might want to transfer your Windows.
- A failing hard drive needs urgently replacing
- Your drive is running low on disk space and transferring all the data is the only option left
- Migrating Windows to a much quicker SSD
If you’re one of those people, we recommend using a migration tool such as EaseUS or MiniTool. They make the process extremely simple and come at no additional cost.
For this example, we’re going to use EaseUS Todo Backup.
Step
Start by following the above link and installing the software
First things first, install the migration tool. Simply download the .EXE file and install it. Restart your computer once it has installed.
Step
Run the tool
Once your computer has restarted, simply double-click the EaseUS icon to load it.
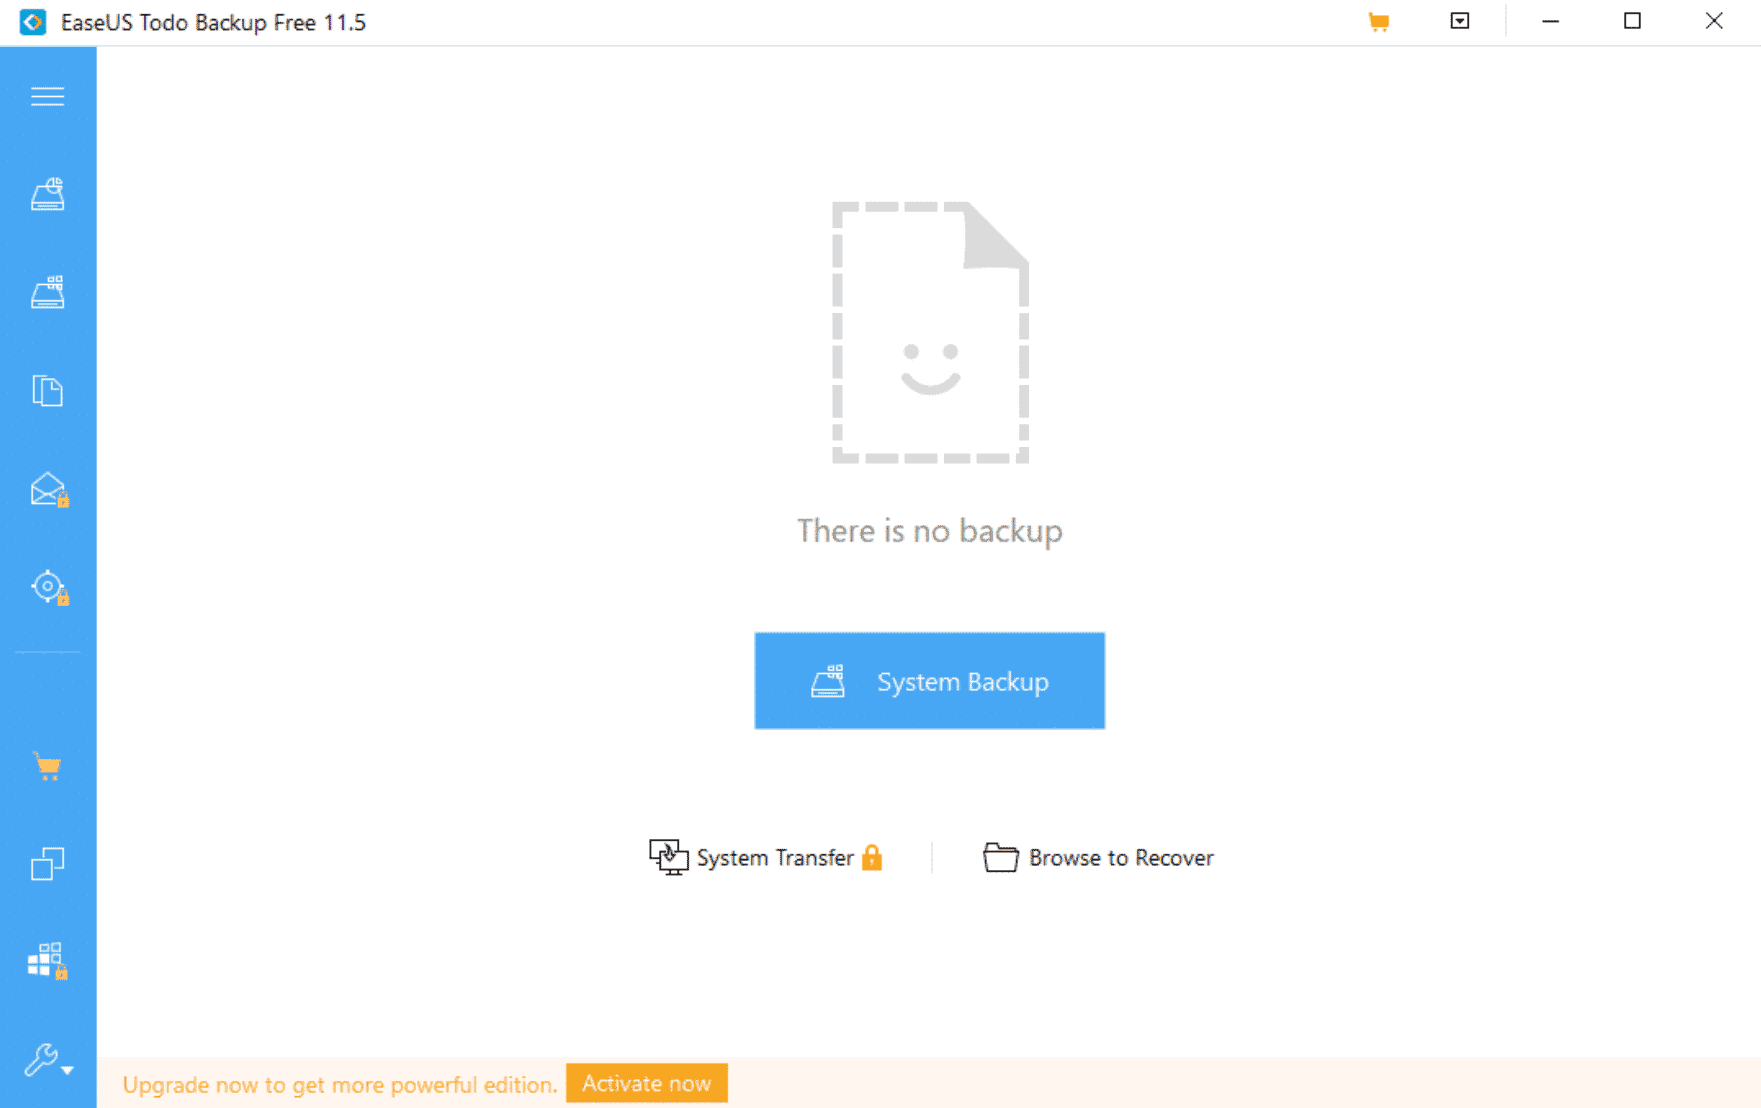
Step
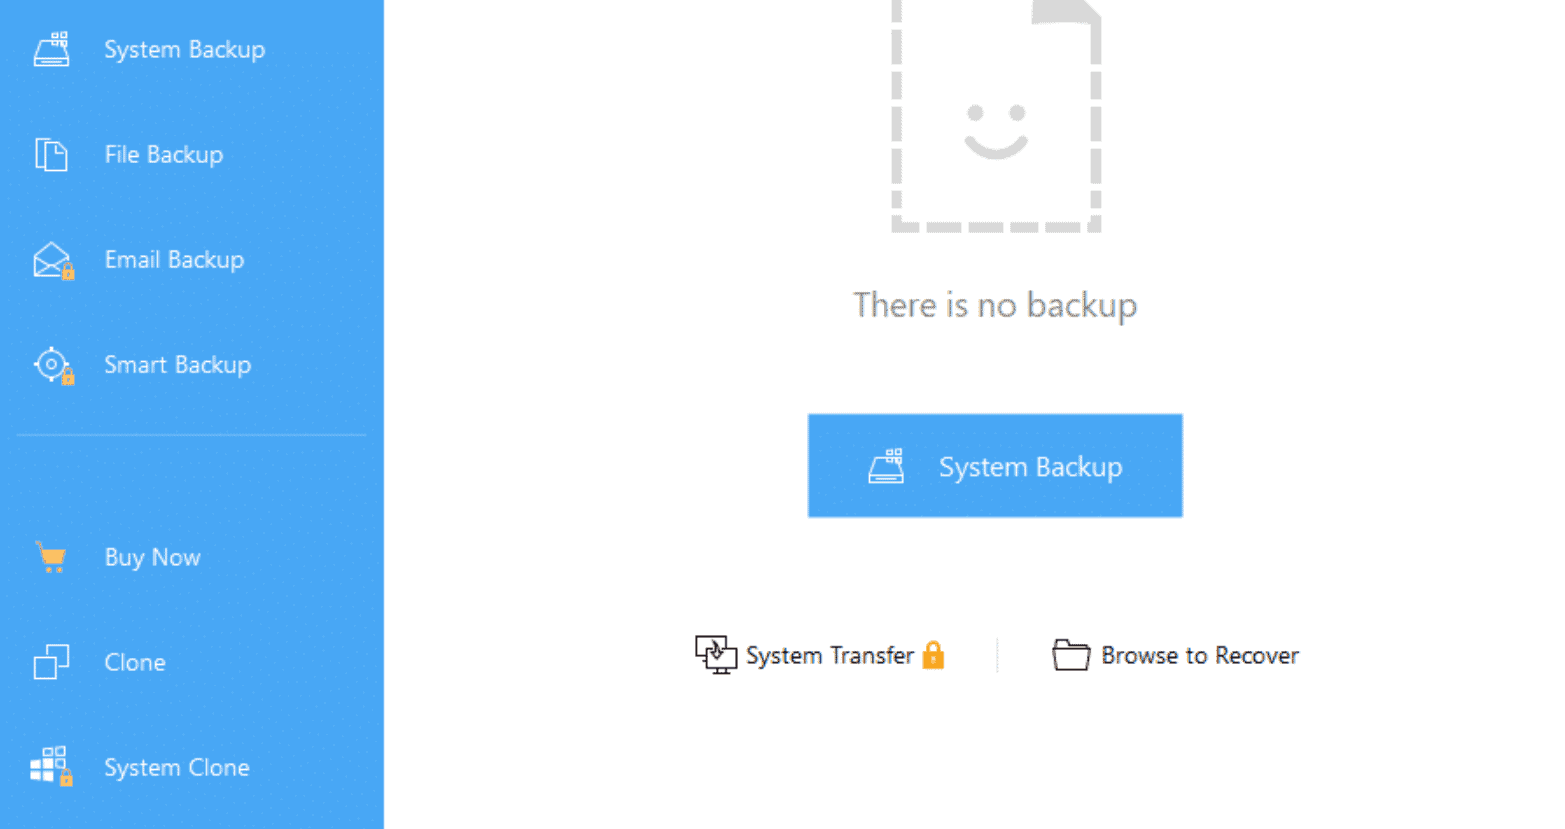
Select System Clone
On the menu you should see a tab for System Clone. Select the System Clone tab. Once selected, click the System transfer tab.
Step
Choose your original Windows disk
It will ask you to choose a source for the new data. Simply select the old storage device. Once done, you will need to choose a destination for the transfer, this is where you select the new drive. Once selected click proceed.
Step
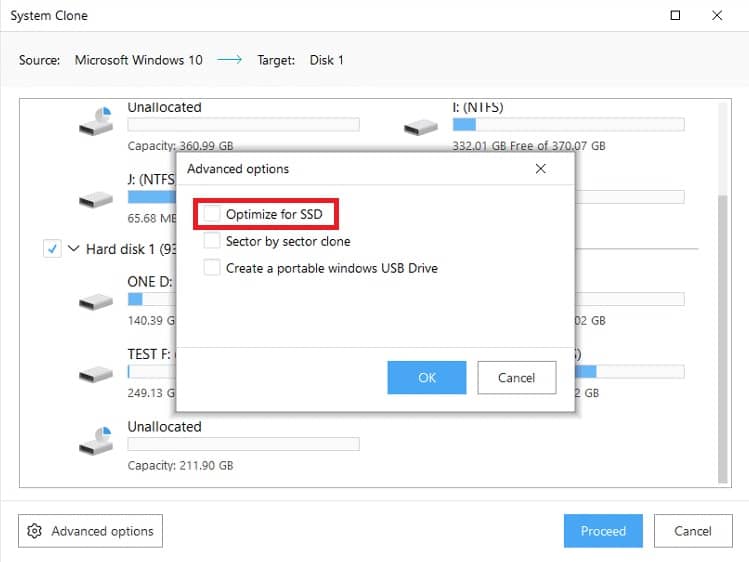
Optimize for SSD
You will be greeted with a popup box of advanced options. Tick the Optimize for SSD box. Click OK and the cloning tool will begin.
Step
Transfer completed & Final steps
When the tool finishes the transfer, you will be prompted with the data. Simply restart your computer at this stage to finalize the process.
At this stage, you might need to change your primary boot option for your computer. This will ensure that the new Windows is booted instead of the old drive.
Simply follow the steps in the ‘Changing your computer’s Boot Settings‘ section above to change your primary boot drive.
Re-installing a clean version of Windows
For most people, re-installing a clean version of Windows means completely reformating your computer and starting fresh.
A lot of people go through this process because they are encountering major problems with their operating system. This is usually caused by viruses and trojans. Alternatively, you might just want to clean out your computer of any clutter. If this is the case, a clean install is certainly the most efficient way to go.
For the most part, following part 4 of this guide will achieve this goal. However, if you don’t want to go through the effort of preparing a USB flash drive and setting the boot options in BIOS. Simply perform a system reformat which removes everything from your PC.
Below, is a simple guide on how to do a system reformat.
Step
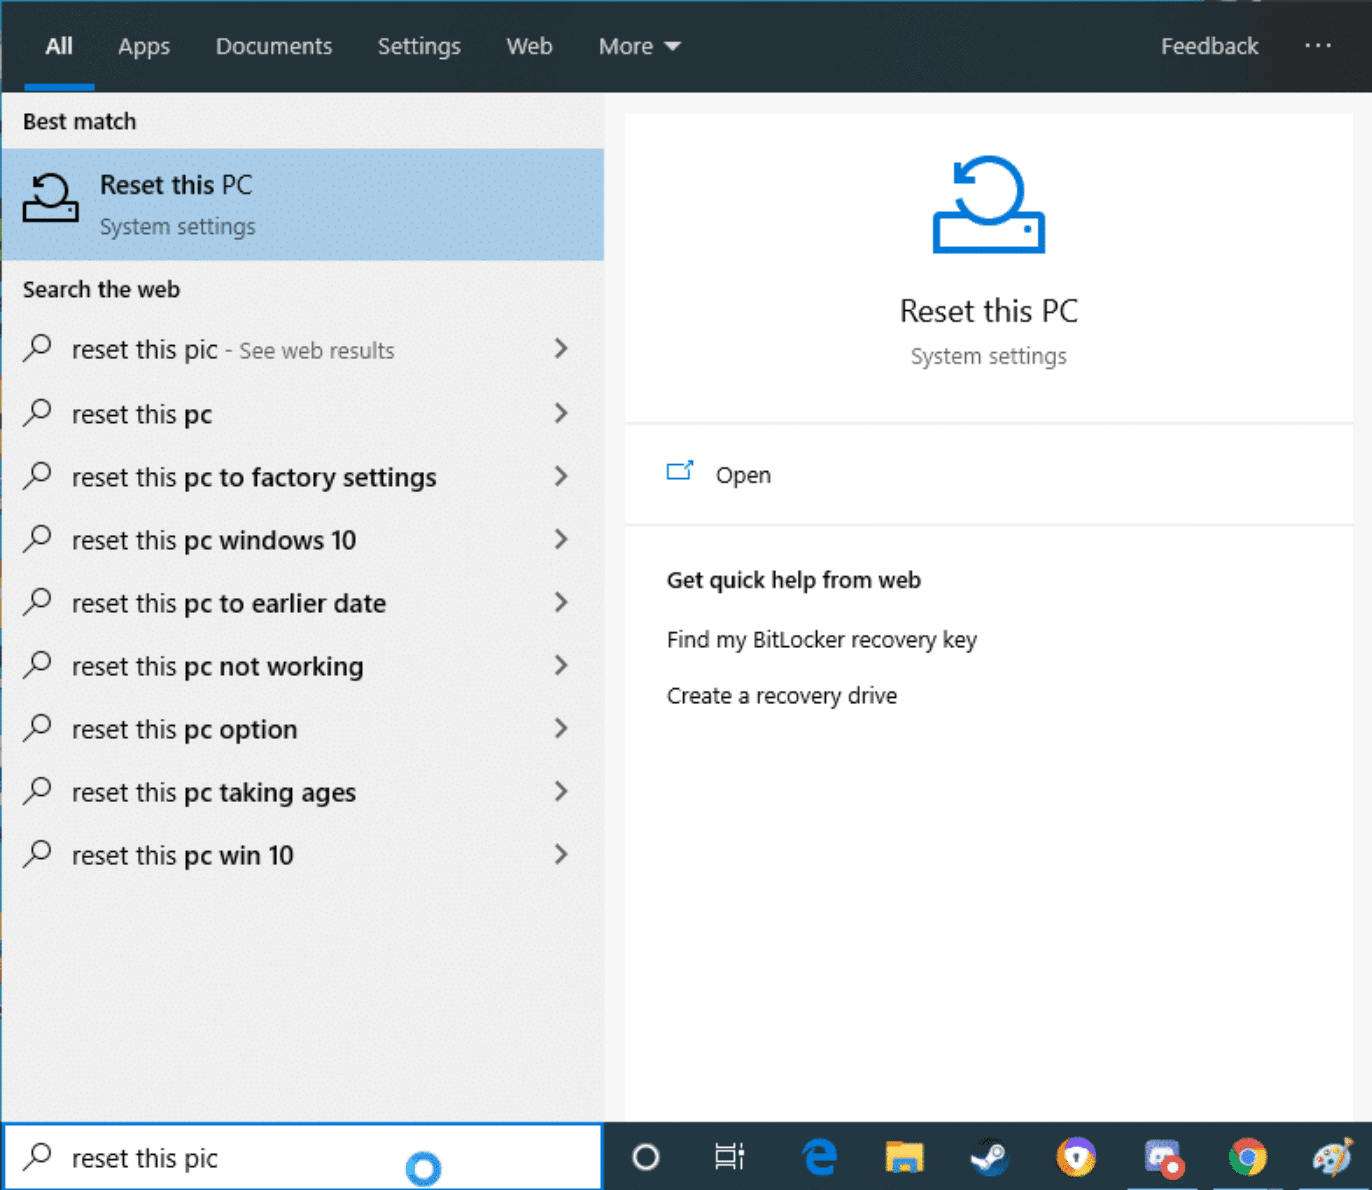
Search for ‘Reset this PC’ in Windows search
In the bottom left-hand corner of your Windows, search for Reset this PC and press enter.
Step
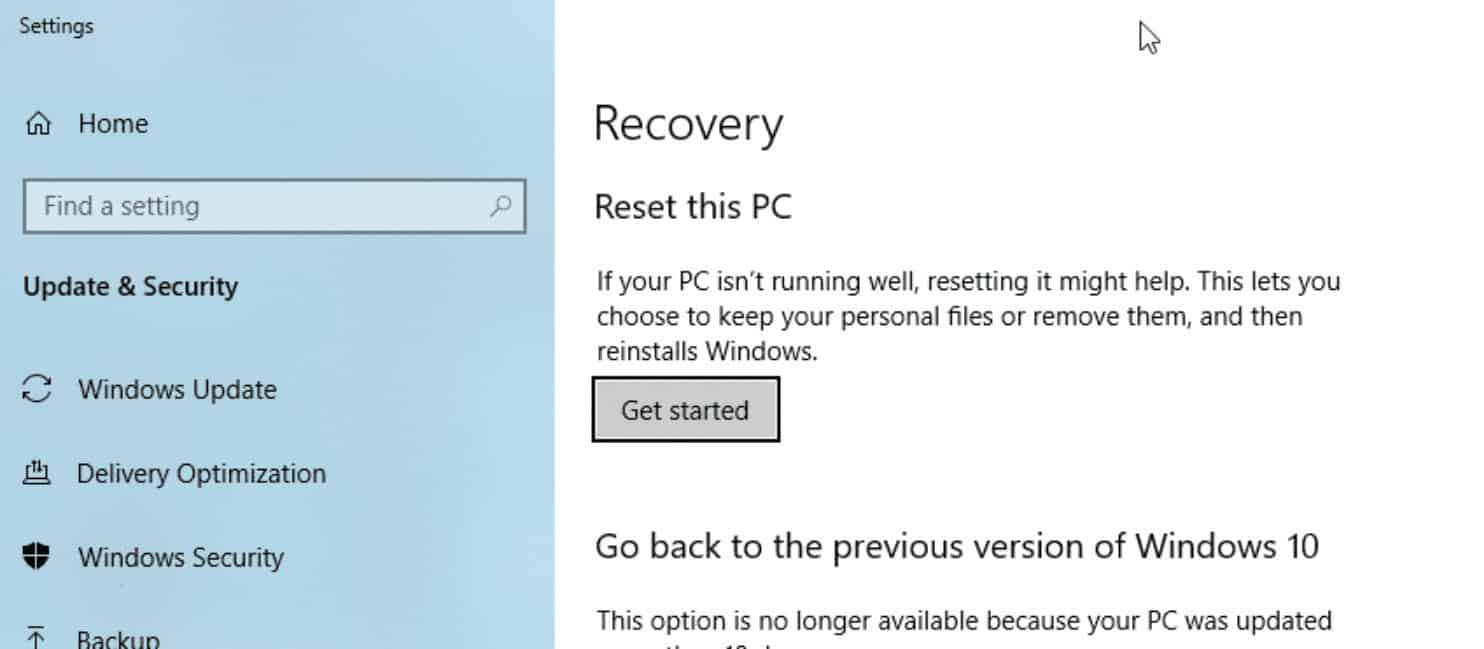
Select Reset this PC from Recovery
At the top of the Recovery tab, you will see an option for Reset this PC. Simply select the Get Started button to start the process.
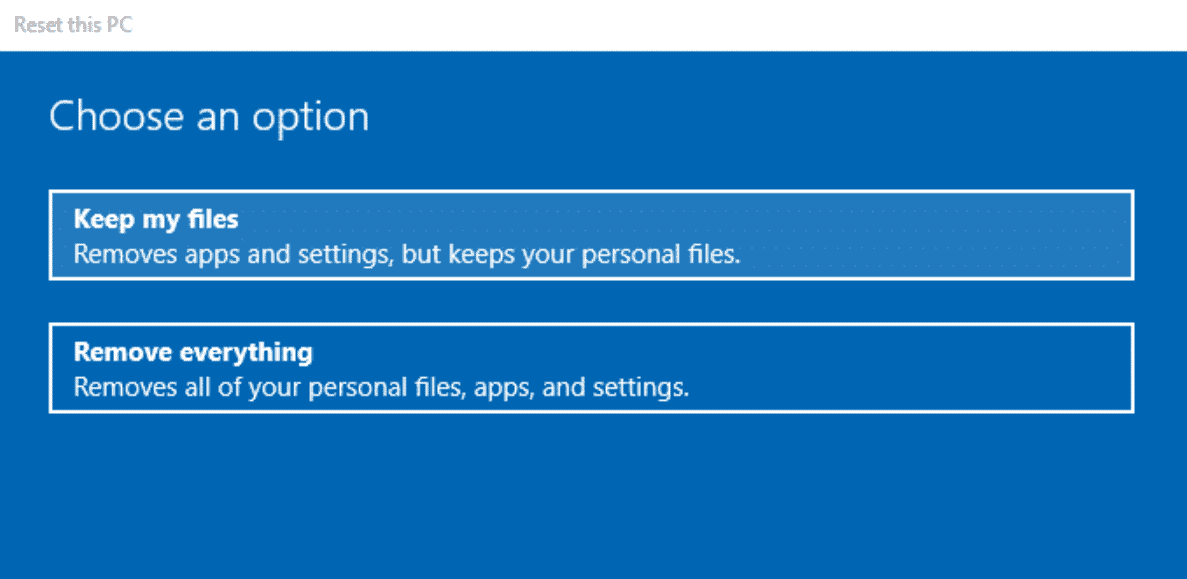
Step
Remove everything
At this stage, you are asked whether or not you would like to keep your files or remove everything. For the purpose of this exercise, we will be removing everything. Click to remove everything and follow the on-screen instructions.
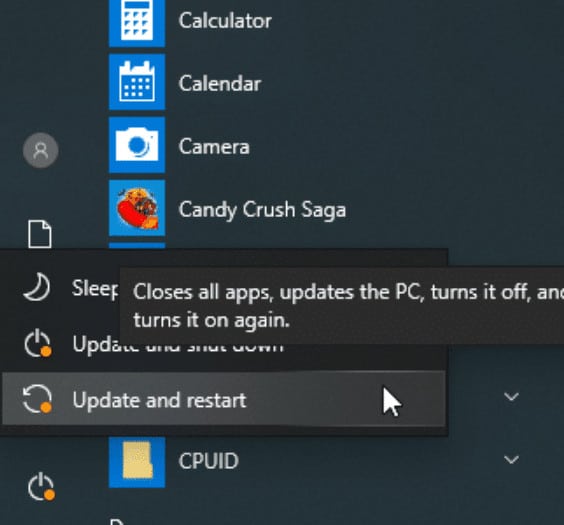
Step
Restart PC
Your PC should automatically restart and be reset to factory settings. This will have completely removed all files from the computer that aren’t essential to the operating system.
Can I install Windows on Mac?
One of the most frequently asked questions we get here at WePC is whether or not you can install Windows onto your Mac. And the short answer is yes.
To be honest, the process isn’t all that difficult. So, let’s jump right into it.
Before starting, you will need to access your Boot Camp Assistant.
Step
Use Boot Camp Assistant to create a new partition
Simply open Boot Camp Assistant and follow the onscreen instructions.
At this stage, you might be asked to input a USB flash drive, this will create a partition on the flash which can be booted into Windows.
Boot Camp Assistant will ask you to set the size of the partition. The recommended drive size for Mac is 128GB.
Step
Format the new partition for Windows
Once Boot Camp Assistant has finished, it will automatically restart your Mac and load into the Windows installer.
The installer may ask where to install Windows if so, select the BOOTCAMP partition and click format.
In most cases though, this part is automatically done for you.
Step
Install Windows
It’s recommended that at this stage you unplug and external devices such as flash drives, displays, or drives. Click Next and follow the onscreen instructions to begin the Windows installation.
Step
Complete the installation
Once the Windows installation has completed, your Mac will start up in Windows and open the Welcome to the Boot Camp installer. Follow the on-screen instructions to install Boot Camp, which will include the Windows support software and drivers. Once done, you will be asked to restart your Mac, finalizing the process.
Windows vs Linux
The battle for operating system supremacy is almost as old as computers themselves. Just like AMD vs Intel, each camp has a healthy following and claim their operating system is the best.
But how do we know which one is really the best? And, more importantly, which one is best for your needs?
These are the sort of questions that get left unanswered. Having said that, we’re going to try and shed a little light on the situation in an easy-to-digest kind of way.
For the most part, Windows is going to be a much more practical, more user-friendly, and overall more versatile operating system for your needs. However, Linux offers benefits in other areas, such as security, price, and stability.
To make the whole debate a little more digestible, below we’ve created a table which compares the two in numerous areas:
| Windows | Linux | |
|---|---|---|
| Accessibility | All users get given the same version of windows and are never given access to the source code. | Users have access to the source code and can alter the code according to their needs. |
| Customization | Windows has very few customization options. | Linux comes with various distributions which can be customized to a user’s needs. |
| Licensing | The Microsoft license doesn’t allow users access to source code. Furthermore, you can only install Windows on a specific number of computers. | According to Linux operating system, users are free to modify the software and can re-use it in any number of systems. |
| Usability | Windows is a very simple system to use and is extremely user-friendly. | Linux is a fairly complicated O/S to install but does have the ability to complete complex tasks easier. |
| Support | You get an abundance of Windows support via online forums/ websites which is easily accessible. | Linux, like Windows, has a massive amount of online support via communities and websites. |
| Updates | Windows updates come sporadically and at various times which can become an inconvenience. | Users have full control over updates and can install whenever needed. |
| Security | Lower levels of security and susceptible to viruses. | Linux is much more secure than Windows. Hackers and viruses find it much harder to penetrate Linux. |
| Price | Much more expensive than Linux. | Linux is completely free. |
How to install Windows : Final word
So, there you have it, our comprehensive guide to installing Windows. We’ve tried to cover every base and make this your one-stop-shop for everything relating to Windows installs. If you’re still having problems with the process, feel free to drop us a message in the comments section below.