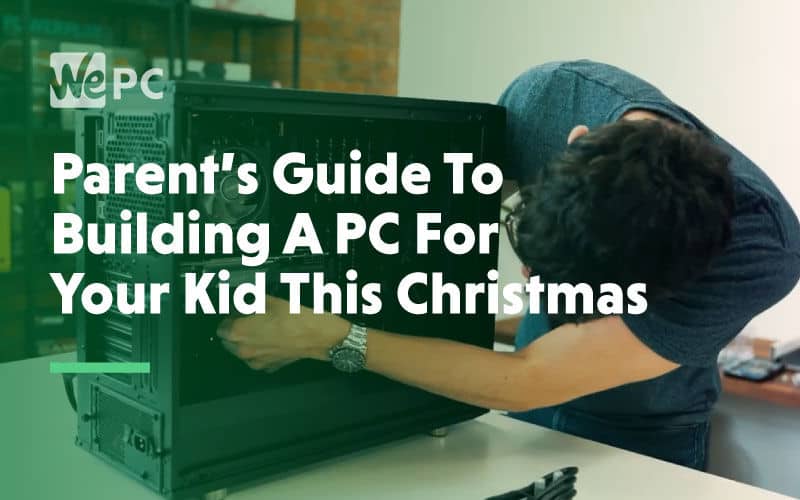
Parent’s Guide To PC Building
With Christmas fast approaching, kids across the globe are starting to write their lists for Santa. Thanks to modern technology and the recent rise of gaming popularity, many of today’s lists will see action man and barbie replaced with PC components and gaming peripherals.
For some technophobe parents, that can be a fairly daunting request, especially when you consider how technical and costly a PC can be if done incorrectly. However, here at WePC, we understand the stress that might come with such a request and have decided to create this comprehensive article – a parent’s guide to building a PC for kids this Christmas.
We’ll be looking at the things you should consider before buying any components, some of the intricacies that come with PC building, a simple step by step PC building guide, and some of the more frequently asked questions we get in our comments section and Community posts.
So, without further ado, let’s dive into it.
Things To Consider
OK, you’ve decided to do it, you’re going to buy your kid a new PC. They say it’s for schoolwork or some hokum, but we all know deep down they just want to play games like Fortnite on it. Which you’re OK with, and so are we!
Anyway. You’ve probably found your way to this article because you’re a first-time builder or haven’t built a PC in a couple of years and wanted to get a refresher. You’re looking for a bit of guidance on PC building and need to know what your money can buy, how much power you need to play games, and a whole host of other questions as well.
We’ll be answering all those questions in the following article, but before you get to that bit, before you even start looking at components, you need to explore the following aspects of a PC build.
Consider these areas before making your purchases and you’ll save yourself a lot of time, money, and stress.
Your Budget
One of the first questions you need to be asking yourself as a PC builder – is budget, or better still, how much of it you have at your disposal.
It’s an extremely important aspect of PC building because the difference between a low-performance PC and a top-tier build can be thousands. Setting a clear budget at the start of your PC build project will set the stage for what performance you can extract from your PC. It will also determine whether you’re performance requirements are reachable or not.
The following are general guidelines to what we believe are reasonable budgets for relevant performance outputs.
- Budget – $300-$600 – At this price point, your performance power is fairly limited. If you’re looking to play new AAA game titles such as Call of Duty or Farcry 5, you’re going to want to consider looking at some of the other price points. Having said that, at $500, you can still build a PC that can play some lower-intensive games at 60FPS+. If you’re looking to play games like CS: GO, Fortnite, and Minecraft, then a PC within this price range should be able to provide you with an enjoyable experience.
- Mid-range – $700-$1,000 – If you’re looking to play more demanding AAA game titles in mid to high settings, you’re going to want to consider a budget within this range. At this price, you start to choose components with the highest available performance output, instead of making compromises. With a powerful standalone GPU, you should be able to play a large variety of games in high-settings, and most in 1080p.
- High-end – $1,000+ – Any budget above $1,000 is considered high-end. At this price point, you enter into the premium-tier hardware components that can drive huge FPS figures and can perform demanding multitasking scenarios. This is where compromises are no longer an issue. You buy the best-of-the-best and start to prioritize aesthetics and speed over budget.
Your Requirements
Once you’ve established what budget you have to play with, the next most important thing to consider is your kid’s requirements.
As mentioned above, the difference between a workstation PC and a gaming PC can differ in price massively. That makes understanding your needs all the more important and will save you time and money.
Let’s discuss some of the main differences between the two types; a workstation computer, and a gaming PC.
A workstation computer has the sole purpose of providing the user with a PC that can perform both light and heavy workload tasks. Whether it be spreadsheet work or demanding video editing, a workstation should be able to accomplish these tasks with the minimum of fuss. If you plan on building a workstation PC, you might find that the component list is quite different from that of a gaming PC. Many modern-day workstation PCs will come equipped with an APU instead of the more commonly used CPU and GPU. Thanks to AMD’s latest line of Ryzen APU’s, consumers can now buy processors with powerful integrated graphics in-built.
A gaming PC is a different beast altogether. Whereas a workstation PC can be built from as little as $300, a gaming PC demands a much higher budget. To be able to play any form of demanding AAA game title, you will require some form of entry-level GPU and a reasonably competent CPU with good single-core performance.
I know by now you’re probably a little flustered at some of the technical terms being thrown around, but don’t worry, we’re going to make everything clear as we go along!
What Hardware You Need To Build A PC
So, you’ve stuck with us this far, and you have a pretty good understanding of what PC will best suit your kid’s needs. But we still know absolutely nothing about PC building or the components that go into a PC. Well, we do, but you don’t.
Don’t worry, that’s exactly what we’ll focus on in this section.
Every build is comprised of several PC components. However, not all builds use the same number of components. Let me explain.
The main list of components for any build is as follows:
These are the base components that make up every PC. If you’re more familiar with PC building, then you might notice certain hardware missing from this list, and that’s because they aren’t essential in getting a PC up and running.
If you’re into gaming you might want to consider a parts list more like this:
- Processor (CPU/APU)
- Graphics Card (GPU)
- AIO Cooler
- Motherboard (Mobo)
- Memory (RAM)
- Hard Drive (SSD or HDD)
- Power Supply (PSU)
- Case Fans
- Case
With the introduction of a GPU and AIO cooler, this PC will be able to handle more demanding games and provide a truly immersive experience. You’re going to need an AIO cooler to ensure system temps are always running low and a GPU for providing a high FPS output.
Let’s take a look at what each part does so you gain a greater understanding of each component.
Processor (CPU)
Each processor can vary in price, clock speed, cores, and thread count. They are measured by their clock speed, and core/thread counts, with high speeds naturally being more powerful and desirable by gamers. Individual CPUs have specific chipset and socket compatibility, so it’s always essential to make sure your motherboard is right for your CPU.
CPU stands for central processing unit and is the brain of the computer. It is the second most impactful component in a gaming rig and the most important in a workstation PC.
A CPU is made up of Cores and Threads and is measured in several different ways, with clock speed being one of the most important. The clock speed is measured in gigahertz (GHz) and is based upon each core across the chip. When your PC is in full operation, the CPU will dedicate cores to individual tasks. Having more cores means your PC can perform highly demanding tasks more efficiently.
If you’re looking for a gaming PC, then I would recommend a CPU with a minimum of 4 cores/ 8 threads. A workstation can get by with a 2 core/ 2 thread CPU, but let’s be honest, you’ll do well to find one of those these days. Entry-level CPUs in today’s market come to shelves with 4 cores/4 threads and are optimized for work tasks and some light gaming.
Motherboard (MOBO)
A motherboard is the main foundation of your technological new-build. It’s the component that allows all the other parts to work together in perfect harmony.
*Be aware though* not every motherboard works with every processor, you need to make sure your components are compatible.
Each motherboard comes designed with a specific chipset and socket in mind. This will tell you, as a consumer, which motherboard is compatible with your specific CPU.
Take the following as a rough guide to chipset and socket selection:
- Intel CPU‘s will work with LGA 1151 socket type and a number of different chipsets ranging from B360 to Z390.
- AMD CPU’s work with AM4 socket type boards and a number of different chipsets ranging from B450 to X570.

As you can see from the table above, sockets lend themselves to many chipsets but are NOT compatible with the opposing brand.
Another important area to consider when purchasing a motherboard is the form factor. The form factor is the physical size of your motherboard. It determines the general shape and size of your motherboard and it also specifies what type of case and power supply you’ll need.
The three most commonly used form factors at ATX, M-ATX, and Mini-ITX, with the latter being the smallest. Below, is a diagram that outlines the size of each motherboard form factor and some of the pros each come with.

Graphics Card (GPU)
Your GPU, or graphics processing unit, is the most impactful component when it comes to your gaming requirements. It will determine what games you can play and at what graphical settings. If your kid is looking to play highly demanding AAA game titles, then you WILL need to invest in a powerful graphics card. Be aware, though; they can be quite expensive. We recommend spending a minimum of 50% of your PC budget on the GPU.
A GPU is measured by its clock speed and VRAM, but can also be separated from other GPU’s in a number of different ways which range from aftermarket cooling to CUDA cores.
Clock speed is fairly unsubstantial when referencing in-game performance, but can be the difference between two aftermarket graphics cards. For example, an ASUS ROG STRIX 2080TI comes with a clock speed of 1665 MHz, whereas a Zotac Gaming RTX 2080TI (essentially the same GPU but with a different aftermarket manufacturing process) has a clock speed of 1545 MHz.
VRAM, on the other hand, is much more important. VRAM is your graphics card’s video RAM and works in the same way as system memory. They come in a variety of capacities and types. Today’s standard VRAM is GDDR5, and you should not accept anything less. However, VRAM does come in improved types such as GDDR5X, GDDR6, and HBM (High Bandwidth Memory). Capacities can range as follows:
- 2GB – At 2GB, you have a very limited amount of VRAM to play with, and you will struggle to play anything over 720p.
- 4GB – This gives you a little more room to play with and should be able to power 1080p and maybe 1440p.
- 6GB – At 6GB, you are entering into the realms of the mid-range GPU, and you should be able to push good FPS in both 1080p and 1440p.
- 8GB – This is the start of the premium GPU’s, and you should be looking to achieve 100FPS in 1440p and some 4k gaming.
- 11GB – Only a few GPUs come with 11GB’s of VRAM, and these are your top of the range cards, which can push in advance of 200FPs in most titles. They can max out 4k resolution gaming and should still provide a smooth, immersive experience.
Memory (RAM)
Memory, or random access memory, is one of the most important aspects of any build. Luckily, it’s also one of the most affordable additions thanks to a decrease in market price over the last couple of years. RAM comes in several different forms and capacities and helps drive the speed of your system when under heavy load.
If your kid is looking to build a gaming PC, then we would highly recommend 8GB of RAM as a minimum. Pushing to 16GB would definitely be advisable if they plan on doing heavy workload multitasking or streaming.
- 4GB – This is the absolute bare minimum we would recommend. If you’re looking to build a PC for schoolwork, emails, general browsing, and multimedia, then 4GB will be suitable for your needs.
- 8GB – This is the minimum we would recommend for a gaming PC. You’ll be able to play most games and should be able to do some light multitasking. From a workstation point of view, 8GB should be good for most tasks and editing purposes.
- 16GB – At 16GB, you pretty much have the freedom to do whatever you like in terms of gaming. No game really needs more than 12GB as they rely heavily on your graphics card.
Establish what your kid is looking to do with this new computer, and you’ll be able to tailor the RAM for their specific needs.
Storage (SSD/ HDD)
Storage is one of the simplest components to understand, mainly because everyone has some sort of storage facility in their techno-lives. Your phone has storage, your TV has storage, even your watch now comes with a little storage drive. It’s everywhere, and it basically allows you to save and access files that you don’t wish to delete. Simple, right?
Storage comes in a number of different formats, some of which are on their way out of consumer-grade builds. The hard drive is something everyone has probably heard of. It’s storage made of a 2.5 – 3.5-inch disk that rotates at high RPM to find and access the files. These have been around for an eternity and still play a major role in today’s PCs. How much longer they will is up for debate, but right now, they offer a cheaper alternative to the more expensive, much faster SSD.
SSD, which stands for solid-state drive, is a new way of accessing memory, which rapidly improves how fast you can access the data. They use non-volatile memory where the data files can be accessed at any time and in any order. Thanks to the hugely increased read/write times, and their general increase in speed, SSD’s are much more expensive than your generic hard drives.
Whichever you choose, just know, if you plan on building a gaming PC, you are going to need a fairly large storage drive. We recommend 500GB as an absolute minimum. For a workstation computer, we recommend 500GB – 1TB unless you are editing large video/image files. In this case, you might want to splash out on a 4TB drive and above.
- 250GB – 500GB – Light gaming and general desktop PC storage requirements.
- 500GB – 1TB – For users with a medium-sized games library and does light work on the side.
- 1TB – 4TB – Extensive gaming library and does quite a bit of video editing on the side.
- 4TB+ – For those looking to own an extensive games library and do a lot of media editing as well.
Power Supply (PSU)
Your power supply pretty much does what it says on the tin; it supplies your PC with power. PSU’s come with varying levels of power output and efficiency and should be taken extremely seriously when purchasing a build. A poorly made, un-certified PSU could be the difference between an enjoyable gaming session and sleepless nights dreaming of fires.
Each PSU has a wattage output that it can provide your computer with. Your hardware will determine what PSU wattage you will need, with more parts requiring more power. PSU’s start from as little as 400W and go up to and beyond 1000W. Wattage’s aside; a PSU also comes with a rating for efficiency.
The 80+ certification, as we’ll call it, ranges from un-certified to Titanium and specifically references how efficient your PSU is. We would recommend not to go under 80+ bronze for a gaming PC as they require good power efficiency, especially when you’ll be using it for long periods of time.
Below is a rough guide to the PSU ratings.
Case
Lastly, we have your case – and you’ll be happy to know this is one of the simplest components to understand. Its main job is to house your components. Having said that, there is one aspect you need to be concerned with, and that’s form factor.
Certain cases are compatible with certain motherboard sizes. As we mentioned above, a motherboard can be one of several form factors that range from Mini-ITX to E-ATX. You need to make sure before purchasing a case, it can accommodate your motherboard form factor.
You also need to be aware of the size of your GPU (if you plan to get one) as they can be extremely large. A smaller ITX case will almost certainly struggle to accommodate a large GPU, so be aware when you’re looking at case purchases.
Hardware Roundup
So, those are the parts you’ll need if you plan on building your own PC for your kid this Christmas. It might seem a little daunting at this stage, but I can assure you, once you start to understand the parts and know where to put them, it really is a piece of cake.
We build PC’s in the office on a weekly basis, and they can go from a pile of parts to a full-blown gaming rig in about 30 mins. Having said that, building the PC is just the start of the process. The following is everything else you will need to get this thing up and running!
Peripherals And OS
Every PC, whether it’s for gaming, schoolwork, or movies, needs the following add-ons to make it a full functioning computer. These will add a little to the cost of your build, but in the grand scheme of things, they roughly add around 20% to your total bill.
Operating System
Without an operating system, your build is simply a very expensive, very large paperweight. Your operating system, or Windows, in this case, is what makes all your parts work together. Your operating system is a series of operating systems that include a graphical interface and desktop, which allows the users to access and view files and folders.
There are a number of different operating systems out there, but for general usage and gaming, we can only recommend Windows. The latest version is 10, and you can pick it up on both DVD and USB flash drive.
Peripherals
Your peripherals can be as simple as a keyboard and mouse, having said that, they can also stretch to mousepads, mouse bungees, headphones, microphones, and a whole host of other addons.
For the purposes of this article, we recommend a mouse, keyboard, and speakers to get your kid up and running. There are a number of bundles out there, or you can buy individual parts, it’s completely up to you.
There is a large difference between peripherals, so please don’t think a $5 mouse is the same as a $100 one, because they aren’t. We have a ton of pages on peripherals, and if you would like to go into more detail on those, I’ve left a list of suitable pages below.
Monitor
Let’s not forget about the monitor. We all know what a monitor is, right? For those that don’t, it’s the seeing box that sits on top of your desk and shows pretty pictures. No, but seriously, monitors are a key piece of hardware, especially when gaming and video editing.
If your kid is into gaming, then you might want to think about purchasing a monitor with a good refresh rate and response time. For kids looking to do a bit of video editing and image manipulation, I’d recommend an HDR monitor with an IPS panel. We have some great pages on monitors, and I’ve listed the most relevant below.
The Difference Between Custom Build And Prebuilt Computers
At this stage in the article, you might be scratching your head in complete confusion, wondering how you’re ever going to figure this thing out. You might be thinking about throwing the towel in and just getting your kid a console. Well, before you do that, you always have the option to go prebuilt.
A prebuilt PC is precisely that. It’s a PC that is prebuilt. That means you don’t have to worry about buying all the parts and going through the seemingly impossible task of putting them all together perfectly. Be aware though, buying a prebuilt will cost you a premium and you will lose a lot of the value by doing so. Having said that, there are some decent prebuilt options; you just need to find them in the sea of overpriced options that are available.
Below are some general guidelines for the difference in price between building your own PC and buying a prebuilt one:

How To Build A PC
So, you’ve got this far, you’ve decided you’re going to buy your kid a PC for Christmas and you now need to figure out how to put this PC together. Even though this might be the most foreign part of the entire process, don’t worry. We have you covered and we’ve already made a video showing exactly how a PC is put together.
Before you start though, you might want to consider purchasing the following items:
- PC Toolkit
- Anti-static equipment
As a first-time builder, these items are going to ensure a much easier, less stressful overall build process.
Below is an easy-to-follow guide to how to build a PC. There are several more, in-depth videos coming soon, so stay tuned!
Final Thoughts
So, there you have it, our comprehensive guide for parents looking to build a PC for their kid this Christmas. Many parents out there are probably terrified of the concept of buying and building a PC from scratch. But, hopefully, we took a lot of the stigma away from something that sounds much more technical than it actually is.
Let us know whether or not this guide helped you by leaving us a comment in the section below. Or, better yet, jump on over to our Community page where you can start a thread and ask any questions that haven’t been answered already.
Just what this momma was looking for!! Many other articles I tried to read first assumed some baseline knowledge and since I have only had computers that I just pointed at and said I like that one, I was at a loss. My boys have been asking for PC gaming system for over a year and I have given up on my husband building it. LOL Thank you! they will be shocked at my prowess.
Super helpful, thank you for posting this! My 9yo wants to build a gaming PC and now I am trying to learn.