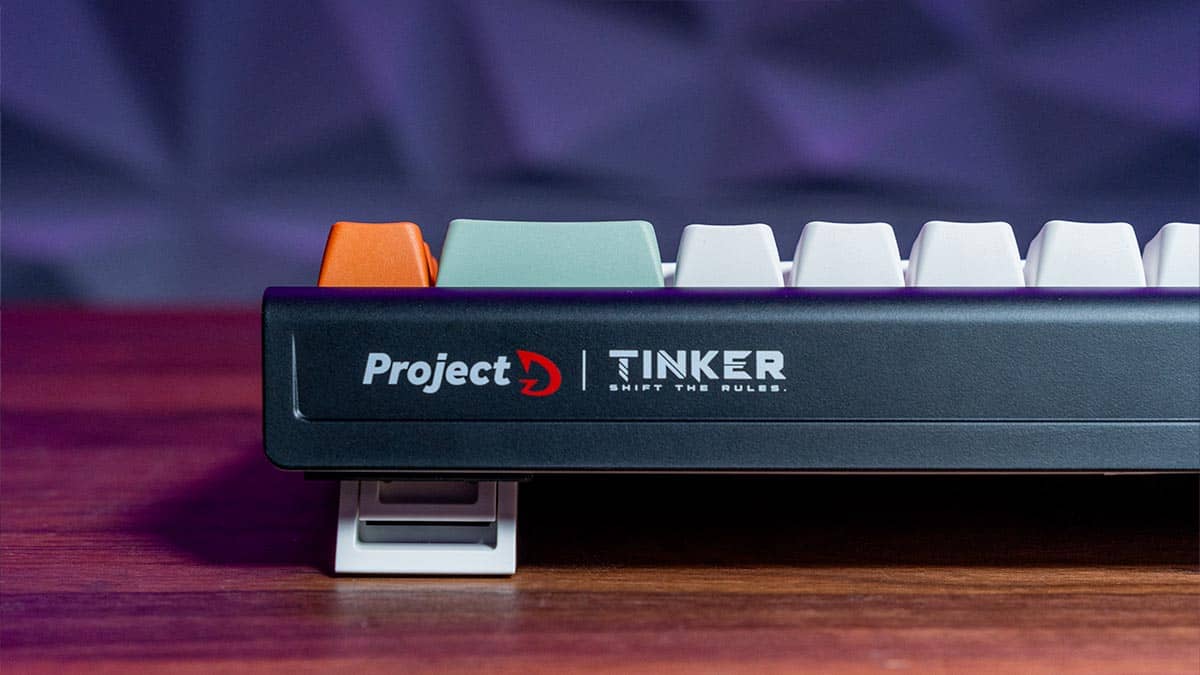
Ducky ProjectD Tinker 65 wired keyboard: first look
A custom keyboard from a legendary brand at a relatively affordable price
Share this article...
WePC is reader-supported. When you buy through links on our site, we may earn an affiliate commission. Prices subject to change. Learn more
SPONSORED PIECE
We take any opportunity we can to get our hands on the latest Ducky keyboards, so jumped at the chance to put the latest release from Ducky sub-brand ProjectD through its paces. The Tinker 65 wired keyboard is a more stripped back model from this premium manufacturer, that aims to offer a quality, customizable typing experience but at a more affordable entry point. Read on for all the details.
Who is Ducky?
Ducky is one of the most highly regarded premium keyboard makers in the world. They are well known for their highly customizable mechanical keyboards, which have great build quality, and provide an excellent typing experience – you’ll struggle to find a more satisfying ‘THOCK’ on another brand’s board.
There are a huge number of Ducky keyboards available covering different sizes and aesthetics, including some highly valued limited edition models, and an even greater number of alternative keycaps you can buy with different colors and designs to tailor the look of your board to perfection. The majority of the Ducky keycaps you can buy are made of the highest quality double shot PBT, and most (though not all) are hot-swappable, meaning you can replace the switches as well as the caps, should you wish for a different feel but want to keep the same keyboard.
What is the Tinker Series?
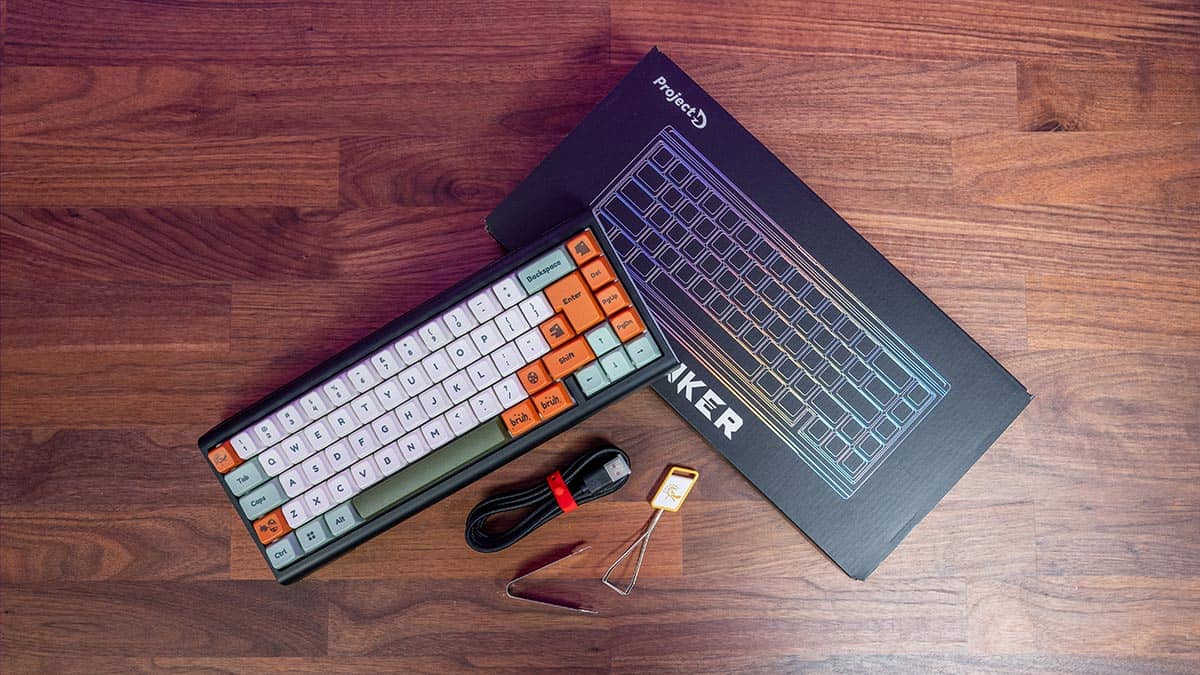
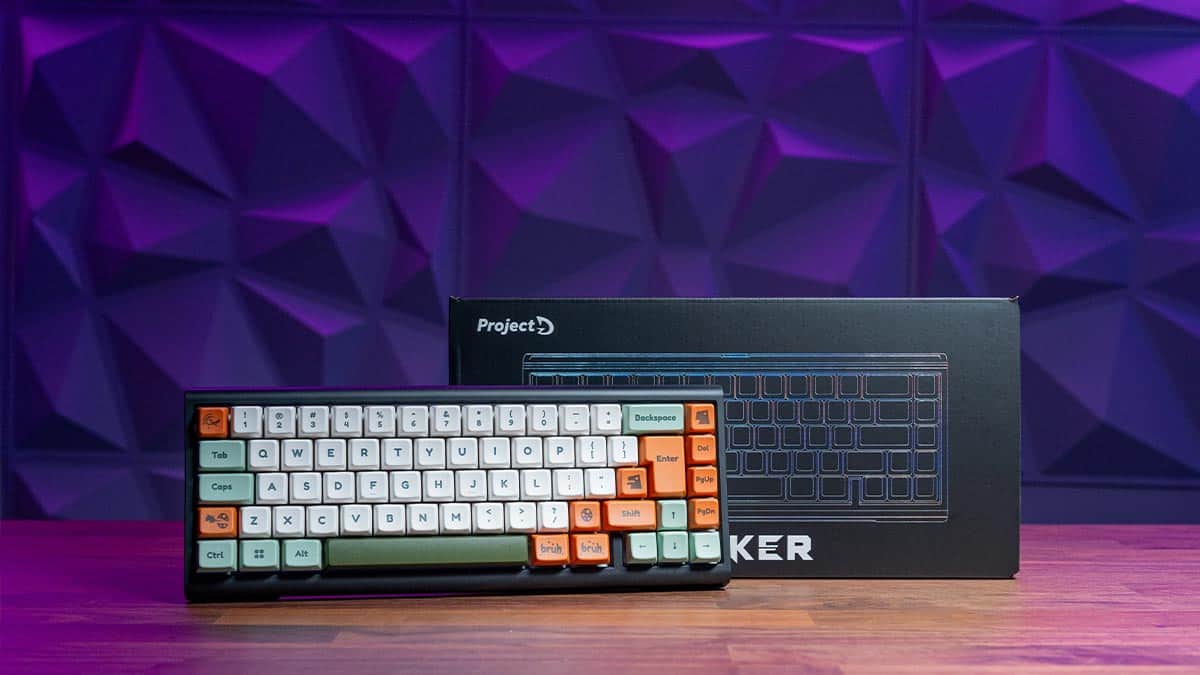
A Ducky ProjectD Tinker 65 wired keyboard with colorful keycaps alongside its packaging and accessories on a wooden surface.

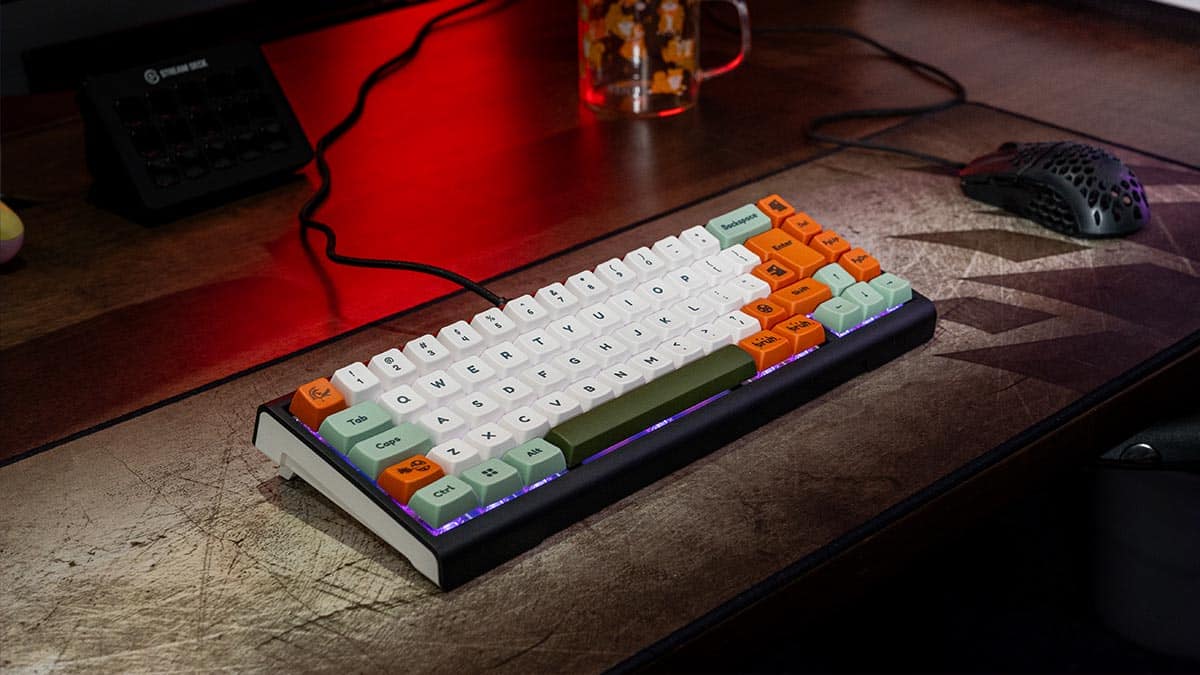
Colorful Ducky ProjectD Tinker 65 wired keyboard on a desk with a geometric background.
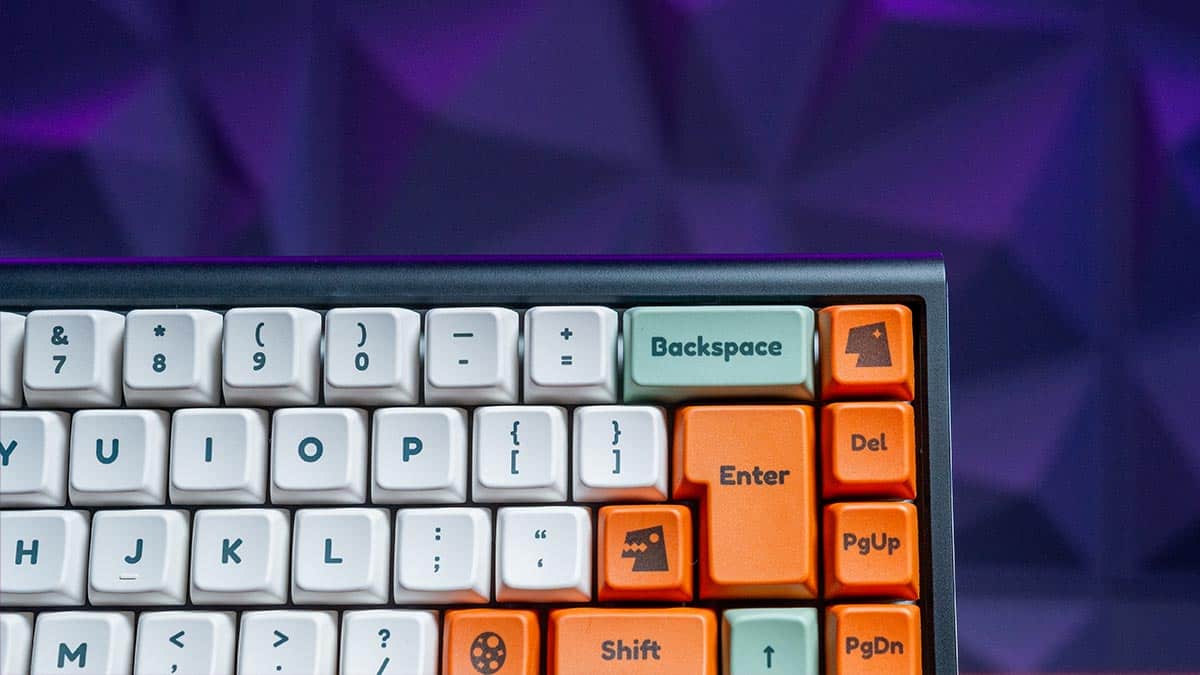
A close-up view of a colorful Ducky ProjectD Tinker 65 wired keyboard with custom keycaps against an abstract geometric background.
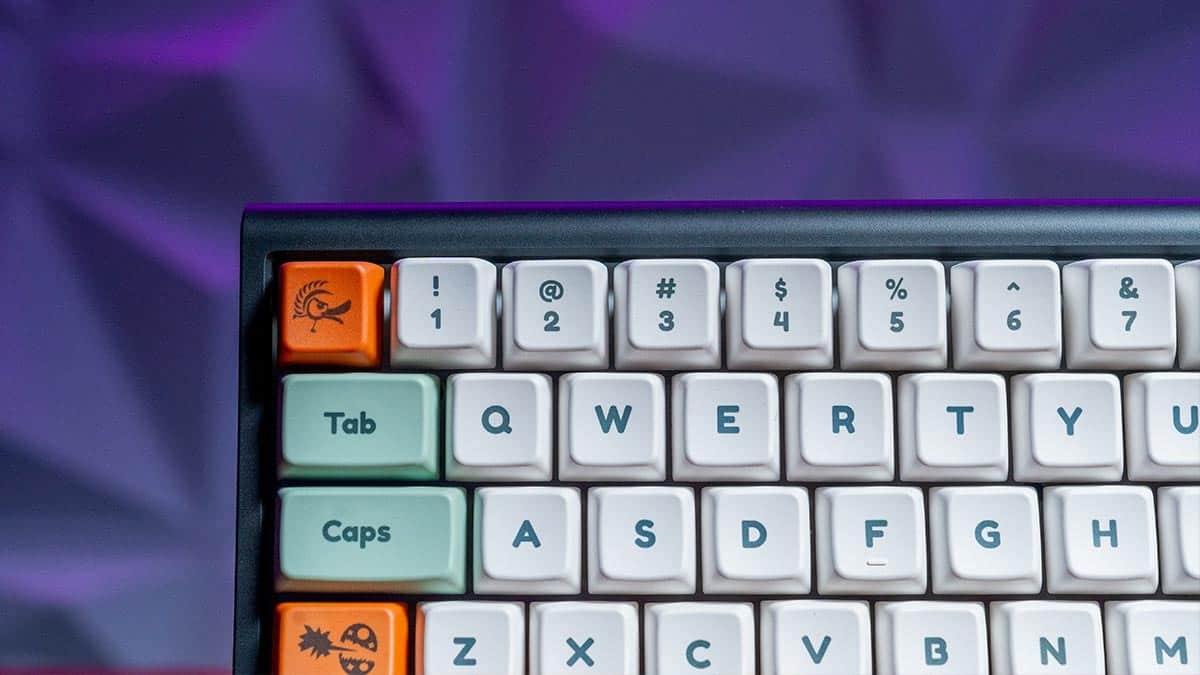
Close-up of a colorful Ducky ProjectD Tinker 65 wired keyboard with custom keycaps against a blurred purple background.
Close-up of a colorful Ducky ProjectD Tinker 65 wired keyboard with custom keycaps on a desk.
Close-up of a customized Ducky ProjectD Tinker 65 wired keyboard with colorful keycaps.
Close-up view of a colorful Ducky ProjectD Tinker 65 wired keyboard with custom keycaps.
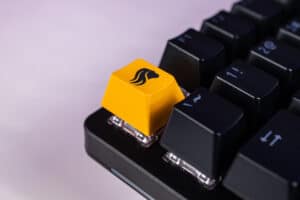
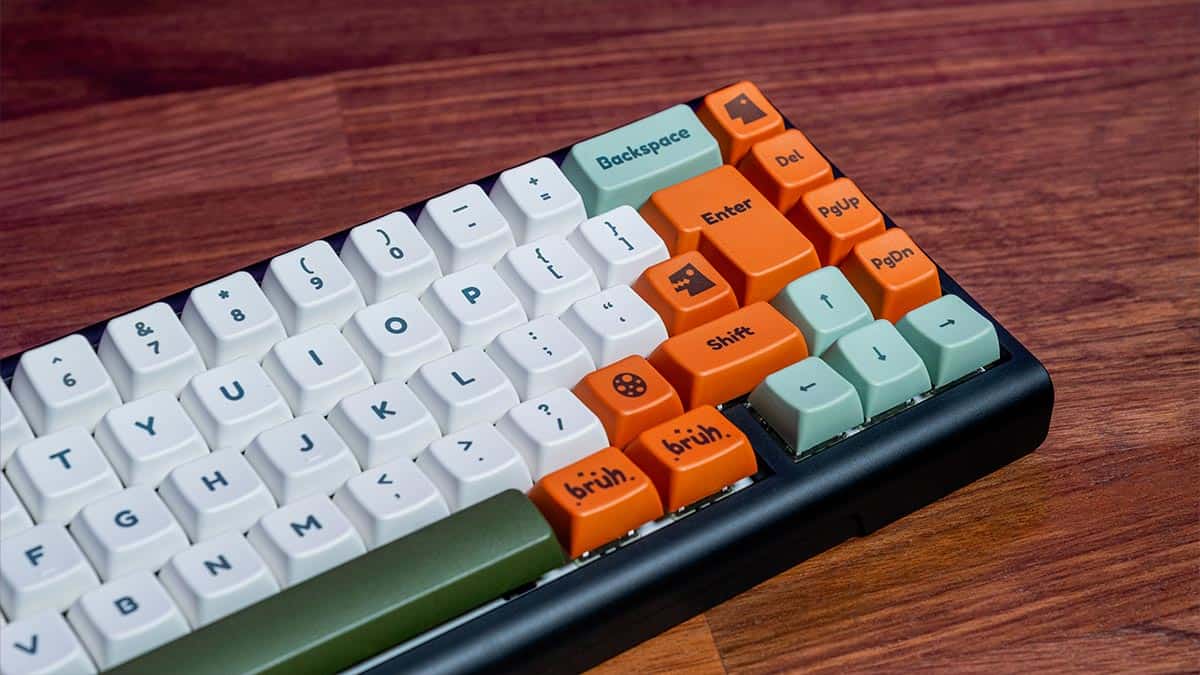
Mechanical Ducky ProjectD Tinker 65 wired keyboard with custom keycaps and “project tinker – shift the rules” branding on a wooden surface.
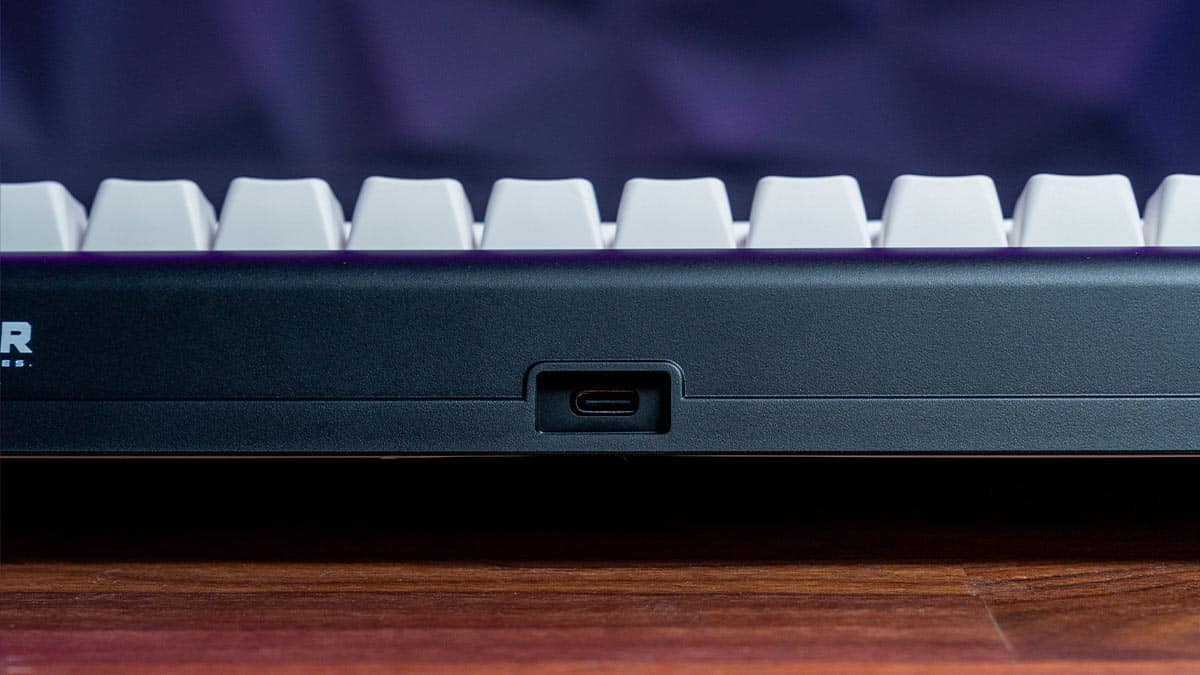
Close-up of a Ducky ProjectD Tinker 65 wired keyboard showing a usb type-c port on its side.
Close-up of a Ducky ProjectD Tinker 65 wired keyboard with a white and orange keycap theme on a wooden surface.
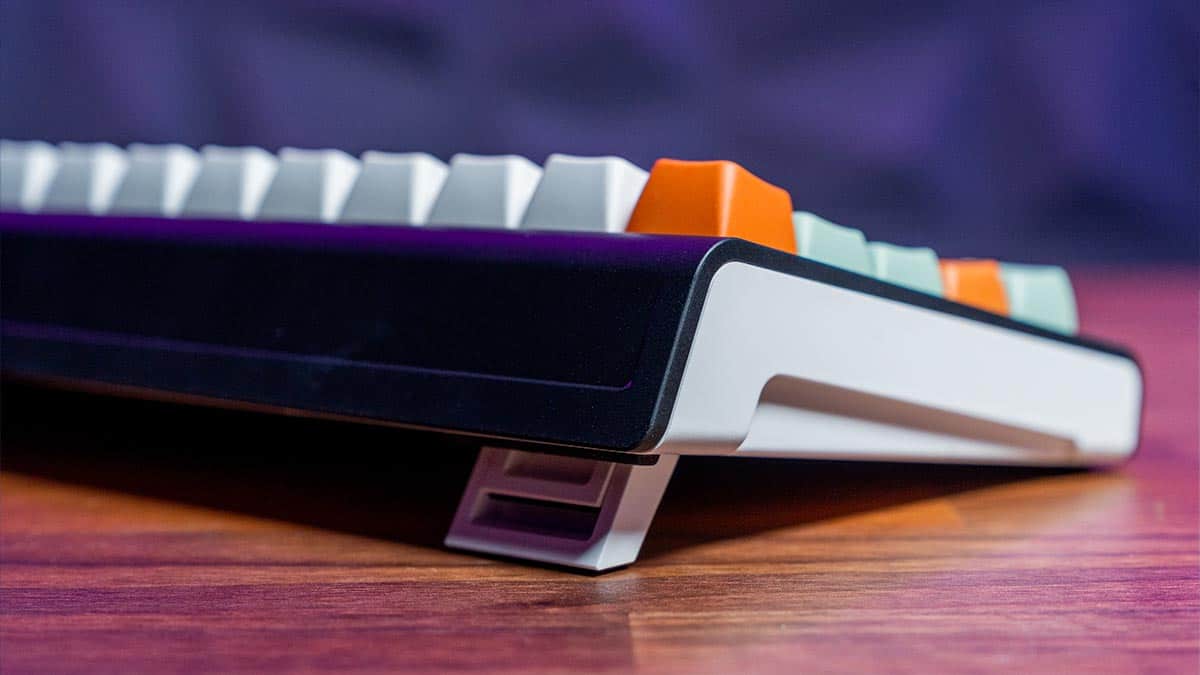
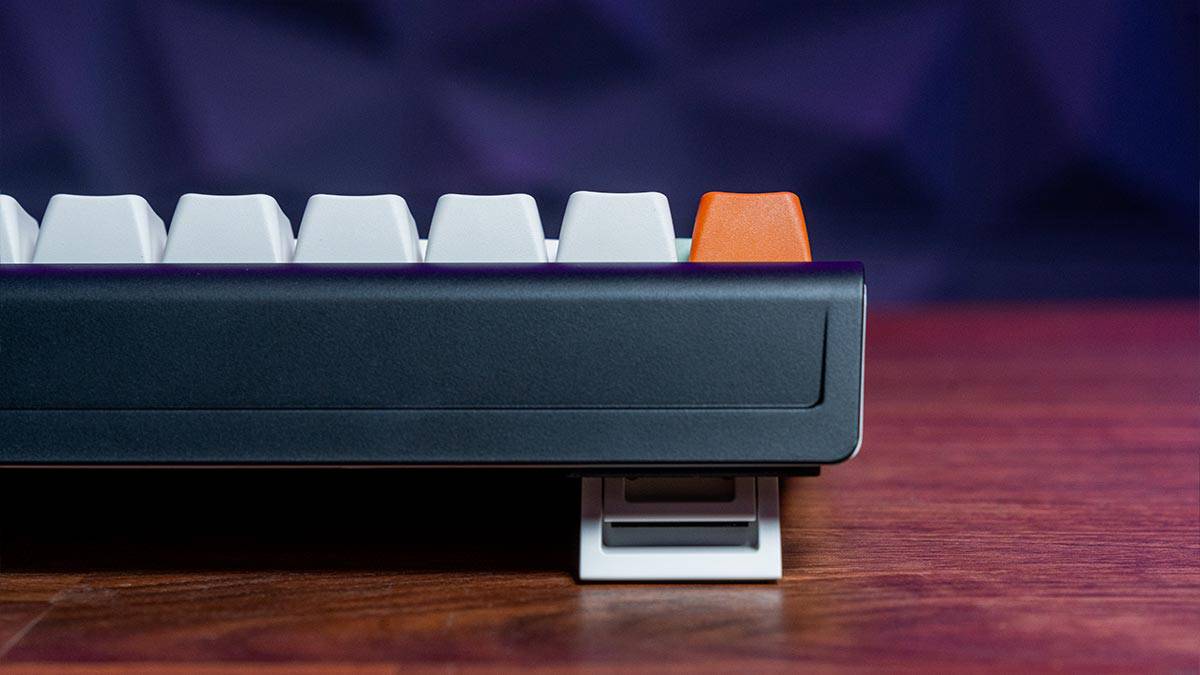
Close-up of a Ducky ProjectD Tinker 65 wired keyboard with elevated keycaps showcasing its profile on a wooden surface.

A silver laptop with a closed lid and a Ducky ProjectD Tinker 65 wired keyboard placed on a table against a geometric-patterned background.
A Ducky ProjectD Tinker 65 wired mechanical keyboard with custom keycaps on a wooden desk.
Mechanical Ducky ProjectD Tinker 65 wired keyboard with custom keycaps on a wooden surface.
The Tinker is the second model in the ProjectD line that aims to be a simpler, more affordable version of the first ‘Outlaw’ model. The Outlaw really emphasised the ‘project’ nature of the ProjectD range – being fully DIY and having you assemble everything yourself from the gaskets, dampening foam, and stabilizers to the backplate and of course the switches and keycaps. The Tinker by contrast limits the customization to the switches and the keycaps, making for a more friendly beginner’s custom keyboard.
Currently the Tinker comes in two size options: the 65% variant and the 75% variant, the larger option coming with dedicated function keys, a Print Screen Key, and a tilde key. For each size you can buy the ‘Barebone’ option which comes with neither keycaps or switches, or a ‘Pre-Assembled’ model, which for a bit more money, comes pre-equipped with either Cherry MX Red, Brown or Blue switches (pre-lubed) plus the standard keycaps, though these can be replaced after the point of purchase. Although the Pre-Assembled option comes with one of these three switches, there is a wide range of other options available that you can buy separately.
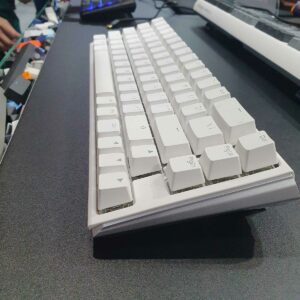
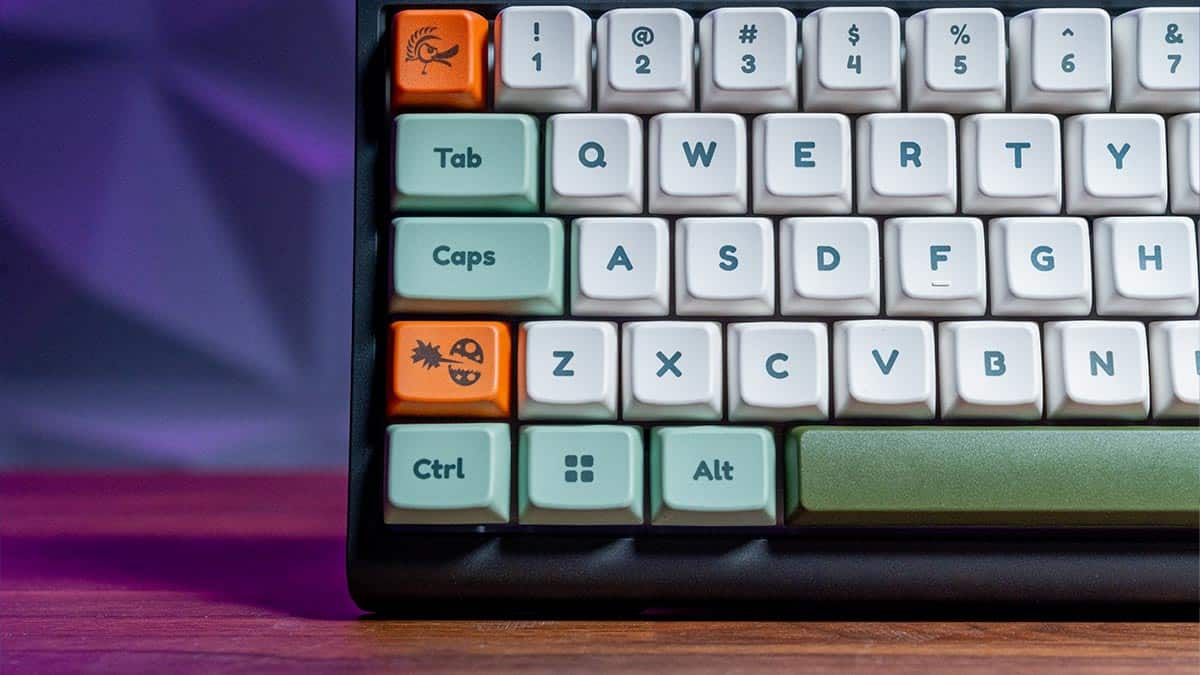
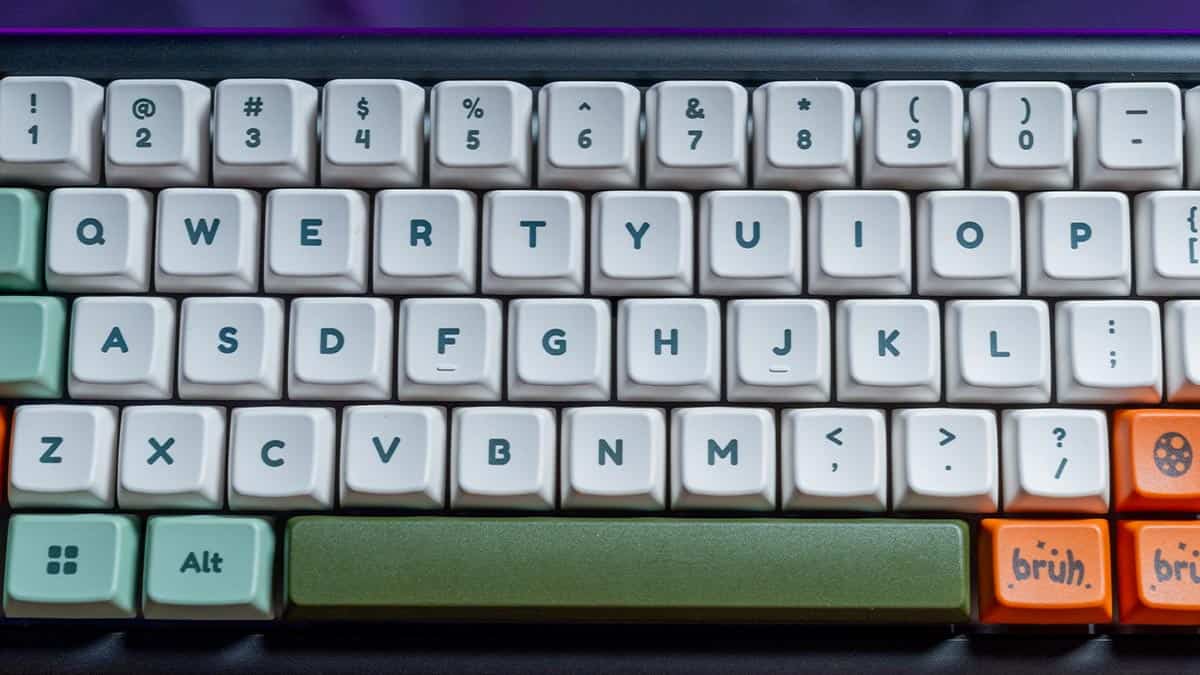
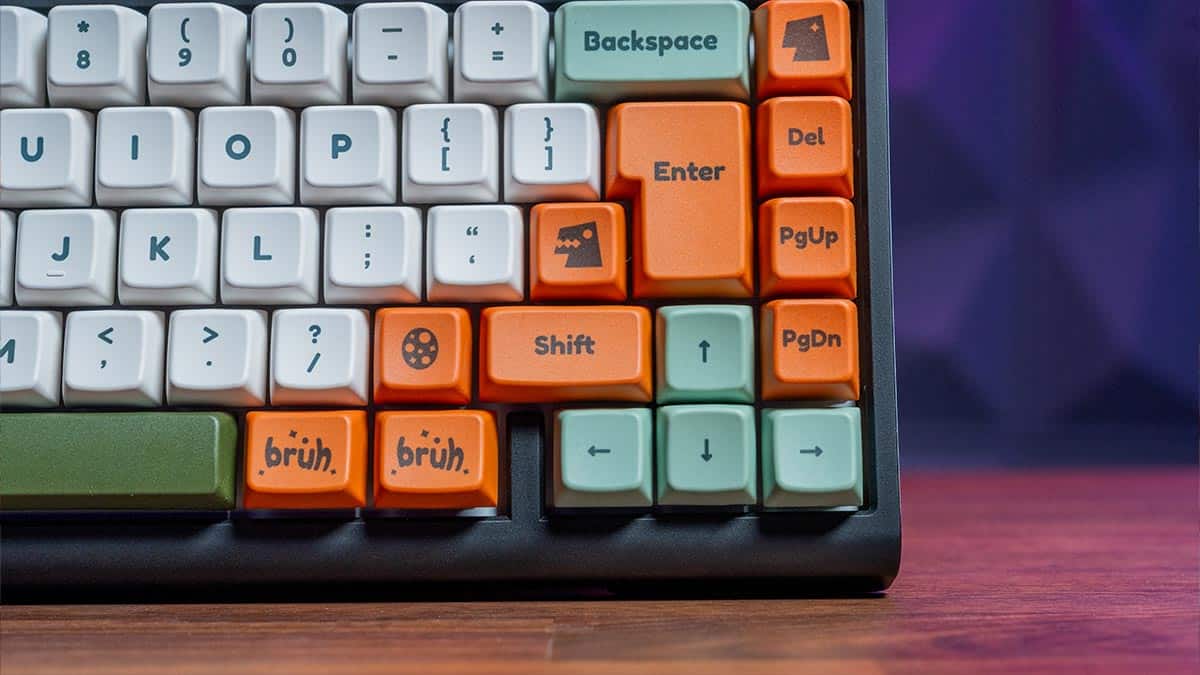
All versions of the board have a gasket mounted design with an FR4 plate, PORON dampening foam, south-facing switches and pre-lubed, screw-in stabilizers, and are programmable with QMK and VIA. You get a detachable braided USB-C cable and the keycaps are OEM profile Double Shot PBT. The chassis is all plastic but very sturdy and well-built, oozing the quality of the Ducky brand, and this material also makes it lighter, which is a good feature for a smaller board. You get two different height options for the feet of the keyboard, which come with nice grippy rubber bottoms.
Building our own Tinker Keyboard
A Ducky ProjectD Tinker 65 wired mechanical keyboard with custom keycaps.
A person is replacing a key on a Ducky ProjectD Tinker 65 wired keyboard with custom keycaps.
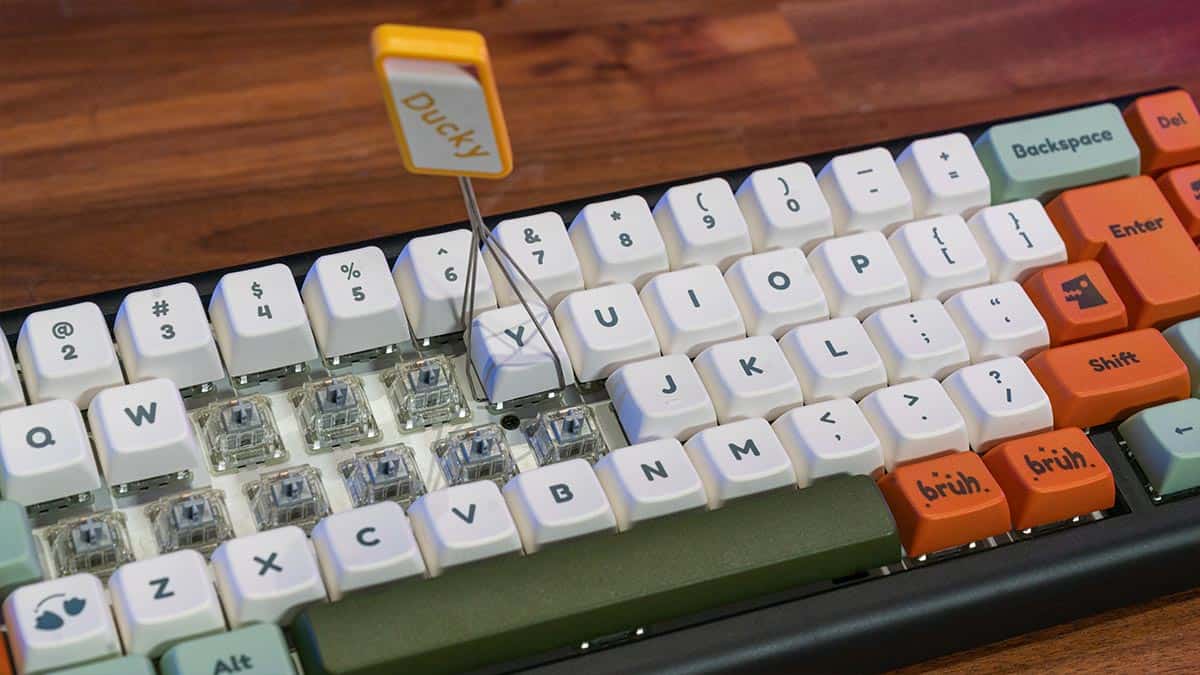
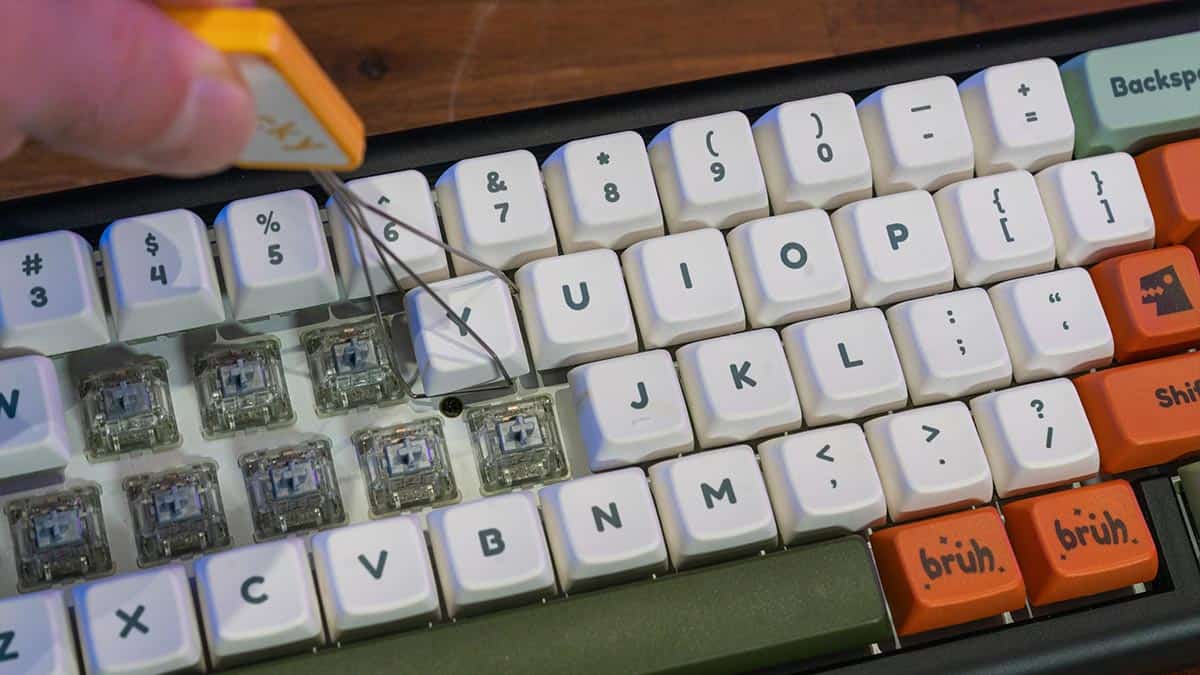
A person’s fingers removing a keycap from the Ducky ProjectD Tinker 65 wired keyboard to reveal the switch underneath.
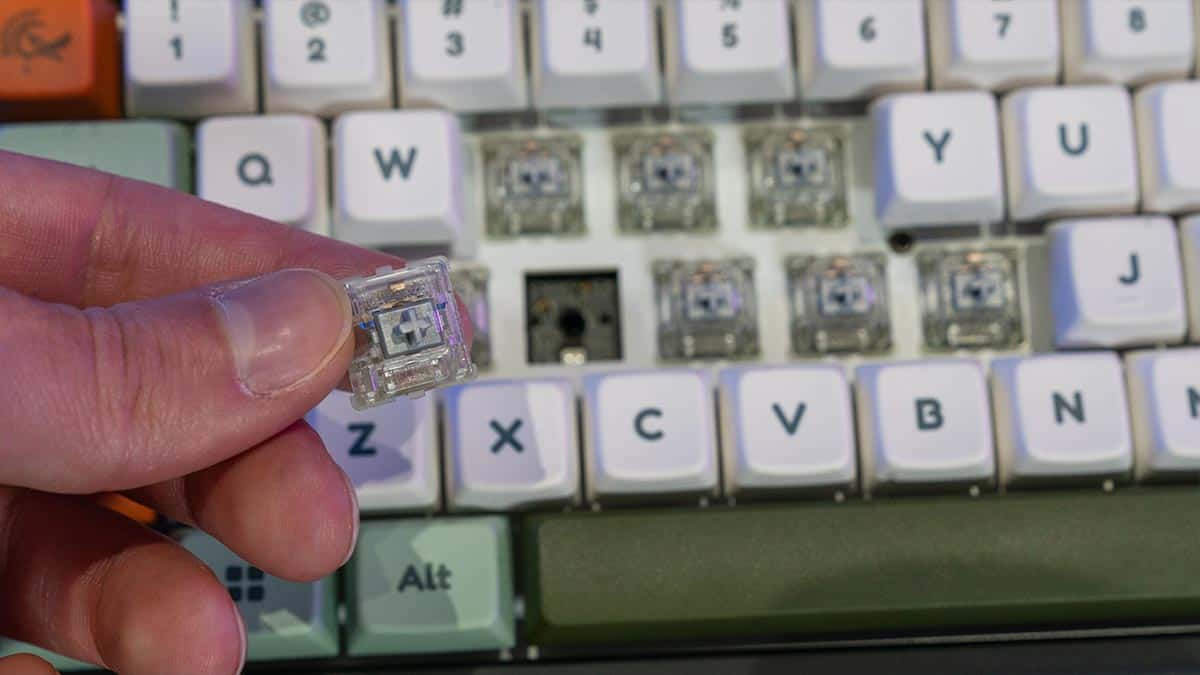
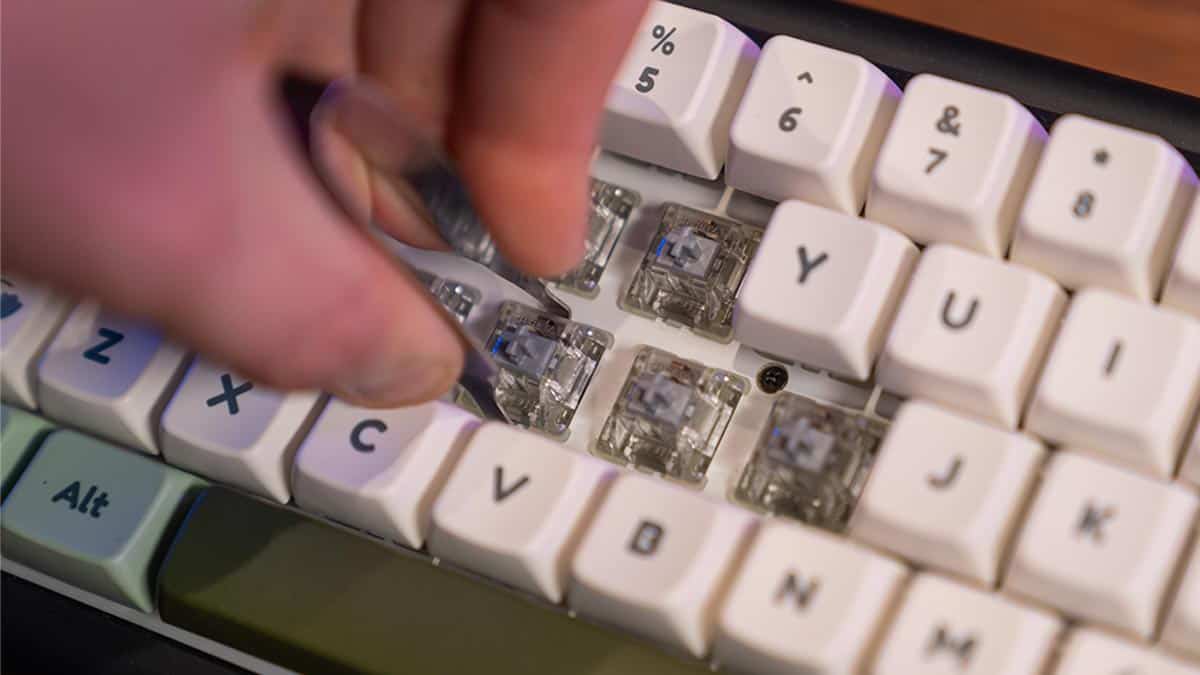
A person holding a clear mechanical keyboard switch above a Ducky ProjectD Tinker 65 wired keyboard with one switch removed.
A person’s fingers holding a clear mechanical keyboard switch with a disassembled Ducky ProjectD Tinker 65 wired keyboard in the background.
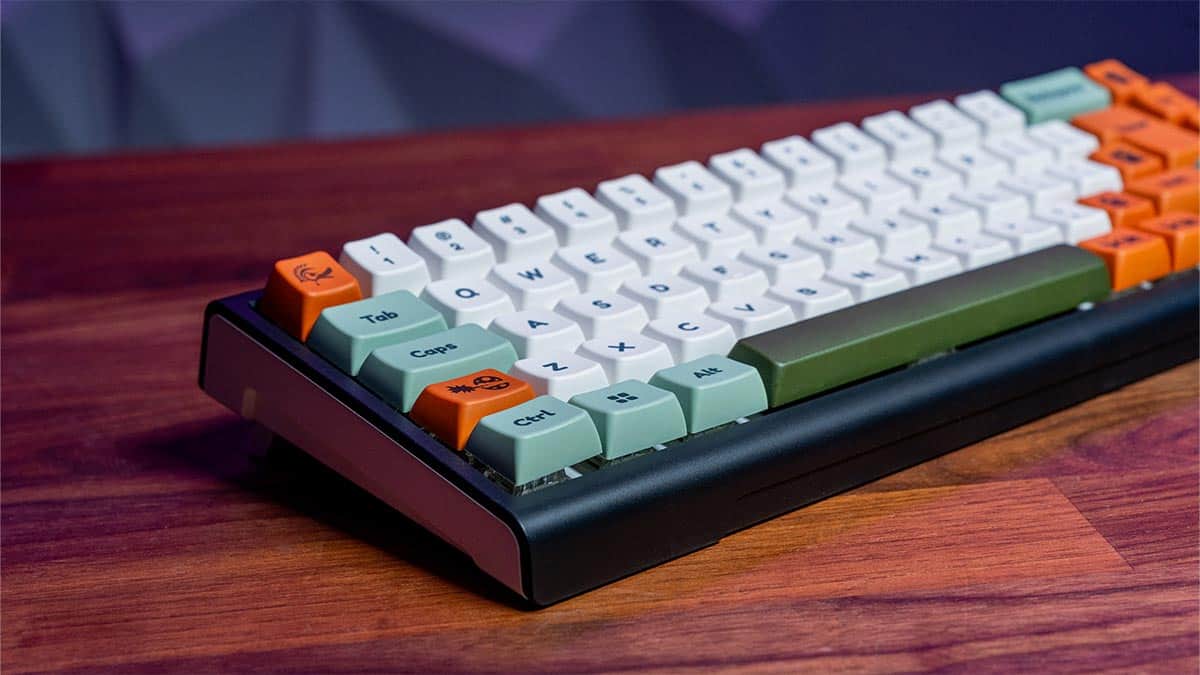
The particular model we had to play with was the Barebone 65% model, which comes with 68 keys in total. Inside the box you get the braided USB-C cable, a switch remover and a keycap remover.
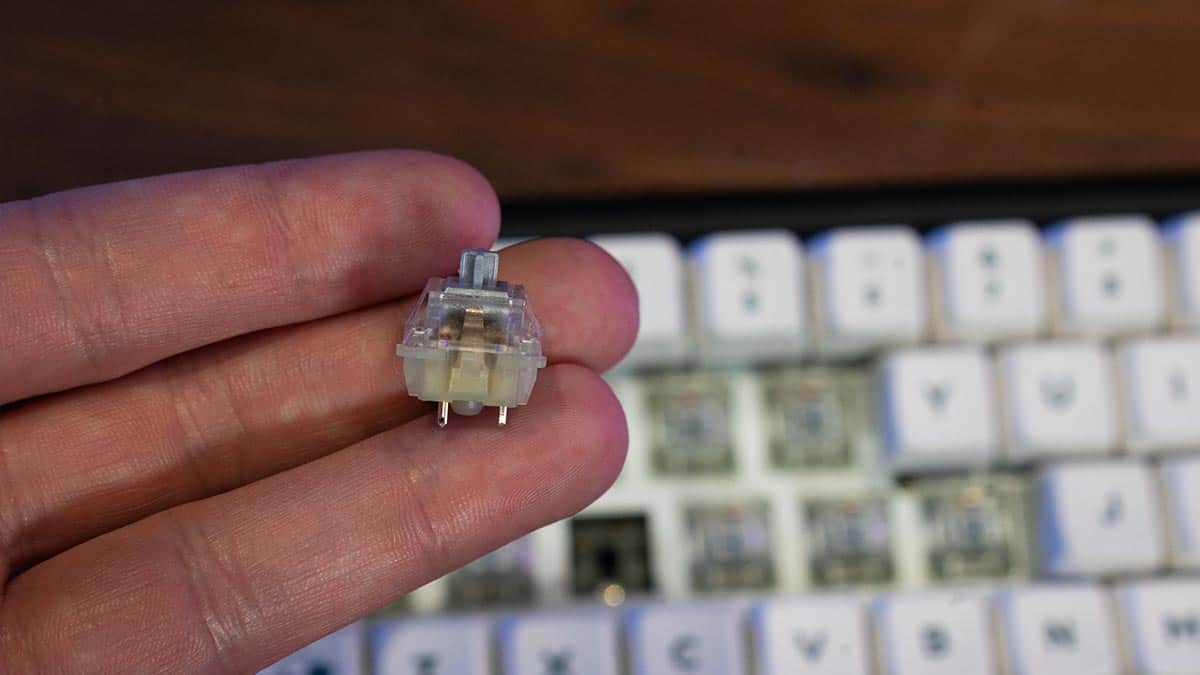
In addition to this we picked up a Ducky switch kit with Cherry MX RGB Speed Silver switches, a ProjectD lubricant and brush set, and a ‘Dino’ themed Ducky keycap set.
Cherry MX Speed Silver switches are similar to the MX Red in that they’re linear and smooth, but they have a shorter and pre-travel/actuation distance (1.2mm vs the 2.0mm of the RX Red) and travel distance (3.4mm vs the 4.0mm of the RX Red), making them the perfect responsive choice for gamers. As mentioned though, you can pick up a whole host of different options, which we’ve listed further down this page.
Building the ProjectD Tinker 65 was a piece of cake. Given the backplate is already in place, all you have to do is pop in the switches by hand (which are completely interchangeable), ensuring the top two metal pins are aligned towards the top, and then do the same with the relevant keycaps (we recommend using a reference image of a keyboard so you place these correctly).
When you’re removing the keycaps, push the removal tool down so the metal brackets align beneath the keycap on either side, gently twist diagonally to lock underneath, and then pull up – the caps should come off with minimum effort. To remove the switches, you’ll need to use the other tool which resembles a pair of metal tweezers – enclose this around the indents on the top and bottom of the switch and carefully pull to remove them.
The finished product was a joy to use – the keycaps feel satisfying under your fingers and look great, with nice clear legibility on the lettering. The RGB is backlighting is nice, clear, and vibrant.
How can you get your own Ducky Tinker?
If you’re in the UK or elsewhere in Europe, Overclockers UK are probably the first retailer you should consider when looking to buy a Ducky board, as they offer a superb selection of the keyboards themselves, plus the compatible switches and keycap options, as well as other accessories. We’ve listed a range of these below to aid in your choice, should you decide the Ducky Tinker (or any other Ducky keyboard for that matter) is the right option for you.
ProjectD Tinker keyboards (Pre-Assembled)
- Ducky ProjectD Tinker 65 – Cherry MX Red – Black – £109.99
- Ducky ProjectD Tinker 65 – Cherry MX Brown – Black – £109.99
- Ducky ProjectD Tinker 65 – Cherry MX Blue – Black – £109.99
- Ducky Project D Tinker 75% RGB USB – Cherry MX Red – UK – £139.99
- Ducky Project D Tinker 75% RGB USB – Cherry MX Blue – U – £129.98
- Ducky Project D Tinker 75% RGB USB – Cherry MX Speed Si – £129.95
- Ducky Project D Tinker 75% RGB USB – Cherry MX Brown – £129.98
ProjectD Tinker keyboards (Barebone)
Cherry MX switches
- Ducky Switch Kit Cherry MX RGB Silent Red – £44.99
- Ducky Switch Kit Cherry MX RGB Red – £40.00
- Ducky Switch Kit Cherry MX RGB Speed Silver – £44.99
- Ducky Switch Kit Cherry MX RGB Brown – £40.00
- Ducky Switch Kit Cherry MX RGB Blue – £40.00
- Ducky Switch Kit Cherry MX RGB Black – £40.00
Kaihl switches
- Ducky Switch Kit Kailh Box Navy – £29.99
- Ducky Switch Kit Kailh Midnight Pro – £39.98
- Ducky Switch Kit Kailh Polia – £29.99
- Ducky Switch Kit Kailh Box White – £29.99
- Ducky Switch Kit Kailh Gateron G Pro Yellow – £29.99
- Ducky Switch Kit Kailh Gateron G Pro White – £39.98
- Ducky Switch Kit Kailh Box Jellyfish – £39.98
- Ducky Switch Kit Kailh Box Brown – £29.99
- Ducky Switch Kit Kailh Box Red – £29.99
- Ducky Switch Kit Kailh Box Jade – £29.99
- Ducky Switch Kit Kailh Box Red-Super V2 Speed Silver – £29.99
Ducky keycaps
- Ducky Yellow PBT Seamless Double Shot UK Keycap Set (DKSA109-UKPDYDYYWO1) – £24.98
- B Grade Ducky Yellow PBT Seamless Double Shot UK Keycap Set (DKSA109-UKPDYDYYWO1) – £29.95
- Ducky Ultra Violet PBT Double-Shot PBT Keycaps, UK Layout – £49.99
- Ducky 132 Key PBT Dye-sub Keycaps ANSI/ISO Layout – Daisy – £29.99
- Ducky 132 Key PBT Dye-sub Keycaps ANSI/ISO Layout – Dino – £29.99
- Ducky 132 Key PBT Dye-sub Keycaps ANSI/ISO Layout – Mico – £29.99
- Ducky 132 Key PBT Dye-sub Keycaps ANSI/ISO Layout – Boba – £29.99
- Ducky “Rosa” PBT Double-Shot Keycap Set, US Layout – £42.95
- B Grade Ducky “Rosa” PBT Double-Shot Keycap Set, US Layout – £22.82
- Ducky 132 Key Cherry Profile Keycaps ANSI/ISO Layout – Blank White – £19.99
- Ducky 132 Key MDA profile Keycaps ANSI/ISO Layout – Blank White – £19.99
- Ducky 132 Key MDA profile Keycaps ANSI/ISO Layout – Blank Black – £19.99