How to overclock GPU – AMD and Nvidia graphics cards overclocking guide
Squeeze out just a bit more perfromance out of your card with these easy steps
WePC is reader-supported. When you buy through links on our site, we may earn an affiliate commission. Prices subject to change. Learn more
If you’re a GPU overclocking rookie, we’re going to show you how to overclock your GPU with relative ease. If you feel as if your graphics card just isn’t delivering enough power – and you don’t have the means to upgrade – overclocking is a great option to make the most of your current gaming PC – perhaps saving you from a whole new build.
The idea of overclocking is that you increase the performance of your component by boosting its clock speed. You’re basically squeezing out the maximum amount of power from your GPU, with the hope this translates into a performance boost, such as improved frames per second in gaming. With this, however, comes issues of higher GPU temperature, more power consumption, system instability, visual artifacts and in severe cases, system damage. Done right, overclocking is harmless, especially for your GPU… done wrong, you can cause lasting damage to your system. If in doubt, we advise you read about the benefits and drawbacks of overclocking.
Everything you need to know about overclocking your GPU: how to do it, but also a brief explanation of what it is and how it works. Any questions you have about GPU overclocking should be answered in this article. If you’re looking to overclock your CPU, then we’ve pulled together a guide for this also.
Prerequisites for GPU overclocking
Before we worry about overclocking, we first need to make sure you know what you’re dealing with (ie, your PC’s specs) and that everything is up to date. Download and Install Speccy or GPUz. Speccy will pull up a list of your exact specifications, including what matters most here: your GPU. You can’t even hope to start overclocking your GPU if you don’t even know what card you’re running!
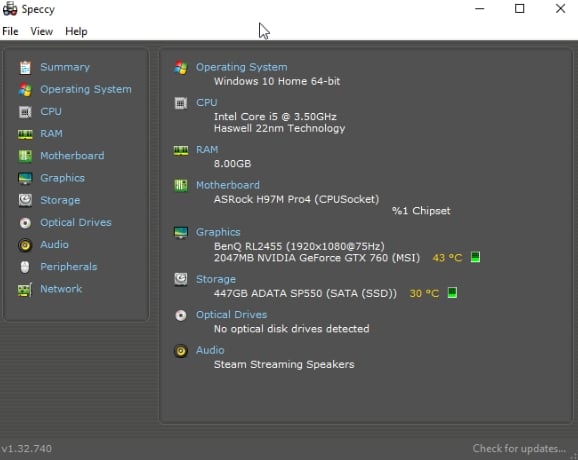
Fortunately for me, Speccy is reporting our exact GPU, an Nvidia GTX 760. If you’re less fortunate, though, you may end up getting a result like “AMD RX 500 Series”. This might be accurate, technically, but doesn’t narrow you down to the exact GPU you’re using. Fortunately, you still get your GPU manufacturer’s name, which means you’ll be able to discover what your exact GPU is in the next section.
How to overclock Nvidia and AMD GPUs
Step 1: Update your drivers
Now it’s time to update your drivers! If you saw “AMD”, “Radeon” or “RX/R9/R7/R3” under your Graphics header in Speccy, it’s time to skip over to the Radeon Software section. If you saw “Nvidia”, “GeForce”, “GTX”, or “RTX” under your Graphics header, continue down to the GeForce Experience section. Or check out our complete guide on how to update your graphics driver.
GeForce Experience (Nvidia)
Using the link above, download and install GeForce Experience. Once you open it, it should automatically update your drivers for you. You can read about how to update Nvidia drivers in our guide.
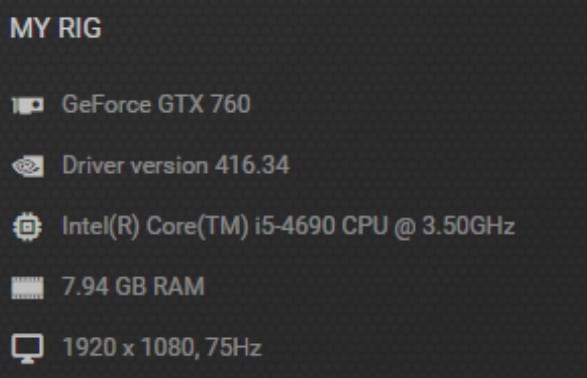
This would have been exactly what we needed if we had gotten a vague result, like the “GTX 700 series”. As long as GeForce Experience is able to identify your GPU, you should be able to continue on to the “Install An Overclocking Program” section.
Step 2: Install GPU overclocking software
Now for the exciting part: choosing an overclocking program! For the sake of simplicity and cross-compatibility, we’re going to use MSI Afterburner. However, you should be able to follow along with the guide if you use one of the other utilities. Don’t worry; none of the below software should make a difference to the quality of your overclock. It’s mostly small things, like visual differences.
- MSI Afterburner (All)
We’re going with MSI Afterburner since it’s the industry standard and is compatible with any GPU, AMD, or Nvidia, even if MSI isn’t the manufacturer. It does offer extra features for MSI GPUs, though, so if you want to make the most of an MSI GPU, go with this one. We’ll go over exactly how to use MSI Afterburner in the upcoming sections.
- EVGA PrecisionX (Nvidia)
EVGA PrecisionX is only compatible with Nvidia GPUs, and, like Afterburner, has a few extra features set aside specifically for EVGA-manufactured GPUs. Unless you’re running an EVGA GPU, though, there’s no real reason to choose this one over Afterburner, unless you just like how it looks more.
Step 3: Overclock your GPU
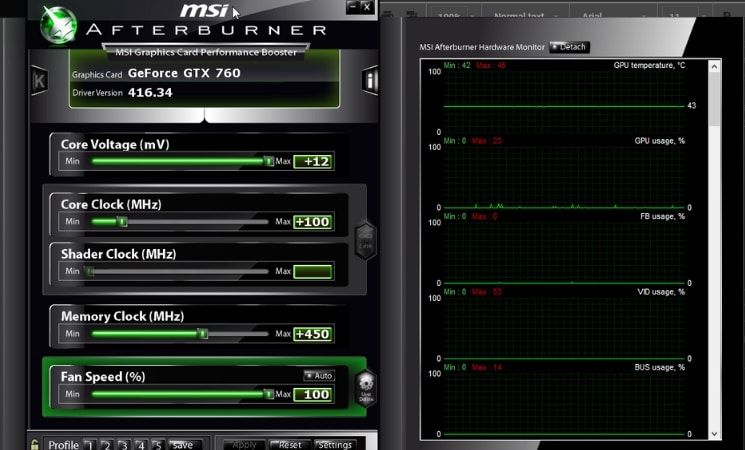
Key
- Core Voltage – This measures the voltage coming into your GPU. You’re going to want to up this before overclocking. Maxing this out shouldn’t be a problem, so long as your PSU has the headroom to account for it. If your system is already very close to the max wattage of your PSU, however, you may want to look into getting a new one before trying this out.
- Core / Shader Clock – These will usually be linked, and have arguably the most impact on your performance. We recommend incrementing this by +25 at a time, as it is the most likely to cause a crash. Don’t start adjusting this until after the memory clock, though.
- Memory Clock – You can usually get away with making larger jumps in this category- go +50 at a time until you start experiencing crashes. We recommend doing this before the core clock- while you won’t see much in the way of performance boosts with this alone, you want to establish memory stability before boosting your core speed.
- Fan Speed – Last up is the fan speed, which is pretty self-explanatory. You can use Afterburner to set a custom fan speed, but unless you’re going to do what I’ve done and push it to run at 100% full-time, just go ahead and click “Auto”.
Before doing any overclocking, click “Save” and save to Profile 1. You’ll want to be able to go back to stock settings quickly if anything goes wrong. Make your first test overclock settings, click Save and save to Profile 2. Keep Afterburner open, and proceed down to testing.
Step 4: Test your GPU overclock
There are two ways to test your GPU overclock. There is the “practical” way, which is running a GPU stress test or two and seeing what happens. There is also the “stupid” way, which is jumping right into your favorite game and risking crashing or disconnecting in the middle of a game. This leads to lost save progress, matchmaking bans, and so on and so forth.
You get the idea. You’re going to want to read our GPU stress test guide and follow the steps we’ve laid out there for testing your overclocks. Whenever you fail a test, come back here and turn a setting down a notch or two. Do this until you achieve stability, then test the waters by making smaller increments upward and running tests with each one, until you’ve reached your perfect overclock. You can see my perfect OC with our GPU, below:
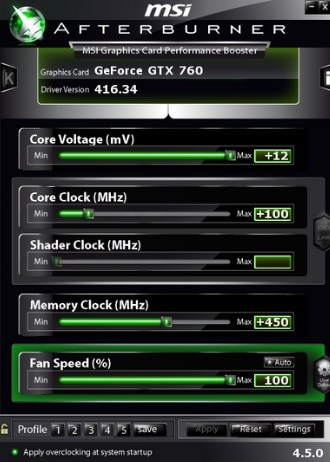
Yeah, that’s just the image you saw earlier. Not bad for such an old GPU though, right? If you were looking for a quick-and-easy solution, sorry, that’s not how this works; overclocking can be a pain and requires some effort to find the right balance.
Test a setting. If it works, push it a little higher. If it fails, push it a little lower, then try again. Do this enough times and you’ll find the perfect overclock for your system, you just need to be willing to put in the work. Now that you know how to overclock your graphics card, we’d love to hear about the results you’ve had.
Expert tip: Do some research
Now, before you get ahead of yourself, you should probably stop and do some research. Now that you know what GPU you’re using and (hopefully) the manufacturer, you should start searching for overclocking results on the web. For instance, from our Speccy results earlier, we have an MSI-manufactured Nvidia GeForce GTX 760. So, searching “MSI GTX 760 overclock” to find people with similar GPUs so we can see what kind of results to expect. In this case, a quick search brought us this article, which showed off our GPU being overclocked by a tech reviewer! Note, this is a great reference, but often you will have to utilize forums, Reddit, etc.
Also, if you’re wondering, ”Can I overclock my GPU?” This is the point where you will find out just how useful, or plausible, that might a ctually be.This helped us establish a baseline of expected performance. An expected baseline gives you somewhere to start, which you adjust upward and downward in accordance with the results of your own testing. Of course, you still have to tweak things since different components will give you varying results. Moreover, how your GPU overclocks depends not only on your card and its age but also on other factors that are completely out of your control. Thanks to what’s called “the silicon lottery”, some chips will have astounding overclocking headroom and others will have very, very little.
Don’t skip this step; it’s important for getting an idea of where to start!
Conclusion
If you were looking for a quick-and-easy solution, sorry, that’s not how this works; overclocking can be a pain and requires some effort to find the right balance.
Test a setting. If it works, push it a little higher. If it fails, push it a little lower, then try again. Do this enough times and you’ll find the perfect overclock for your system, you just need to be willing to put in the work. Now that you know how to overclock your graphics card, we’d love to hear about the results you’ve had.
Other Overclocking Guides
FAQs
Does overclockd GPU reduce lifespan?
If you do want to have some extra performance, you want to make sure you’re not doing some further damage. As such overclocking, your GPU can cause some issues down the line. As it will increase the heat generated by the GPU you want to be sure your cooler can accommodate that. But this will still reduce some of the lifespan of the card. It’s not going to be a great deal and will still last you till your next card.
How do I know if my GPU is overclocked?
If you’ve fiddled around with your overclock then you might be wondering how much effect it had. As such, you may consider doing a benchmark before and after the overclock. Using something such as 3DMark to get a graphical score, then applying an overclock and running it again. Then comparing those scores to see how much it improved.


