WePC is reader-supported. When you buy through links on our site, we may earn an affiliate commission. Prices subject to change. Learn more
Corsair had huge success with its popular Carbide 270R PC case thanks to excellent build quality, great aesthetics, and good airflow options. It was one of our stand-out picks as far as mid-range PC cases went. So, when they introduced the Carbide 275R – a refresh of the fan-favorite – we were both unsurprised and intrigued to see what it had to offer.
The Carbide 275R has held on to all the positives that came with its predecessor but improved on areas where necessary. The Carbide 275R now offers a full windowed side panel (available in both acrylic and tempered glass), a newly designed front panel, and some cool interior changes that make build assembly and cable management a much easier process too.
So, in today’s article, we’ll be putting Corsair’s Carbide 275R through its paces to see how it stacks up in the most important areas for a case; build quality, cooling, noise levels, aesthetics, and value for money. Furthermore, considering this case currently resides in a very competitive price point, we’ll be looking at how it compares to some similarly priced alternatives.
With all that in mind, let’s dive straight into it.

[mks_col]
[mks_one_half]
Pros
[/mks_one_half]
[mks_one_half]
Cons
[/mks_one_half]
[/mks_col]
No products found.
| Case Type | Mid Tower |
|---|---|
| Dimensions (mm) | 460 x 215 x 455 (L x W x H) |
| Materials | Steel, Plastic, Glass/Acrylic |
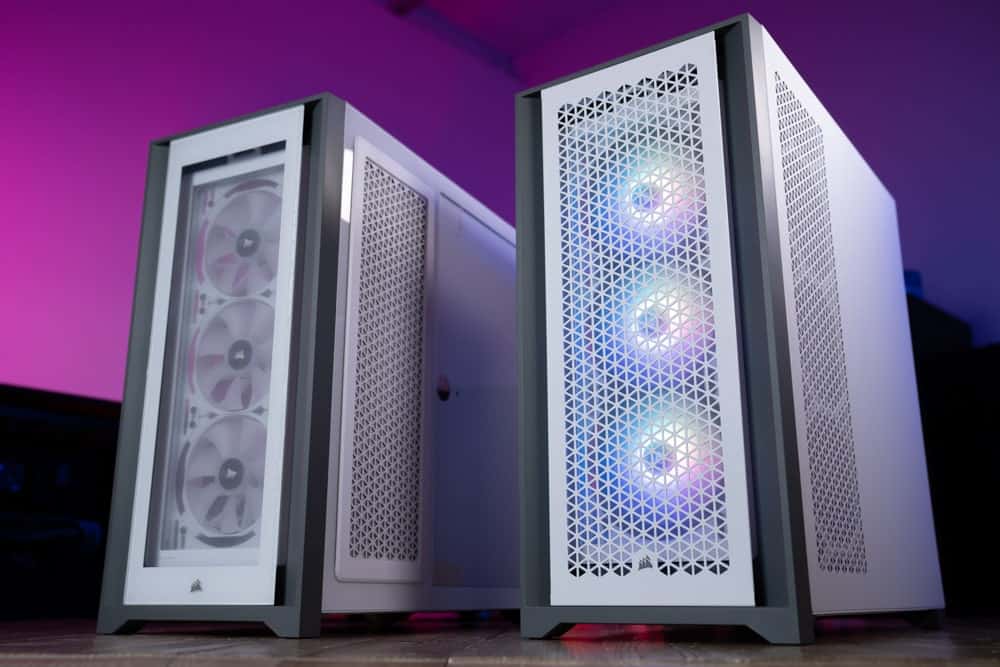
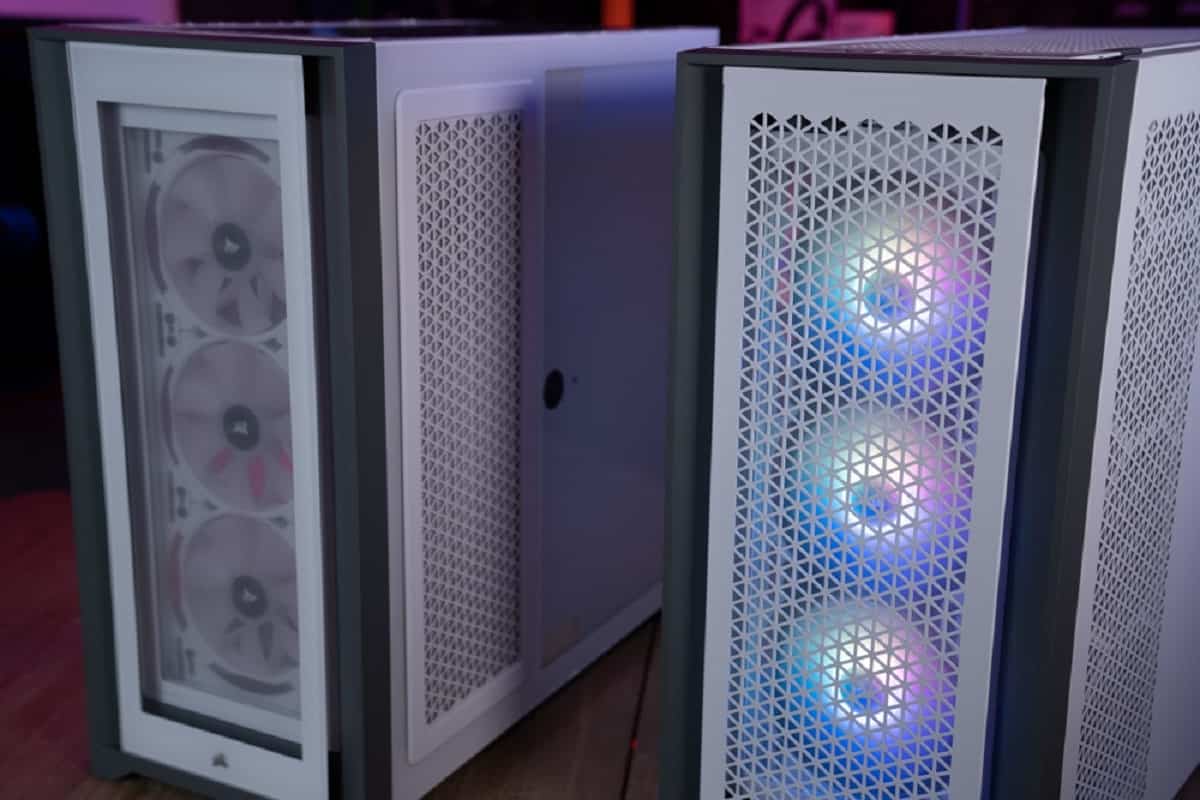
| Available Colours | Black White |
| Weight | 10.14Kg |
| Front I/O panel | USB 3.0 x 2, HD audio x 1, microphone jack x 1 |
| Expansion Slots | 7+2 |
| Drive Bays | 2 x 3.5" 4 x 2.5" |
| Motherboard support | ATX, Micro-ATX, Mini-ITX |
| Cooling (Front/Top/Rear) | 3 x 120 or 2 x 140mm 2 x 120mm 1 x 120mm |
| Maximum GPU length | 370mm |

The Carbide 275R came in a fairly generic brown box that weighed in at around 12Kg. Like most cases, this one came with two styrofoam protectors on the top and bottom of the case, with no signs of damage upon arrival.

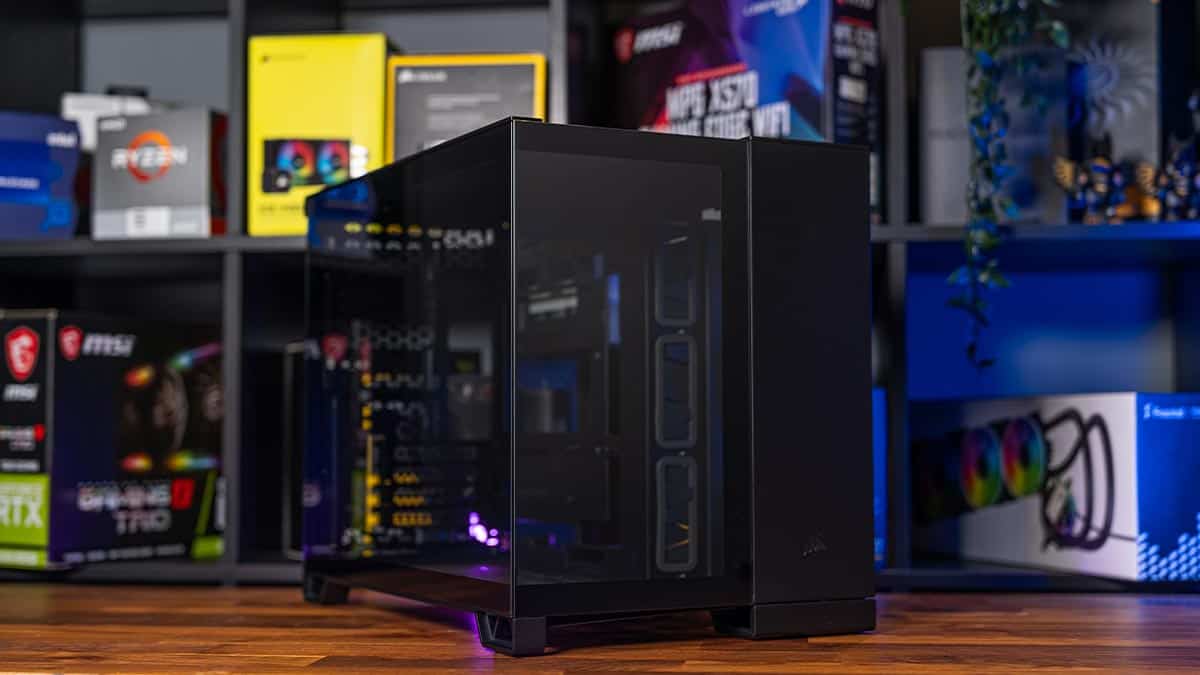
From a design point-of-view, not a great deal has changed when comparing this to the old Corsair Carbide 270R. It still offers a fairly basic, yet aesthetically pleasing, design that makes use of steel and plastic elements. We picked up the all-black version, however, it does come in white as well. The roof has the same honeycomb mesh style finish as its predecessor – still offering great airflow and fan mounting options.
Having said that, the Carbide 275R isn’t completely identical to the 270R, it does off some design changes. The first, and possibly most obvious difference, is the newly implemented window that the 275R comes equipped with. Users can choose between tempered glass or an acrylic version of the 275R, with a price difference of around $10 between the two cases. The front also sees some subtle differences, now losing the mesh air-intake gap and opting for a rounded edge that leads into an open area around 10-15mm wide. It’ll be interesting to see how this affects cooling later on.
Overall, this cases loses the flashy RGB and opts for a more subtle design that I feel will be a huge hit.
As mentioned above, the front of the Carbide 275R is all-black and has a brushed aluminum styling to it. It’s rounded on the edges to promote airflow and has moved the I/O ports from the side to the top. At the bottom of the front panel, we see the Corsair logo and another area for air intake – which also doubles up as a handle to remove the front panel.
If you need to access under the panel, simply pull from the bottom with light force and it easily removes. Underneath you’ll be able to access the dust filter which, again, is easily removed and fairly straight forward to clean. At the bottom, you’ll see the LED light bar which illuminates the bottom portion of the front panel. When the case is up and running, I actually really like this design feature, it’s subtle but effective.
The back of the chassis is fairly basic but offers decent build quality for the most part. At the top, you have the I/O cut-out alongside a fan mount which does offer height adjustment. Underneath, you’ll find the expansion slots which are, unfortunately, unreplaceable when used. No big deal personally, but you know, some people may want to remove their graphics card forever and replace the shield. The same applies to the two vertical expansion slots as well. Speaking of the vertical expansion slots, they come with a mounting mechanism attached which can be held in place via a screw found above. I’ve never been a huge fan of this design feature, but here I feel it does off some functionality, especially when you have a GPU mounted vertically.
The back panel is firmly held in place by two thumbscrews that sit inside the panel when loosened. The screw holes feel well made and don’t take much effort to find and tighten – an issue that is fairly common in many cases.

No products found.
We opted for the acrylic version of the carbide 275R over the tempered glass to see what it had to offer. To our surprise, it was pretty well made – as far as plastic side panels go. Corsair – unlike the tempered glass version which used Allen key screws – has made use of thumbscrews in the acrylic version which feel high-quality and robust. Corsair has also gone to the effort of adding a textured square around each thumbscrew for grip and cleanliness – no fingerprint marks – another nice touch.
The side panel doesn’t offer much in terms of weight, meaning it can easily be removed when needing to access the interior of the case. Underneath the acrylic, you will find four rubberized stoppers to remove full contact with that chassis – alleviating any pressure that might occur.

The top of the Carbide is probably the most basic part of the case but does offer a good amount of functionality. The entire roof is designed with honeycomb mesh that provides excellent airflow for the most part. You also have the option to mount numerous fans and radiator options which include; 2 x 120mm fans or a 240mm radiator.
The I/O ports for the Carbide are also found on the top of the case, unlike the 270R which were positioned on the side. Users have 2 x USB 3.0 ports, 1 x mic, 1 x headphone jack, and reset/power buttons too. All are fairly basic in design, however, the power button does offer a tactile feel which is welcome.

For the most part, the Carbide 275R has kept all the good qualities of its predecessor. Having said that, it’s not the same story from start to finish. Corsair have implemented some internal changes that are very welcome.
The front panel can be removed by pulling the button with light force. Once removed, you have access to the dust filter which can be removed for cleaning or to access the front fans. If you are looking to access the cooling configuration, you’ll have to do so via the inside of the case (via the window). This is a fairly easy process, however, as the Carbide 275R has a fairly large interior – even with the newly designed full PSU shroud.
Out-of-the-box, the Carbide 275R comes equipped with 1 x 120mm intake fan at the front. It’s been positioned in the middle for, what Corsair claims to be, optimal airflow. Users can install an additional 2 x 120mm fans (3 total) or replace the existing 120mm with 2 x 140mm fans (2 total) if they feel the need to. Furthermore, you have the option to install a 280mm or 360mm radiator too. The top, as mentioned above, does not come with any pre-installed fans but does have mounting options for several cooling configurations – up to 2 x 120mm fans or a 240mm radiator. Unfortunately, this case didn’t come with a magnetized dust filter on the top. You can pick one up for around $5 from the website, but I feel that’s a standard with many similar cases.
Like many cases of this price point, the Carbide 275R comes equipped with pre-installed standoff screws to aid in the build process. They’ve been installed the in ATX motherboard configuration, so you will need to re-arrange these if you’re using M-ATX or Mini-ITX motherboards. To make life a little easier, Corsair has labeled the hole with the referring motherboard factors. To continue with the motherboard tray, there is a huge opening to allow users to easily access the CPU cooler backplates.

Unfortunately, the acrylic version of the 275R seems to be stripped-down, losing the addition of grommeted cable cut-outs we find on the tempered glass version. However, it does come with the newly designed full PSU shroud that certainly helps in the cable management department. This will affect thermals, but we’ll touch upon that later. The PSU filter is also honeycomb and comes with a dust-filter underneath.
At the rear, you will find the 2nd 120mm exhaust fan and the expansion slots we touched upon earlier. Something we didn’t mention, however, is that the screws for the seven regular expansion slots can only be accessed on the inside. The opposite can be said for the vertical GPU mount.

No products found.
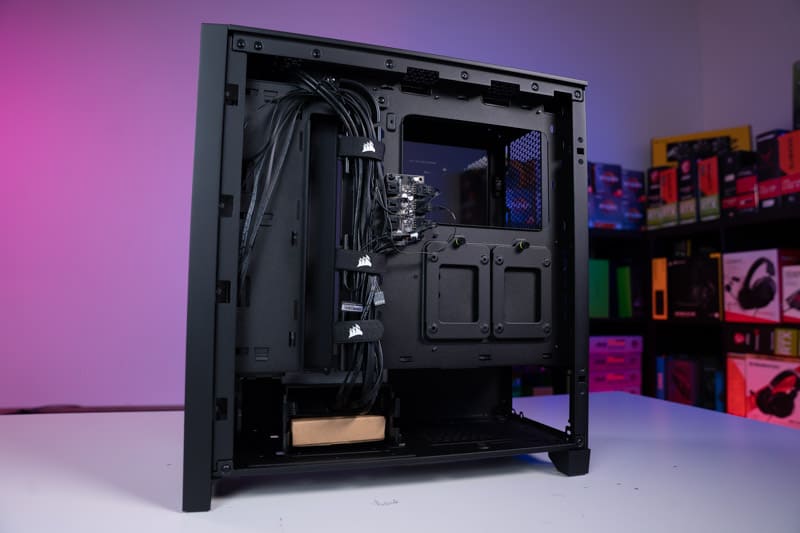
Looking at the back panel we found that Corsair has tied the I/O port cables to the back of the motherboard tray. As far as storage compatibility is concerned, this case offers a decent amount of expansion. Users will find 2 x pre-installed 2.5″ drive trays mounted to the back of the motherboard tray and mounting holes for a further two drives on the left-hand side of the backplate.
The hard drive space doesn’t end there though. Underneath the PSU shroud, Corsair has installed a drive tray that accepts 2 x 2.5″ drives or 2 x 3.5″ drives, respectively. For users that don’t want to make use of this feature, you can easily remove the tray by unscrewing it from the motherboard tray. If you do plan on using the drive tray underneath the PSU shroud, be aware that this will limit the PSU size you use. It also doesn’t leave a great deal of space for cable management either.
Speaking of cable management, Corsair has designed the back of the motherboard tray to make cable management as easy as possible. This case offers 18 areas for tieing cables down and 7 cut-outs for cable routing.

So, we’ve taken a look at the design and briefly touched on some of the highlights of what this case has to offer. It’s now time to see what this case was like to build in and check out some of the more subtle features we have yet to touch on.
Design – For me, the design is one of the biggest features this case comes equipped with. It’s a fantastic example of a manufacturer taking time to consider the build assembly process when designing a case. It comes to the table boasting an array of cooling options, a subtle aesthetic that looks great in most settings, and a bunch of cable management options too. So a big thumbs up as far as design is concerned.
Fans – I was pretty surprised with the performance of the fan configuration that this case comes equipped with out-the-box. Even though there are only two pre-installed fans, it still provided a decent amount of airflow for the most part. Users also have access to a bunch of additional cooling configurations spanning the front, top, and rear of the case.
Easy assembly process – It’s always important to make sure a case’s design is not only aesthetically pleasing but designed in a way that aids in the build process. Luckily, the Carbide 275R comes with an abundance of options when it comes to this department. The cable management options help provide a clean looking build, whilst also being positioned in a way that makes wiring the rig up a lot easier. The newly installed PSU shroud increases design and houses a hidden storage drive tray that doesn’t invade any space at the front – still allowing for numerous radiator configurations. Ultimately, the build process of this PC case hasn’t changed much from the 270R, and that’s a good thing.
So, let’s complete this comprehensive review of the Corsair Carbide 275R by answering some of the big questions surrounding this case.
Firstly, is this case much of an improvement over the 270R? Well, if truth be told, probably not. I mean, it has a new front panel which looks great, but ultimately, it doesn’t really offer anything new in terms of functionality. It’s simply an aesthetic change. Secondly, the PSU shroud. In the 270R, you’ll find that the PSU shroud is only half-length, leaving a bunch of room for fans and radiators. On the other hand, the 275R comes equipped with a full-length PSU shroud which comes with its own set of pros and cons. That’s great as it effectively makes cable management that little bit easier. However, it does affect the internal temps of this build – in a bad way. You’ll notice that the internal temps, especially on the GPU, are definitely higher than the 270R. That’s probably because the new shroud is either bouncing heat back up into the GPU, or the airflow has been effected in some way. Whichever way you look at it, it’s an increase in temps. So to answer that question more bluntly, no, it is not a huge difference over the 270R.
Is that a bad thing though? And does this case display good value for money? Well, when you consider the fact that the price of the 275R isn’t that much more expensive than the 270R, you’d have to say yes.
I mean, taking the 270R comparison away, this is a very good case on its own when compared to others of similar price. It offers a great design, good cooling, ample noise levels, and is aesthetically pleasing. Ultimately, if you’re looking for a mid-priced case that offers everything you’d need for an easy build process whilst looking stylish at the same time, the Corsair Carbide 275R should be high on your list of considerations.
No products found.