How to Move Steam Games to Another Drive
New HDD or SSD? Here's how to move your Steam games over

WePC is reader-supported. When you buy through links on our site, we may earn an affiliate commission. Prices subject to change. Learn more
Games have been getting larger over the past decade and have now reached a point where you’d be lucky to install a game onto your remaining 50GB of storage. With that, Steam decided to offer their valued users a “multiple library folder” facility which meant users could move their chosen games to another drive without having to go through the monotonous task of redownloading the files.
This process effectively saved users having to redownload hundreds of gigabytes of game files in order to move a couple of games to another drive.
In this following article, we’re going to explain exactly how to move a game(s) from one drive to another in a simple step-by-step guide. Whether you’ve got a new SSD and want quicker loading times, or just want to free up some space on your main C drive, this guide will show you the easiest way to move your games. Let’s get into it!
Moving Steam Games to a different drive
Before we actually move any games, we need to do a bit of PP.
PP in this scenario means preliminary preparation if you weren’t aware, and this means creating a secondary Steam folder where your games will eventually be moved to.
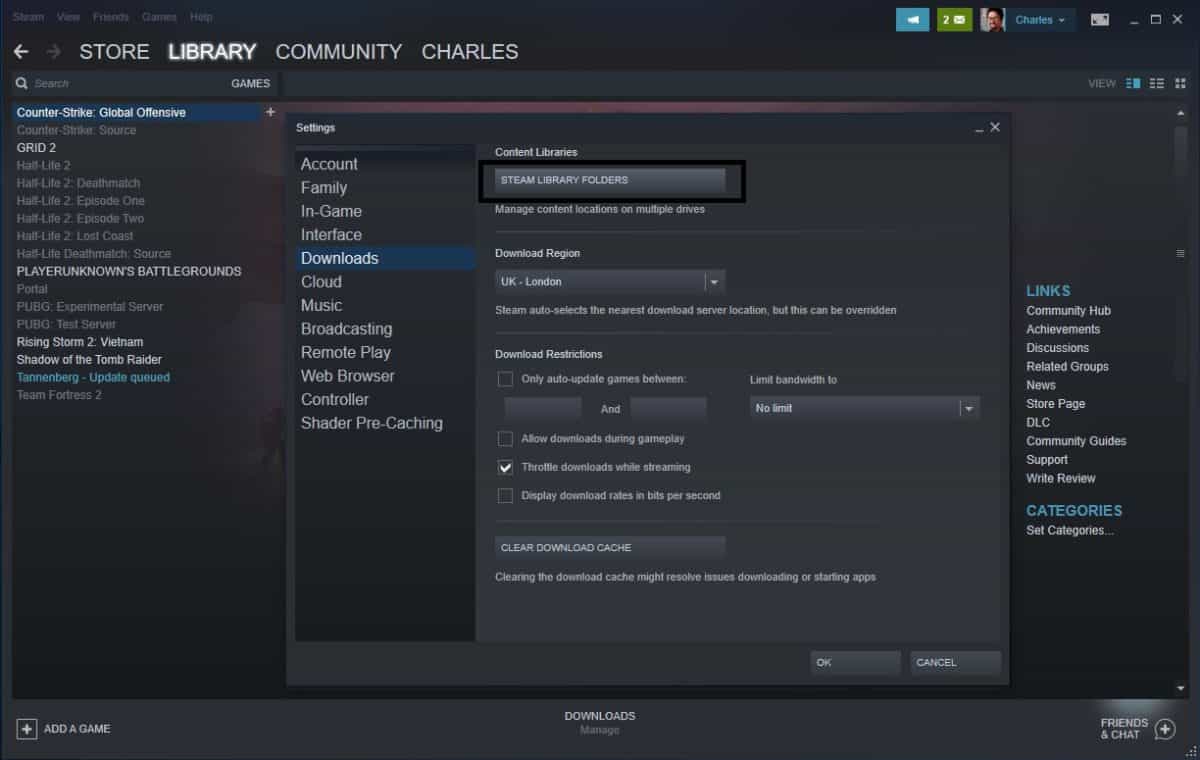
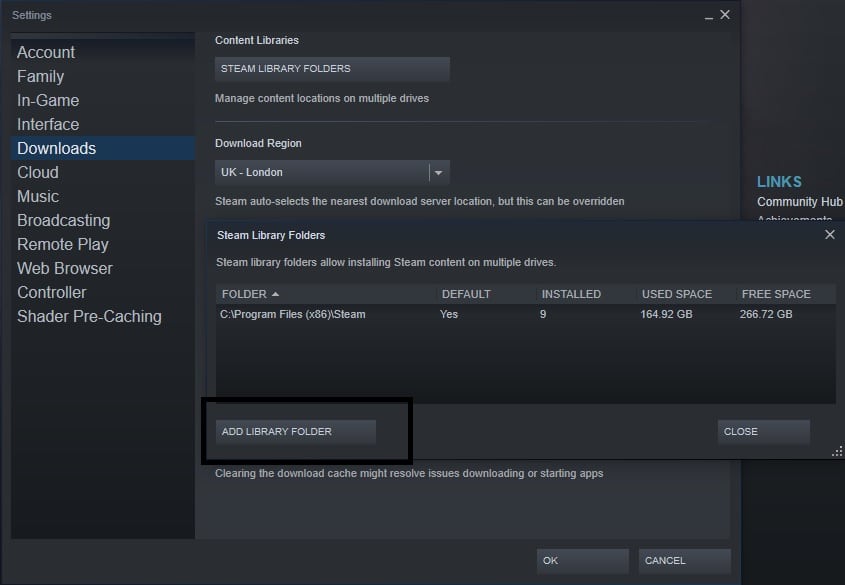
To do this, you need to follow the steps below:
Creating a secondary Steam folder
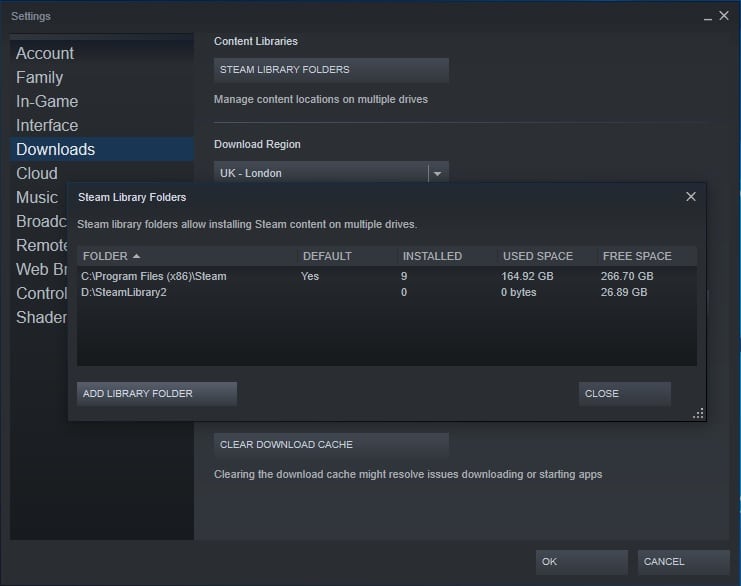
Your folder should look like this when created, with the name you chose.
Moving your game files
Step
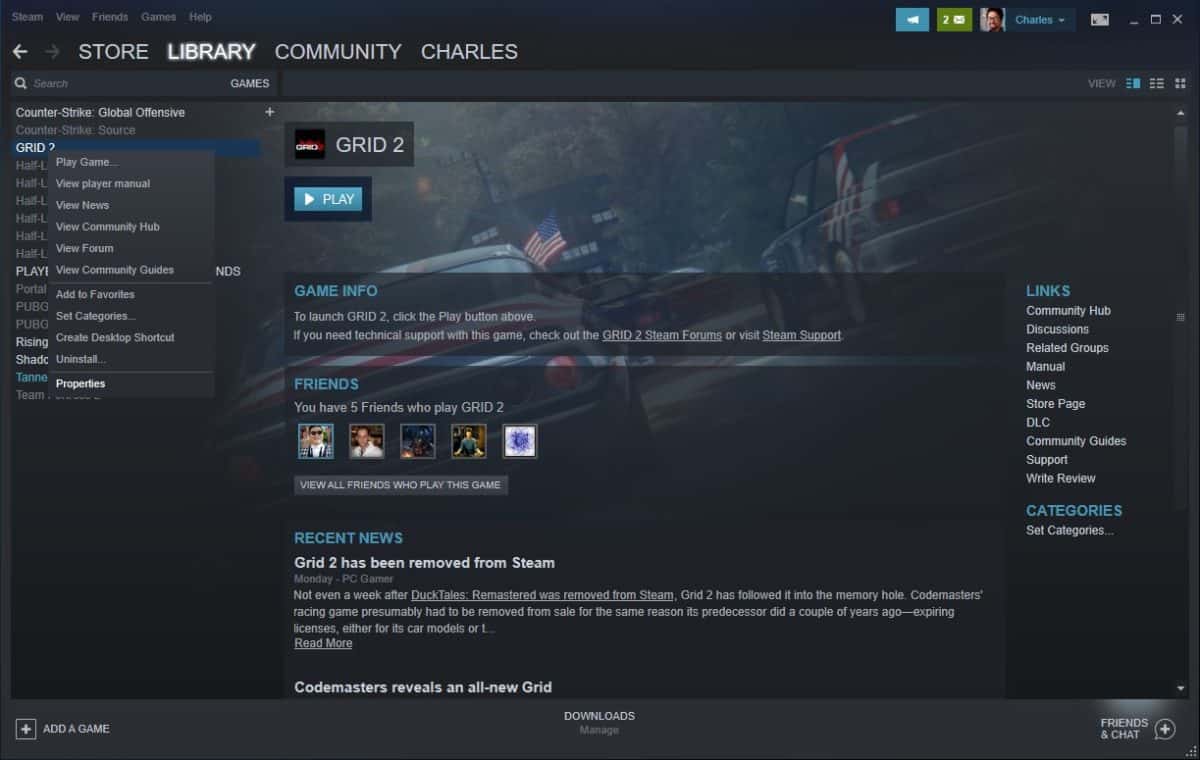
Move your game files to the new folder
It should automatically find your secondary Steam folder. If it doesn’t, just click the drop-down menu and navigate to it. Once located, click Move folder.
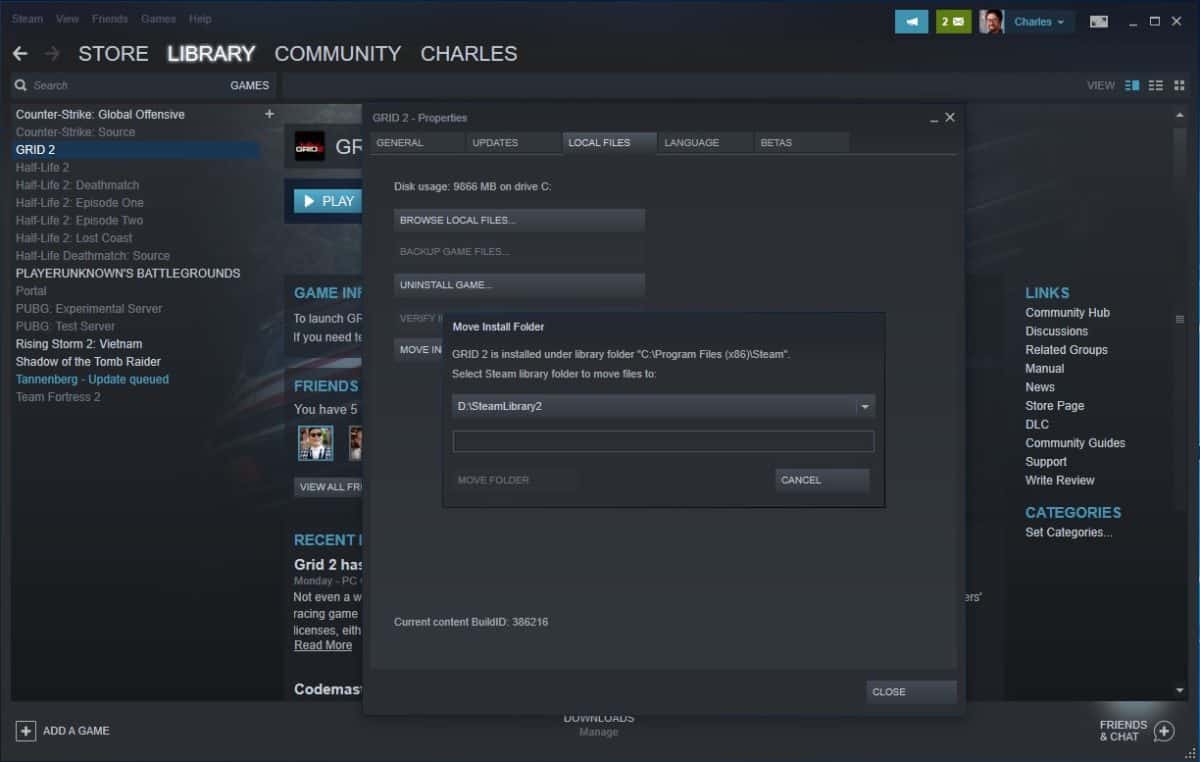
You are now transferring all the files from the original source to the new folder. The progress bar will let you know how long is remaining.
Once the game has completed the transfer, the process is finished. You have successfully moved the game to another drive. If you want to move any more games, simply repeat the process.
When you install games from now on, Steam will ask you which library you would like to install the game onto. You now have the freedom to choose which drive to use before the installation process.
If you have any questions regarding the process, feel free to drop us a question in the comments section below, and we will get back to you as quickly as we can.

