
How To Grow Pumpkins In Minecraft
Share this article...
WePC is reader-supported. When you buy through links on our site, we may earn an affiliate commission. Prices subject to change. Learn more
Minecraft Pumpkins have more uses than you might realise. Of course, you can use them for food, but there are other, more decorative, uses, too. And even an important survival application.
To farm Pumpkins in Minecraft, you’ll first need to find a pumpkin or Pumpkin seeds in your Minecraft overworld. Pumpkins are often found in the Windswept Hills, Windswept Gravelly Hills, and Plains biomes, or in Villages. You may also find Pumpkin Seeds in loot chests in Villages, Dungeons, Woodland Mansions and Mineshafts.
If you’re working from a Pumpkin, though, once you’ve found one, it’s time to dig it up. Simply hit the Pumpkin with the use button, the same as you would the break a tree or other block. While you can break a Pumpkin with your hand, the quickest method is with an Axe.
How to get Pumpkin Seeds in Minecraft
Find them!
As mentioned above, you can find Pumpkin Seeds in your Minecraft world without having to locate Pumpkins in the wild. Pumpkin Seeds may appear in loot chests in Dungeons, Villages, Mineshafts and Woodland Mansions. In Bedrock Edition, if you start your game with a bonus Chest, you may even start off with Pumpkin Seeds in your arsenal.
While you’re looking through these chests, you may also find Beetroot Seeds and Melon Seeds. Beetroot Seeds can be found in all of the aforementioned locations, as well as End City Chests, while Melon Seeds might be found in Dungeon, Mineshaft or Woodland Mansion Chests.

Craft them
If you find a Pumpkin out in the wild before you find its seeds, then don’t rush to turn it into a Pumpkin Pie. Make sure you get those seeds out, and farm them – for endless Pumpkin Pies!

Step
Place Pumpkin in a Crafting Table
To craft Pumpkin Seeds, you can either use a Crafting Table or your own, on-person crafting block. Simply open your inventory and place a Pumpkin in any of the crafting grid spaces. You’ll then be able to take four Pumpkin Seeds out of the right hand side of the Crafting UI.

Carve a Pumpkin
Actually, the best way to obtain Pumpkin seeds involves the best of both worlds! By carving a Pumpkin – not just for Halloween – you will gather Pumpkin Seeds, while also keeping a nice decorative Carved Pumpkin item to boot. As you’ll see further down, this in itself has its own uses.
How to farm Minecraft Pumpkins from Seeds
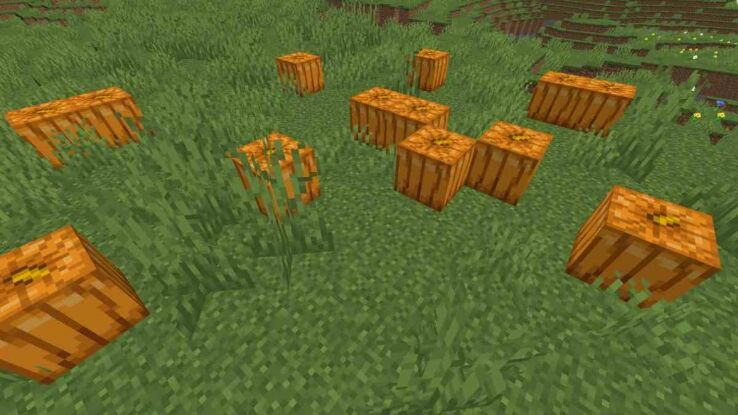
Pumpkin seeds are intended for field planting only. They establish a stem where planted, and finally create a pumpkin on any adjacent Dirt block, Grass block, Farmland, Podzol, Moss Block or Coarse Dirt block.

If a Pumpkin has already grown on a nearby block, the stem will remain dormant until the pumpkin is removed, as each stem can only grow one Pumpkin at a time. However, each single stem has an infinite capacity for producing pumpkins. So, unlike other arable crops, you don’t have to re-sow seeds each time you obtain a Pumpkin.
In order to grow, Pumpkin Seeds – and subsequent stems – need a minimum light intensity of 10 in the block above the stem to grow and produce pumpkins.
While Bone Meal does affect the development of Pumpkin Seeds into a stem, it does not affect Pumpkin production. The stem twists after a pumpkin has grown from it. A fully-developed single stem may connect to a Pumpkin in any adjacent square, giving the stem a total of five distinct appearances. When the Pumpkin is removed, the stem reverts to its original straight shape.
Pumpkin stems are technically blocks. They are not available as things in Java Edition, but are editable in the inventory or added to Bedrock Edition via add-ons.
Uses for Pumpkins in Minecraft
Carved Pumpkin
A carved Pumpkin is created by chopping a pumpkin using shears. The Pumpkin itself can either be placed first, or can be carved right on the stem before picking. A carved pumpkin, despite its lack of protection, may be used as a helmet. When worn, the player’s perspective is limited to a mask pattern resembling the carved face of the pumpkin.

The pattern is not visible from a third-person perspective or when the F1 key is pressed.
As mentioned, this doesn’t provide a lot of protection, and hinders your vision, so is not best used in place of a Helmet apart from one specific situation… Around Endermen! If you wear a Carved Pumpkin on your head near any Endermen, anywhere, they will no longer be aggravated when you look at them, meaning you’re far less likely to be attacked. This is most useful in Warped Forests in the Nether and in The End.
What’s more, Carved Pumpkins can simply be used as an awesome decorative block, particularly in October!…
Jack O’Lanterns
Speaking of which, you can also turn a Carved Pumpkin into a Jack o’Lantern, a solid block of light that is formed by putting a carved Pumpkin on top of a Torch in a crafting grid.

When immersed in water, Jack o’Lanterns still emit light and have a brightness of 15. They are capable of melting snow and ice, much like the majority of other sources of light.
Try mixing some Carved Pumpkins with Jack o’Lanterns around your base next Halloween!
Golems
A subsequent use of Carved Pumpkins and Jack o’Lanterns themselves is in the creation of Golems. Both Snow and Iron Golems can be forged with the use of a Carved Pumpkin or Jack o’Lantern (though the latter would be a waste of a perfectly good Torch, as it makes no difference to the final appearance of the Golem).
To make your own Iron Golem, you’ll need the Carved Pumpkin and four Blocks of Iron. Place the four Iron Blocks in a T-shape, finally placing the Pumpkin on top, immediately causing the formation to come alive!

To create a Snow Golem, on the other hand, you’ll need just two blocks of Snow, placed one on top of the other. Finally, place the Carved Pumpkin on top, and your cool new friend will appear!
You can take this one step further still by using Shears on a Snow Golem, which will remove the Pumpkin, and your Golem will look more like a classic snowman…

As you can see from the images, a Snow Golem is useful in creating a trail of Snow that you can then pick up with the right tool!
Pumpkin Pie
By placing a Pumpkin in a crafting grid with one Sugar and one Egg, you’ll be able to bake yourself a delicious Pumpkin Pie! Eating one restores 8 hunger and 4.8 saturation.
Frequently Asked Questions
Why Won’t My Pumpkins Grow In Minecraft?
Ascertain that your pumpkin has at least one vacant space next to the stem. Additionally, the block immediately next to the pumpkin stem must be made of soil, gritty dirt, grass, or farmland. Every other block will be pumpkin-free.
How Often Do Pumpkins Grow In Minecraft?
Each pumpkin stem takes around ten to thirty minutes to grow. This is about equivalent to one-half to one-and-a-half Minecraft days. Ensuring all four neighboring blocks to remain open reduces the duration to less than ten minutes.
What Is The Best Way To Grow Pumpkins In Minecraft?
By placing water up to three blocks out from your farmland, you may hydrate the nearby farmland, giving the dirt blocks a darker brown color. Crops planted on hydrated soils will grow at a faster pace. Remember, unlike wheat, melons and pumpkins do not grow on the same block as they were sown.
More Minecraft farming guides
- How to grow Nether Wart
- How to harvest Honey using Bees
- How to make a Sweet Berry farm
- How to get Honeycomb in Minecraft
- How to farm Cactus in Minecraft
- How to grow Dark Oak trees in Minecraft
And head over to our Minecraft hub for even more news, guides and how-tos!


