How To Add Emojis To Discord
We show you how to add Discord emojis to your chat and upload your own emojis to Discord servers
Share this article...
WePC is reader-supported. When you buy through links on our site, we may earn an affiliate commission. Prices subject to change. Learn more
Emojis have taken over communication on the internet, so you’ll want to learn exactly how to add emojis to Discord. Emojis come in nearly every kind of form these days, allowing you to express your emotions or point in as many ways as you can think of. Keep on reading below as we take you through the necessary steps required to make full use Discord’s emoji features – which are accelerated by Discord Nitro.
If you want to create your own custom emojis, these are called emotes. Here’s how to make Discord emotes.
As emojis are a huge part of the visual language of the internet, they are of course massively integrated into Discord, one of the biggest online communication platforms in the world. Discord allows users to use emojis (also known as emotes) in their text chat channels in the same fashion as with most chat applications, though there is a greater degree of customizability open to its users, should they wish to make full use of the tools afforded to them.
This guide will detail where to find the standard emojis in Discord and also how to upload your own custom emojis to use in your online chats and Discord servers.
How to add existing Discord emojis to chat
As is the case with many text chat applications, emoji functionality comes with Discord as standard, and all the usual ones you’d expect (smiley faces, love hearts, eggplants etc.) are available. Besides these though, each server you join will often have their own custom emojis that have been created by the community of the server and/or its owners.
If you have the free version of Discord, you likely will not be able to use these custom server emojis outside the server in question, though if you have Discord Nitro you can use any emoji from your library in any server.
Step
Click on the face icon
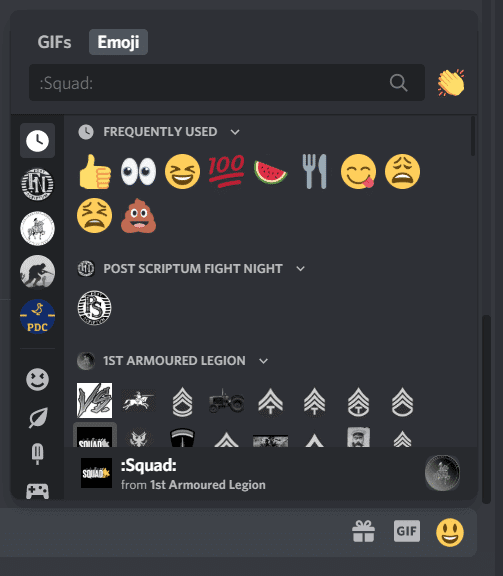
Make sure you are in a text channel within Discord. Look to the right side of the text box and you will see a face icon (next to the GIF icon). Click on it.
Step
Select your emoji
A menu should have opened up with various emojis for you to select. On the left hand side you should see a list of any servers you are a member of, and if you click on these icons it will bring up a list of custom emojis for use in those specific servers (which can be used elsewhere if you have Discord Nitro).
If you are unable to use an emoji on the server you are in currently it will be grayed out. The more standard selections of emotes should be visible further down the left hand side. You can also use the search bar at the top to find the specific emoji you are looking for.
Step
Wumbojis and stringing multiple emojis
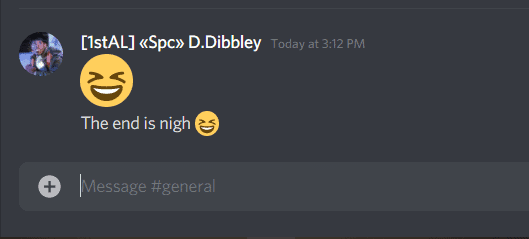
Simply clicking on the emoji you want from the menu in Step 2 will have it appear in your message, ready to be sent. You may notice that if you send the message without any text, the emote appears larger than if you send it with accompanying text. These larger emojis are known as wumbojis, and you can have up to 27 of these in a message before the Discord app forces them back down to normal size.
On that subject, you can select multiple emojis from the menu at the same time by holding shift and left-clicking on them.
How to upload new custom emojis to Discord
As mentioned, a massive part of online culture and humour is derived from image-based memes. The creativity of online communities like Discord servers in creating and sharing their own visual references is a big chunk of what makes them feel special.
Emojis are one such creative avenue and below is how you can add your own custom emojis to Discord, to be used in your own Discord server or, if you have Discord Nitro, anywhere you like. If you want to learn how to actually make emojis for Discord, check out our guide How To Make Discord Emotes.
Step
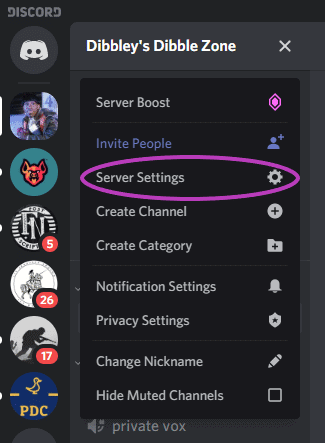
Open ‘Server Settings’
You can find this by clicking on the server you want to upload the emojis to on the left of your Discord window. Then click the drop down arrow next to the server name in the top left and select Server Settings.
Step
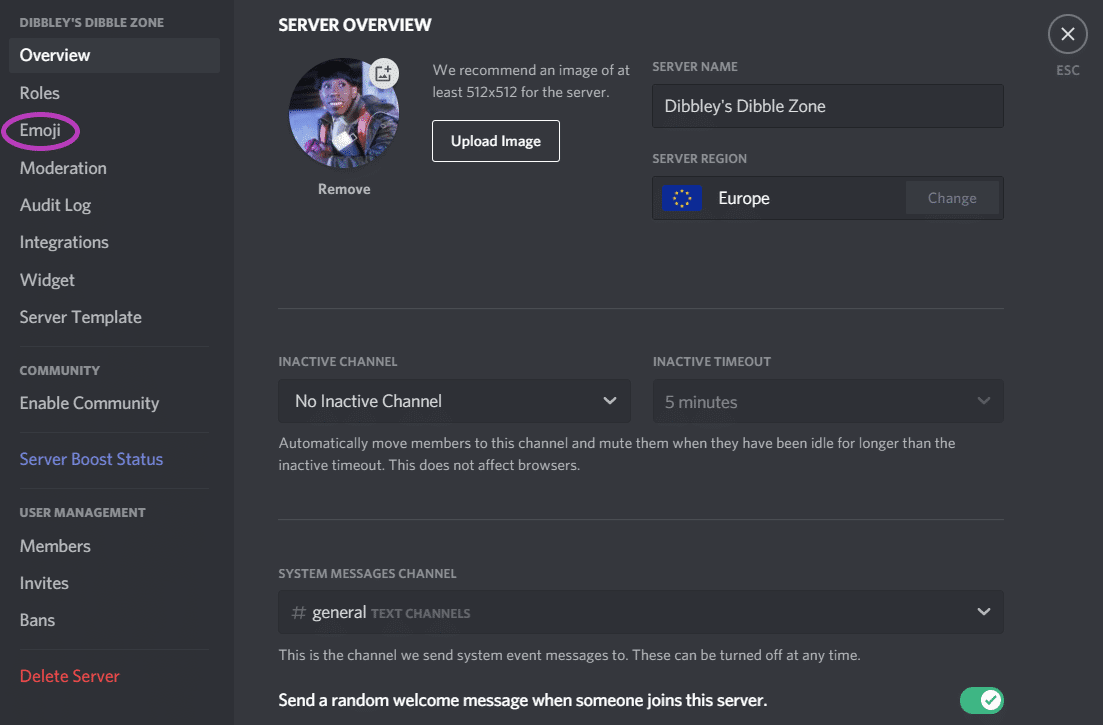
Click on ‘Emoji’
From within your server settings menu on the left hand side, select Emoji.
Step
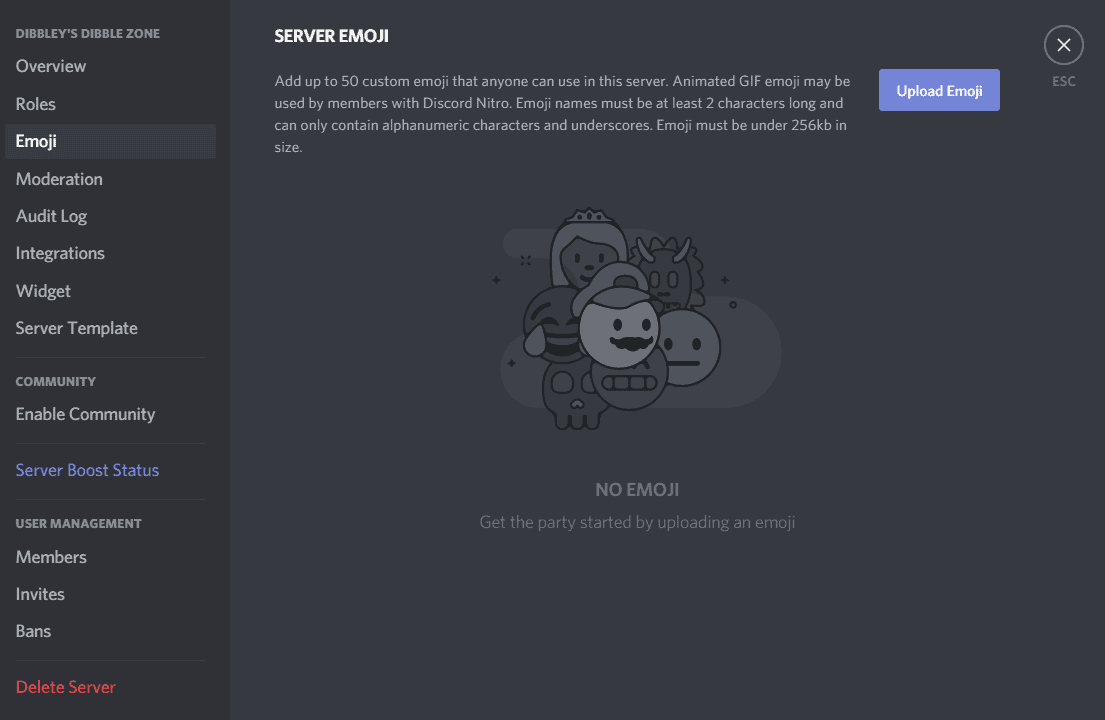
Upload emoji
This will bring up an Upload Emoji button on the right which enables you to select a pre-made custom Emoji from your files.
As the accompanying text will state:
- You can add up to 50 custom emojis per server
- Animated GIF emoji can only be used if you have Discord Nitro
- Emojis must be under 256kb in size
- Emote names must be at least 2 characters long and only contain alphanumeric characters and underscores
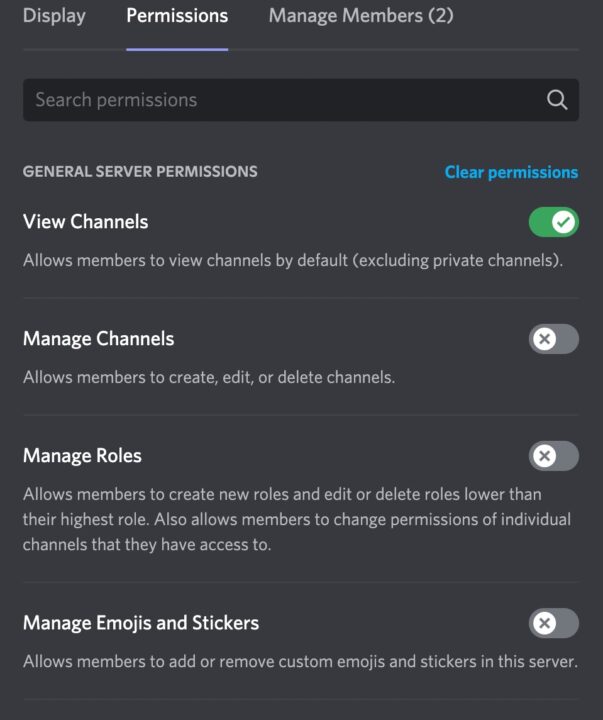
How to enable ‘Manage Emojis’ for people in your server
If you are a member of a server but not its owner, in order to add to or remove server-specific emojis you will need to have the Manage Emojis permission toggled under your role by the server owner. If you are the server owner and wish to give these powers to people in your server, follow the below steps.
Step
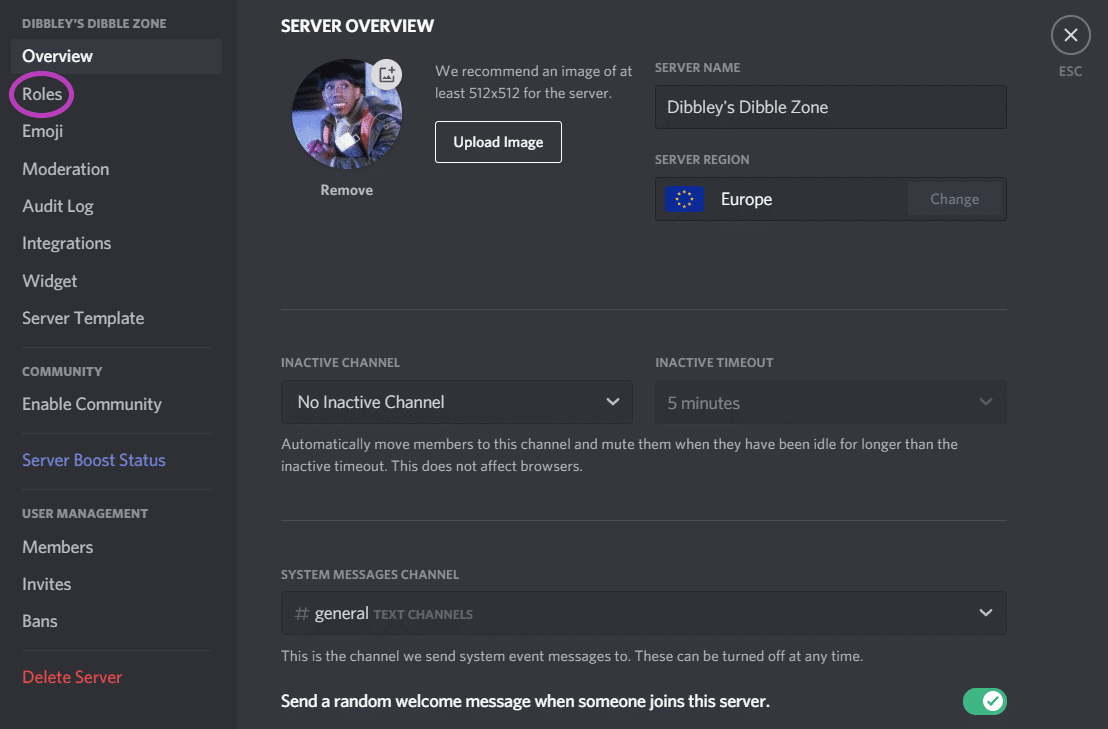
Open ‘Roles’
First open Server Settings as with Step 1 of Part 2 above. This time however click on Roles from the server settings menu on the left.
Step
Toggle ‘Manage Emojis’
First, select the role you wish this permission to apply to, in this case we are applying it to everyone in the server. Then simply toggle the slider for ‘Manage Emojis and Stickers’ to “on” (so that it shows green), save your changes, and voila!
Final word
This has been our article on How To Add Emojis to Discord – we hope you have found it of use. If you have any further questions about Discord, or simply wish to know more about the application, check out our guide on How To Use Discord which summarises and organises all of our individual guides relating to the software on one page. Alternatively, check out some of the recommended Discord articles alongside this page.